> ## Documentation Index
> Fetch the complete documentation index at: https://www.ayrshare.com/docs/llms.txt
> Use this file to discover all available pages before exploring further.
# 将 Telegram 群组或频道关联到 Ayrshare
> 将 @AyrshareBot 添加为管理员,把 Telegram 连接到 Ayrshare,从而在你的群组或频道中发布和删除帖子。
Telegram 通过 bot(机器人)实现向你的群组或频道发帖。
你需要通过 Telegram 移动 App 授予 Ayrshare Telegram Bot 管理员权限,才能启用发布和删除功能。
**请添加正确的 bot:`@AyrshareBot`**(其显示名称为 "Ayrshare",带有如下图所示的红色 logo)。
 在 Telegram 中搜索 "Ayrshare" 会返回多个名称或 logo 相似但**并非**我们官方的 bot——
例如用户名 `@AyrShareSocialMediaBot`、`@ayrshare_bot`、`@kylo_post_bot` 以及
`@AyrshareTestbot`。只有 **`@AyrshareBot`** 才能与 Ayrshare 配合使用。如果你
添加了任何其他 bot,你的关联代码将永远不会被接收,也不会有任何反应。添加之前,
请打开该 bot 并确认其用户名严格为 **`@AyrshareBot`**。
你必须拥有该频道或群组的管理员权限才能添加 bot。Telegram 频道帖子
会显示频道名称和 logo 作为作者。Telegram 群组帖子会显示 Ayrshare 的名称和 logo
作为作者。
**该 bot 必须被设为 Administrator(管理员)——仅作为成员是不够的。** `@AyrshareBot`
已启用 Telegram Privacy Mode(隐私模式),因此如果它只是作为成员被添加,就永远
不会收到你的 `Code:` 消息,关联会静默失败且不会有任何错误提示。请在你粘贴代码
的同一频道或群组中,将其提升为 Administrator(管理员)。
## 如何将 Telegram 与 Ayrshare 关联
1. 在 Telegram 移动 App 中,进入你想要发布内容的频道或群组。点击右上角的三个横向圆点,然后进入 **Info**。
在 Telegram 中搜索 "Ayrshare" 会返回多个名称或 logo 相似但**并非**我们官方的 bot——
例如用户名 `@AyrShareSocialMediaBot`、`@ayrshare_bot`、`@kylo_post_bot` 以及
`@AyrshareTestbot`。只有 **`@AyrshareBot`** 才能与 Ayrshare 配合使用。如果你
添加了任何其他 bot,你的关联代码将永远不会被接收,也不会有任何反应。添加之前,
请打开该 bot 并确认其用户名严格为 **`@AyrshareBot`**。
你必须拥有该频道或群组的管理员权限才能添加 bot。Telegram 频道帖子
会显示频道名称和 logo 作为作者。Telegram 群组帖子会显示 Ayrshare 的名称和 logo
作为作者。
**该 bot 必须被设为 Administrator(管理员)——仅作为成员是不够的。** `@AyrshareBot`
已启用 Telegram Privacy Mode(隐私模式),因此如果它只是作为成员被添加,就永远
不会收到你的 `Code:` 消息,关联会静默失败且不会有任何错误提示。请在你粘贴代码
的同一频道或群组中,将其提升为 Administrator(管理员)。
## 如何将 Telegram 与 Ayrshare 关联
1. 在 Telegram 移动 App 中,进入你想要发布内容的频道或群组。点击右上角的三个横向圆点,然后进入 **Info**。
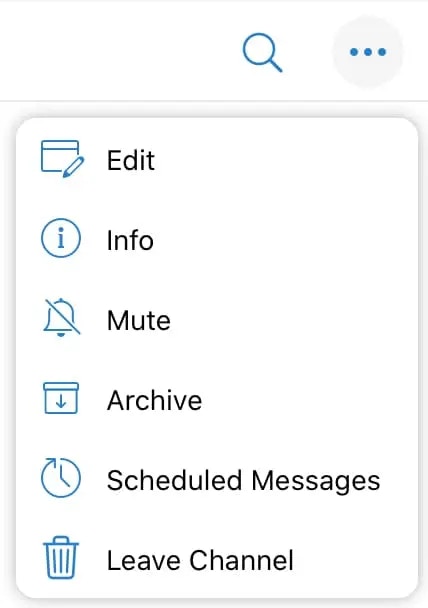 2. 将 Ayrshare 添加为管理员:
- 如果是 *频道(Channel)*,选择 **Administrators**,然后 **Add Admin**。
-
如果是 *群组(Group)*,点击 "+ Add" 将 Ayrshare 添加为成员,搜索 **Ayrshare** 并
添加为成员。然后点击右上角的 **Edit**,点击 **Administrators**,
再点击 **Add Admin**。
3. 搜索 **Ayrshare** 并选择官方 bot **`@AyrshareBot`**(显示名称为 "Ayrshare")。请不要选择任何名称相似的仿冒 bot——参见上文警告。
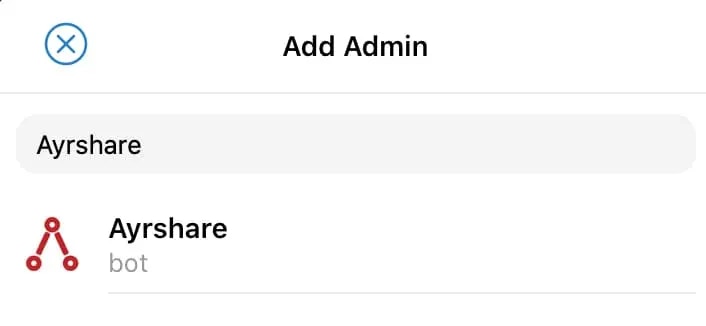 4. 系统会要求你为该 bot 选择权限。请选择除最后两项以外的所有权限,让 bot 可以代表你发布和删除内容。
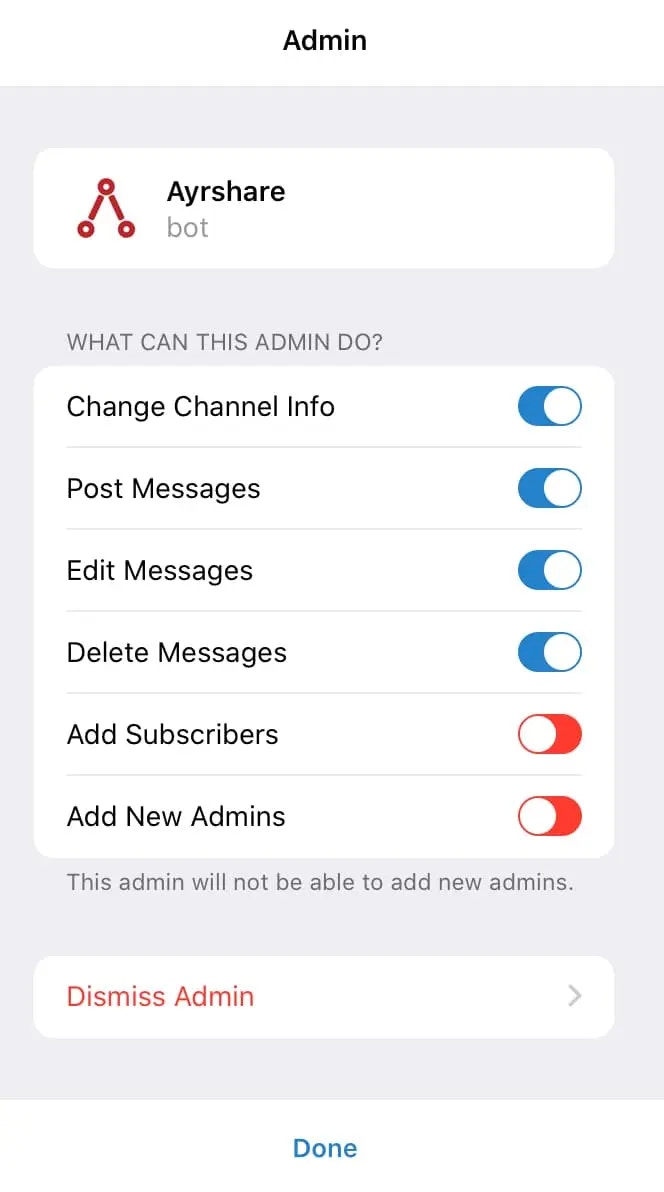 5. 完成后点击 **Done**。
6. 在 Ayrshare 控制台的 Social Accounts 中,点击 Telegram 图标,你会得到一个 Telegram 访问代码。
7. 连同 "Code:" 部分一起复制该代码。
5. 完成后点击 **Done**。
6. 在 Ayrshare 控制台的 Social Accounts 中,点击 Telegram 图标,你会得到一个 Telegram 访问代码。
7. 连同 "Code:" 部分一起复制该代码。
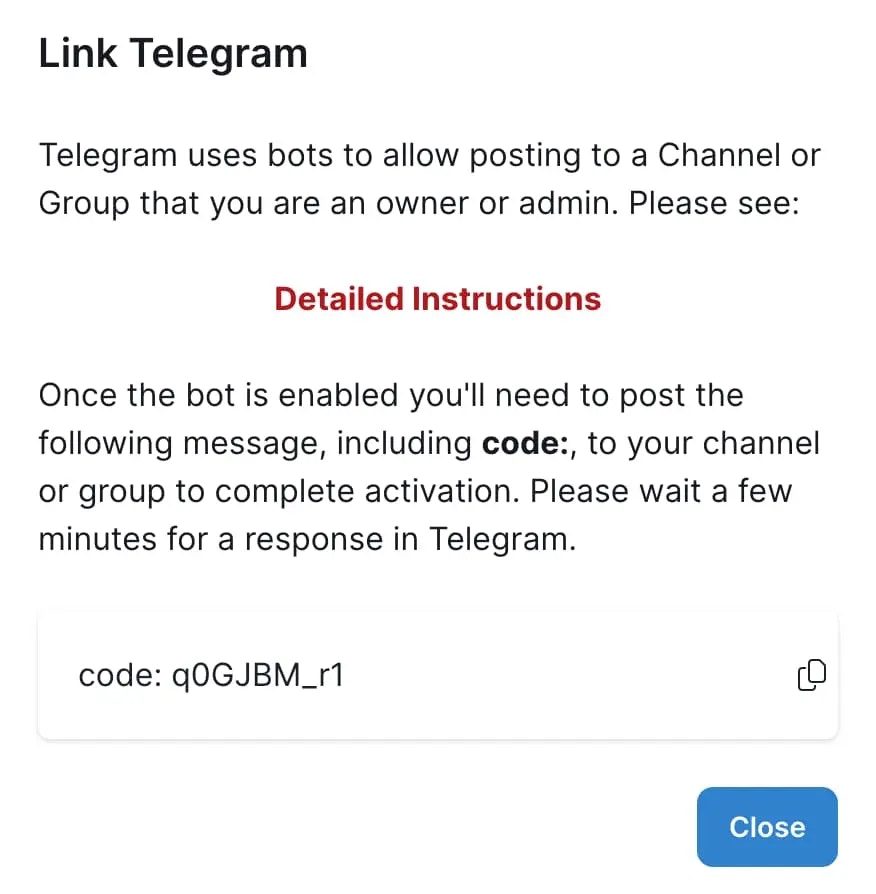 8. 在你的 Telegram 群组或频道的聊天输入框中粘贴该代码并按回车/点击发送按钮。如果成功,你会在该频道或群组中收到一条成功消息。
在你输入代码消息后,Telegram 可能需要最多 **5 分钟** 才会向你发送成功消息,
请耐心等待。
8. 在你的 Telegram 群组或频道的聊天输入框中粘贴该代码并按回车/点击发送按钮。如果成功,你会在该频道或群组中收到一条成功消息。
在你输入代码消息后,Telegram 可能需要最多 **5 分钟** 才会向你发送成功消息,
请耐心等待。
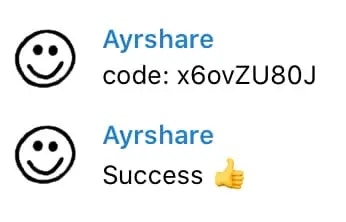 Telegram 集成完成。你现在可以通过 API 或 Web App 发布内容。
如果你需要帮助或有任何问题,请 window.Intercom && window.Intercom('show')}>与我们对话或[联系我们](mailto:support@ayrshare.com)。
## 更多 Telegram 信息
请参见以下文档,了解 [发布到 Telegram](/apis/post/social-networks/telegram)、[获取分析数据](/apis/analytics/overview)、[管理评论](/apis/comments/overview) 或 [获取历史记录](/apis/history/overview) 的详情。
Telegram 集成完成。你现在可以通过 API 或 Web App 发布内容。
如果你需要帮助或有任何问题,请 window.Intercom && window.Intercom('show')}>与我们对话或[联系我们](mailto:support@ayrshare.com)。
## 更多 Telegram 信息
请参见以下文档,了解 [发布到 Telegram](/apis/post/social-networks/telegram)、[获取分析数据](/apis/analytics/overview)、[管理评论](/apis/comments/overview) 或 [获取历史记录](/apis/history/overview) 的详情。