> ## Documentation Index
> Fetch the complete documentation index at: https://www.ayrshare.com/docs/llms.txt
> Use this file to discover all available pages before exploring further.
# Generate JWT 概觀
> 為 User Profile 產生社群網路連結 URL。
export const PlansAvailable = ({plans = [], maxPackRequired}) => {
let displayPlans = plans;
if (plans && plans.length === 1) {
const lowerCasePlan = plans[0].toLowerCase();
if (lowerCasePlan === "business") {
displayPlans = ["Launch", "Business", "Enterprise"];
} else if (lowerCasePlan === "premium") {
displayPlans = ["Premium", "Launch", "Business", "Enterprise"];
}
}
return
Available on {displayPlans.length === 1 ? "the " : ""}
{displayPlans.join(", ").replace(/\b\w/g, l => l.toUpperCase())}{" "}
{displayPlans.length > 1 ? "plans" : "plan"}.
{maxPackRequired && window.open('https://www.ayrshare.com/docs/additional/maxpack', '_self')} className="flex items-center mt-2 cursor-pointer">
Max Pack required
}
;
};
[generateJWT 端點](/apis/profiles/generate-jwt)可為單一 User Profile 產生一個社群網路連結 URL。
詳情請參閱 [Business Plan 與 Launch Plan 的 API 整合](/multiple-users/api-integration-business)。
## 切換 Profile
若要在不同 Profile 工作階段間切換(例如以多個 Profile 進行測試時),你必須先登出目前的 Profile。有關如何正確處理 Profile 切換,請參閱[自動登出 Profile 工作階段](/multiple-users/api-integration-business#automatic-logout-of-a-profile-session)。
## Private Key 與 Profile Key
### 從何處取得 Private Key
Private Key 檔案(private.key)及範例 Postman JSON 檔會隨著你在導入期間收到的[整合套件(Integration Package)](/multiple-users/api-integration-business#integration-package)一併提供。
你也可以在 Ayrshare 開發者控制台的 API 頁面 -> Integration Package 中取得整合套件。
### 使用 Private Key
我們建議從檔案中讀取 Private Key(private.key),並以字串形式傳入 `privateKey` 欄位,這樣可以保留所有字元,包括換行字元。
Private Key 必須完全正確,也就是保留所有字元,包括換行字元。
如果你直接將 Key 貼到程式碼中,可能需要手動將換行替換為 `\n` 字元,或將字串進行 URL 編碼。
直接將 Key 貼進程式碼中通常會產生問題。
## 產生 JSON Web Token
一段 1 分鐘的影片,說明如何產生 JSON Web Token(JWT):
JWT URL 的有效期為 **5 分鐘**。5 分鐘後你必須產生新的 JWT URL。
其他選項請參閱 [Max Pack `expiresIn`](/apis/profiles/generate-jwt-overview#jwt-expires-in)。
## 開啟 JWT URL
在新的瀏覽器分頁、瀏覽器視窗,或 iOS 的 View Controller 中開啟 JWT URL。
你可以控制新視窗或分頁的[關閉或轉向](/multiple-users/api-integration-business#opening-and-closing-the-social-linking-url)。
社群網路不允許在 iFrame 中開啟該 URL,也不允許遮蔽已核准的合作夥伴來源網域 profile.ayrshare.com。
## 驗證 JWT URL
`generateJWT` 端點預設不會驗證回傳的 JWT URL。
例如,若將損毀的 Private Key 傳入 `generateJWT`,仍然會回傳一個 URL,但該 URL 會造成 401 錯誤。
你可以在 `generateJWT` 的 Body 參數中加入 `verify: true` 以驗證回傳的 JWT URL。若 JWT URL 無法驗證,將回傳錯誤。例如,若 Private Key 缺少了一個字元,將回傳以下訊息:
```json JWT Error theme={"system"}
{
"action": "JWT",
"status": "error",
"code": 189,
"message": "Error generating JWT. Check the sent parameters, such as the privateKey has no extra tabs, spaces, or newlines. Also the entire private.key file including -----BEGIN RSA PRIVATE KEY----- and -----END RSA PRIVATE KEY-----. Error: secretOrPrivateKey must be an asymmetric key when using RS256"
}
```
由於驗證會耗費額外的處理時間,我們建議僅在非正式環境使用 `verify: true`。
## 在 Postman 中測試
**建議**先在 [Postman](/testing/postman) 中測試 JWT URL 的產生。
整合套件中(可在控制台的 Primary Profile API Key 頁面找到)包含一份範例 Postman 設定 JSON 檔,內含驗證 JWT URL 產生所需的一切。
只要將設定檔匯入 Postman,在 `profileKey` *body* 欄位填入你的 Profile Key(可在 Ayrshare 開發者控制台切換到要測試的 Profile 中找到),然後點擊藍色的 *Send* 按鈕即可。
其他必填欄位都已填好。
你也可以[從 Postman 產生程式碼](/testing/postman#auto-generate-api-code-with-postman),或從目錄或資料庫讀取 Key 檔案。
## Instagram 連結方式
Instagram 帳號可以透過[兩種方式](/dashboard/connect-social-accounts/instagram)連結:直接使用 **Instagram Login**,或透過**已連結的 Facebook 粉絲專頁**。
當使用者在社群連結頁面點擊 Instagram 按鈕時,會啟動哪一種流程,通常由控制台中的帳號層級 [Instagram Login](/multiple-users/manage-user-profiles#instagram-login) 設定控制。
[generateJWT 端點](/apis/profiles/generate-jwt)的 `instagramLinkMethod` body 參數允許你針對單一連結 URL 覆寫該設定:
| 值 | Instagram 連結流程 |
| ----------- | ------------------------------------- |
| `instagram` | 直接的 Instagram Login,不需 Facebook 粉絲專頁。 |
| `facebook` | 透過已連結的 Facebook 粉絲專頁連結。 |
舉例來說,若你的帳號預設是使用 Facebook 粉絲專頁連結,以下設定會強制此連結工作階段改用直接的 Instagram Login:
```json Instagram Link Method theme={"system"}
{
"instagramLinkMethod": "instagram"
}
```
產生的 JWT URL 會包含此覆寫設定,且點擊連結頁面上的 Instagram 按鈕後,在整個工作階段(包含跨越 Instagram/Facebook 授權轉址過程)都會使用所要求的流程。
須注意的事項:
* 覆寫僅套用於從回傳 URL 開啟的連結頁面,不會改變你的帳號層級 Instagram Login 設定,也不會影響其他連結工作階段。
* 若省略 `instagramLinkMethod`,連結頁面會沿用你的帳號層級設定,與之前一致。
* 若傳入無效值,將回傳 `400` 錯誤,並列出有效值(`instagram`、`facebook`)。
* 在選擇覆寫之前,請先參閱兩種流程的[功能差異](/multiple-users/manage-user-profiles#direct-instagram-login-vs-facebook-page-authentication)——部分 Instagram 功能,例如 hashtag 搜尋與 collaborations(協作),僅支援 Facebook 粉絲專頁驗證。
## JWT Expires In
如果你希望 JWT 逾時時間比預設的 5 分鐘更長,請加入 `expiresIn` 欄位。
例如,以下 JSON 會將 JWT URL 的有效期設定為 30 分鐘:
```json JWT Expires In theme={"system"}
{
"expiresIn": 30
}
```
這樣你就可以將該連結[以電子郵件寄送](/apis/profiles/generate-jwt-overview#connect-accounts-email)給使用者,而不必讓他們前往你的應用程式或平台。
常見用例是:當使用者需要重新連結社群帳號時,你可以將 JWT 連結透過電子郵件寄給他,讓他直接重新連結社群帳號,而不必再前往你的平台。
請務必與你的資安團隊確認你的業務希望 JWT 保持有效多長時間。
較長的有效時間會增加未經授權的第三方存取該連結的風險。
## 整合方式
### Bubble.io JWT
如果你是 Bubble 使用者,請參閱 Bubble.io 章節中的 *Generate JWT Token* 說明:
### 行動端 JWT
下列 Swift、Flutter 與 React Native [行動端程式碼範例](/apis/profiles/generate-jwt-overview#mobile-code-examples)示範如何在 iOS 裝置上開啟社群連結頁面。
請將 `jwtURL` 字串變數替換為 [/generateJWT 端點](/apis/profiles/generate-jwt)的回傳結果。
#### Swift(iOS)
在 Swift 中,請使用 `UIViewController` 與 `SFSafariViewControllerDelegate`。
我們不建議使用 `WebView`,因為 Facebook 與 Google 等部分社群網路會封鎖此類驗證。
#### Flutter(Dart)
在 Flutter(Dart)中,並沒有與 `UIViewController` 或 `SFSafariViewController` 直接對應的元件。
不過你可以使用 `url_launcher` 套件開啟網頁 URL 來達成類似的功能。
#### React Native
React Native 同樣沒有與 `SFSafariViewController` 直接對應的元件,但你可以使用 `expo-web-browser` 提供的 `WebBrowser` API 達成類似效果——它會在一個與系統瀏覽器共用 Cookie 的模式化瀏覽器視窗中開啟 URL。你也可以使用 React Native 內建的 `Linking` 函式來開啟 Safari:`await Linking.canOpenURL(jwtURL);`
#### 行動端程式碼範例
```swift Swift theme={"system"}
import UIKit
import SafariServices
class ViewController: UIViewController, SFSafariViewControllerDelegate {
var jwtURL = "https://profile.ayrshare.com?domain=acme&jwt=eyJhbGciOiJ"
override func viewDidLoad() {
super.viewDidLoad()
setupButton()
}
func setupButton() {
let button = UIButton(type: .system)
button.frame = CGRect(x: (view.bounds.width - 200) / 2, y: (view.bounds.height - 50) / 2, width: 200, height: 50)
button.setTitle("Open URL", for: .normal)
button.addTarget(self, action: #selector(buttonTapped), for: .touchUpInside)
view.addSubview(button)
}
@objc func buttonTapped() {
openURLInInAppBrowser()
}
func openURLInInAppBrowser() {
if let url = URL(string: jwtURL) {
let safariVC = SFSafariViewController(url: url)
safariVC.delegate = self
present(safariVC, animated: true, completion: nil)
}
}
// Optional: If you want to handle when the in-app browser is closed
func safariViewControllerDidFinish(_ controller: SFSafariViewController) {
controller.dismiss(animated: true, completion: nil)
}
}
```
```dart Flutter theme={"system"}
/** yaml dependencies
dependencies:
flutter:
sdk: flutter
url_launcher: ^6.2.1
*/
import 'package:flutter/material.dart';
import 'package:url_launcher/url_launcher.dart';
void main() {
runApp(MyApp());
}
class MyApp extends StatelessWidget {
@override
Widget build(BuildContext context) {
return MaterialApp(
title: 'URL Launcher Example',
theme: ThemeData(
primarySwatch: Colors.blue,
),
home: MyHomePage(),
);
}
}
class MyHomePage extends StatelessWidget {
final String jwtURL = "https://profile.ayrshare.com?domain=acme&jwt=eyJhbGciOiJ";
@override
Widget build(BuildContext context) {
return Scaffold(
appBar: AppBar(
title: Text('URL Launcher Example'),
),
body: Center(
child: ElevatedButton(
onPressed: () {
openURLInBrowser(context);
},
child: Text('Open URL'),
),
),
);
}
void openURLInBrowser(BuildContext context) async {
if (await canLaunch(jwtURL)) {
await launch(jwtURL);
} else {
ScaffoldMessenger.of(context).showSnackBar(
SnackBar(
content: Text('Could not launch $jwtURL'),
),
);
}
}
}
```
```jsx React Native theme={"system"}
/**
• Using the API provided by expo-web-browser,
• which opens a URL in a modal browser window that shares cookies
• with the system browser.
• Learn more about expo: https://reactnative.dev/docs/environment-setup?guide=quickstart
• and running the following command:
• expo install expo-web-browser
*/
import React from 'react';
import { StyleSheet, Button, View } from 'react-native';
import * as WebBrowser from 'expo-web-browser';
export default function App() {
const jwtURL = 'https://profile.ayrshare.com?domain=acme&jwt=eyJhbGciOiJ';
const openURLInBrowser = async () => {
try {
await WebBrowser.openBrowserAsync(jwtURL);
// Optional: WebBrowser.openBrowserAsync returns a promise that resolves with an object containing
// 'type' that can be 'cancelled' or 'dismissed'. You can use this to handle when the browser is closed.
} catch (error) {
console.error(error);
}
};
return (
);
}
const styles = StyleSheet.create({
container: {
flex: 1,
justifyContent: 'center',
alignItems: 'center',
},
});
```
## Connect Accounts 電子郵件
搭配較長的到期時間選項,你也可以讓 Ayrshare 自動將社群連結頁面的連結以電子郵件寄送給你的使用者。
### Connect Accounts JSON
例如,以下 JSON 會寄送電子郵件給 `john@user.com`,公司名稱為 ACME、聯絡電子郵件為 `support@mycompany.com`,並附上服務條款與隱私政策連結:
```json Example Contact Email Request theme={"system"}
/**
All fields are in the email object required.
Missing fields will cause the email to fail.
*/
{
"email": {
"to": "john@user.com",
"contactEmail": "support@mycompany.com",
"company": "ACME",
"termsUrl": "https://www.ayrshare.com/terms",
"privacyUrl": "https://www.ayrshare.com/privacy",
"expiresIn": 60
}
}
```
若已設定電子郵件與到期時間,回應會包含以下欄位:
```json Example Contact Email Response theme={"system"}
{
"emailSent": true,
"expiresIn": "30m"
}
```
### JWT Connect Accounts 電子郵件範例
以下是含有 Connect Account 連結、可開啟社群連結頁面的電子郵件範例:
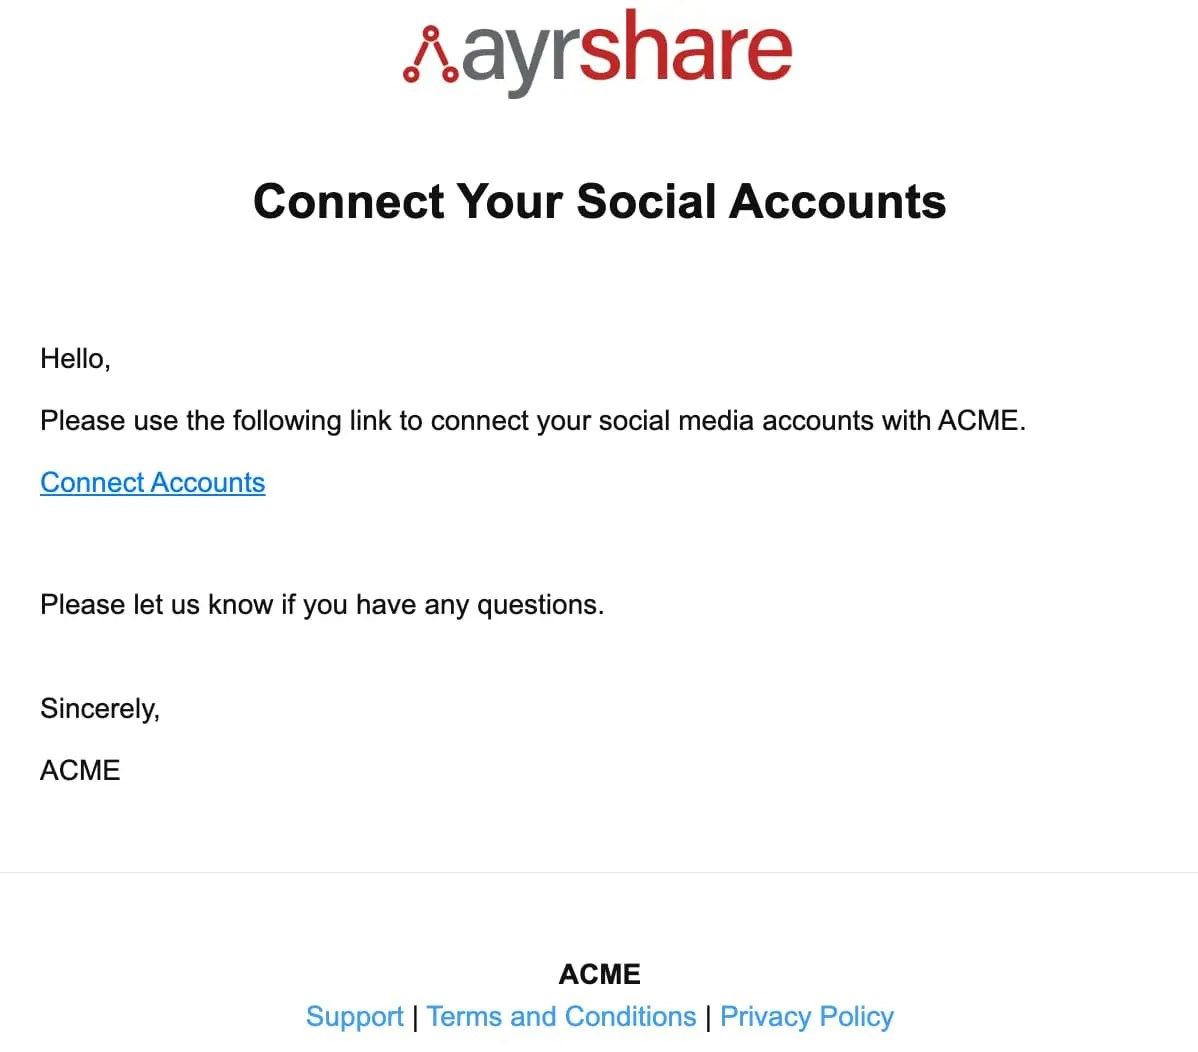 該電子郵件將由以下地址寄出:
`Social Connect Hub `
該電子郵件將由以下地址寄出:
`Social Connect Hub `