> ## Documentation Index
> Fetch the complete documentation index at: https://www.ayrshare.com/docs/llms.txt
> Use this file to discover all available pages before exploring further.

# 管理多個使用者設定檔

> 有兩種方式可為你的組織、使用者、客戶或品牌建立與管理多個帳戶設定檔——透過儀表板或 API。

<Warning>
  **儀表板僅供你的內部團隊使用。** 在 Launch、Business 與
  Enterprise 方案中，儀表板是給 *你的團隊* 用來建立與管理使用者設定檔、
  進行測試以及代表客戶發文。你的客戶 **永遠不會**
  取得儀表板存取權——他們透過白牌 [JWT URL 連結頁面](/multiple-users/api-integration-business#single-sign-on-with-jwt-authentication) 連結社群帳號。
  在正式環境中，請使用 [API](#using-the-api) 以程式方式建立與管理設定檔。
  （單一使用者的 Premium 方案是例外：因為沒有多使用者層級，
  你自己直接使用儀表板。）
</Warning>

## 使用儀表板

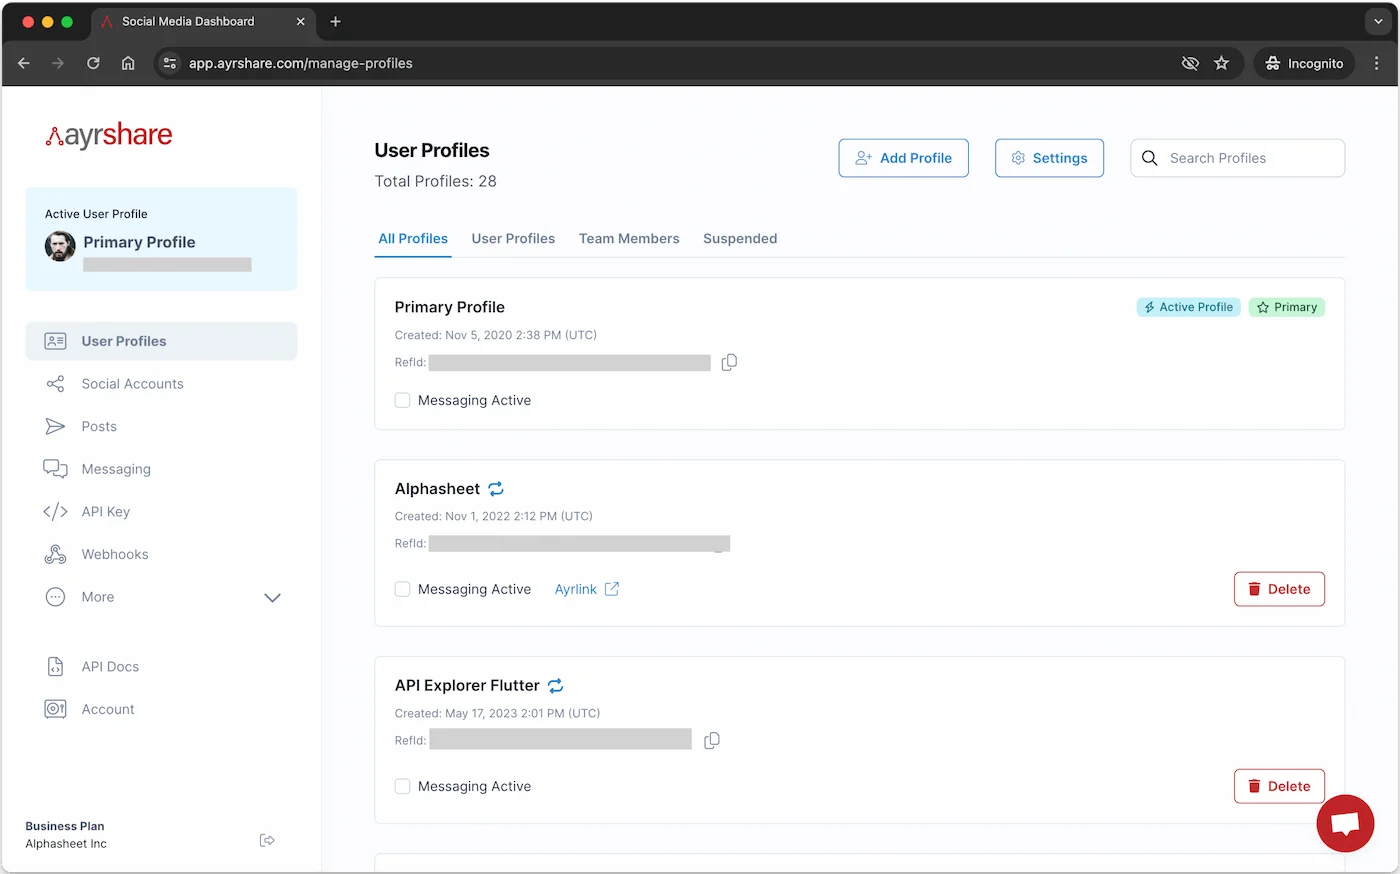
如果你的 Ayrshare 帳戶具有管理多個設定檔的權限，你就會在左側導覽看到 **User Profiles** 選項。

<Info>
  如果你的帳戶沒有管理設定檔的選項，請聯絡你的 Ayrshare
  業務代表，或 [聯絡我們](mailto:contact@ayrshare.com) 進行升級。
</Info>

### 建立新設定檔

點選 **Add Profile** 按鈕並輸入使用者設定檔標題。

<img src="https://mintcdn.com/ayrshare-docs/dKBti0xVDJrOZ19f/images/multiple-users/create-profile.webp?fit=max&auto=format&n=dKBti0xVDJrOZ19f&q=85&s=56ffca9d00547aa746c67769eee87759" alt="Create a User Profile" width="1400" height="874" data-path="images/multiple-users/create-profile.webp" />

### 切換到新設定檔

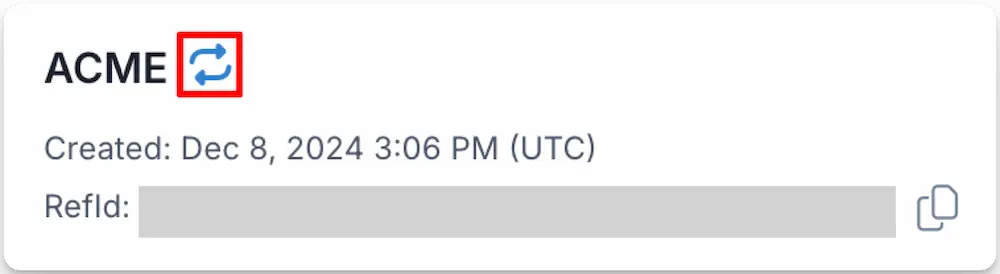
你會在 Active Profiles 區段看到新建立的設定檔。
你現在可以點選 **switch to this profile** <Icon icon="repeat" iconType="solid" /> 圖示切換到該使用者設定檔。
<img class="center" src="https://mintcdn.com/ayrshare-docs/6mPR4kmwNEz1kMbX/images/multiple-users/switch-profile.webp?fit=max&auto=format&n=6mPR4kmwNEz1kMbX&q=85&s=a3a47332f16b57377b879f37423e38f8" alt="Switch to a User Profile" width="1000" height="274" data-path="images/multiple-users/switch-profile.webp" />

當你切換到另一個使用者設定檔時，你會在畫面左上方的設定檔圖示下看到該設定檔名稱。

你隨時可以點選 Primary Profile 旁的 **switch profile** 連結，或點選 User Profiles 頁面上方的 **Switch to Primary** 按鈕，切換回主要帳戶設定檔。

從這裡開始，你就以客戶／使用者的身分操作，可以透過 *Post* 頁面代為發文。

### 取得 Profile Key

Profile Key 用來透過 API 代為設定檔發文。切換到 [使用者設定檔](/multiple-users/manage-user-profiles)，並在儀表板左側導覽中前往 *Profile Key 頁面*，即可取得該設定檔的 Key。
進行 API 呼叫時，請務必在請求標頭中包含你的 [API\_KEY](/apis/overview#authorization) 與 [PROFILE\_KEY](/apis/overview#profile-key-format)。

當你使用 [/profiles/profile 端點](/apis/profiles/create-profile) 建立新的使用者設定檔時，也會取得 Profile Key。這是取得 Profile Key 的建議方法。

### 邀請團隊成員

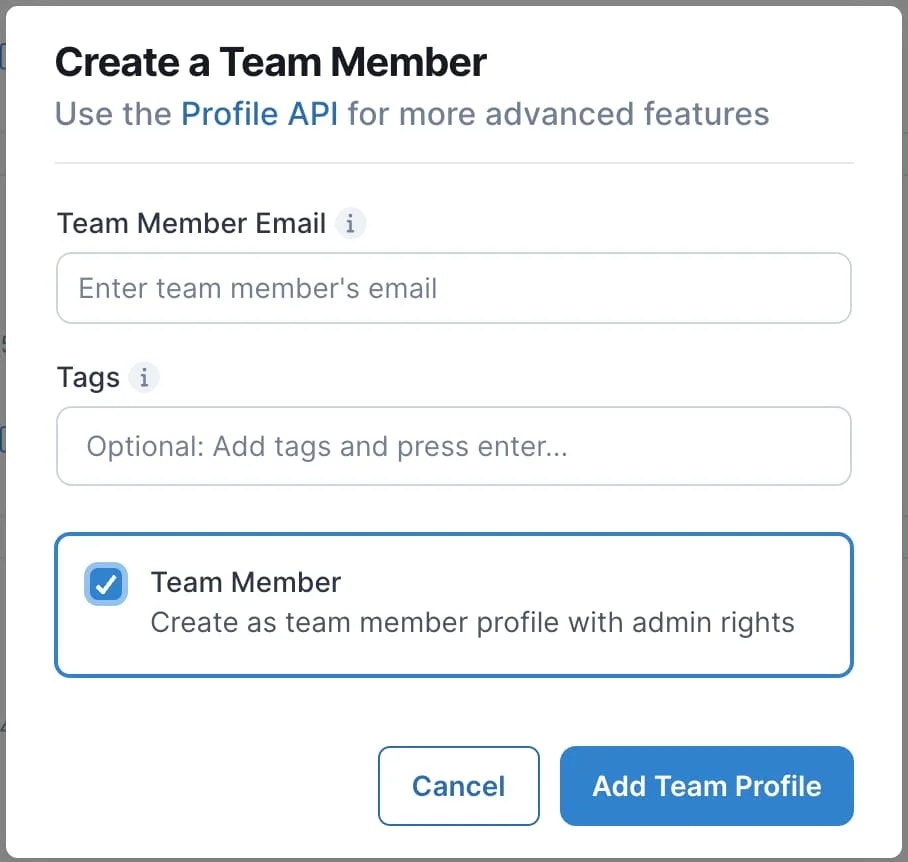
你可以為團隊成員建立使用者設定檔。預設情況下，團隊成員擁有具備完整儀表板存取／管理員權限的 Ayrshare 帳戶，並計為一個新的使用者設定檔。請注意，你可以透過 [鎖定主要設定檔](/multiple-users/manage-user-profiles#primary-profile-lock) 限制存取權。
<Tip>
  你只能邀請尚未註冊 Ayrshare 的團隊成員。若要
  使用已註冊的電子郵件，請讓該使用者登入儀表板，前往 Account
  頁面，並點選 **Delete** 按鈕。
</Tip>

在 User Profiles 頁面，切換到主要設定檔並點選頁面上方的 *+ Add Profile* 按鈕。

在彈出的視窗中，勾選「Create a team member profiles with admin rights」核取方塊，並輸入團隊成員的電子郵件位址。

<img width="50%" class="center" src="https://mintcdn.com/ayrshare-docs/6mPR4kmwNEz1kMbX/images/multiple-users/team-member.webp?fit=max&auto=format&n=6mPR4kmwNEz1kMbX&q=85&s=bd920b7ce2fa834579c7073639a8c8d0" alt="Invite team member" data-path="images/multiple-users/team-member.webp" />

點選 *Add Team Profile*，系統會寄送一封電子郵件到團隊成員的信箱，內含啟用帳戶的連結。

#### 團隊成員狀態

當團隊成員接受邀請後，你會在 Team Member 標籤旁看到綠色勾勾。

<img class="center" src="https://mintcdn.com/ayrshare-docs/6mPR4kmwNEz1kMbX/images/multiple-users/team1.webp?fit=max&auto=format&n=6mPR4kmwNEz1kMbX&q=85&s=08a9aae96eeed3ce0bab912b1e5847f6" alt="team member accepted" width="238" height="64" data-path="images/multiple-users/team1.webp" />

如果團隊成員尚未接受邀請，你可以點選郵件圖示重新寄送邀請。

<img class="center" src="https://mintcdn.com/ayrshare-docs/6mPR4kmwNEz1kMbX/images/multiple-users/team2.webp?fit=max&auto=format&n=6mPR4kmwNEz1kMbX&q=85&s=52b397f9a1fb6761ba77ea73a0222cd2" alt="team member resend" width="238" height="64" data-path="images/multiple-users/team2.webp" />

#### 團隊成員聯絡支援

<Warning>
  基於安全考量，僅已註冊的團隊成員可以代表企業聯絡支援。若對方未註冊
  並經驗證為你企業的團隊成員，我們將無法提供協助。
</Warning>

### 重新啟用被停權的使用者設定檔

#### 停權原因

當使用者設定檔因社群網路違規而遭停權（例如 [Facebook 社群守則違規](/help-center/technical-support/facebook_or_instagram_account_restricted)）時，你會收到詳細的通知電子郵件。
此電子郵件包含關於停權的重要資訊，包括具體原因與受影響的使用者設定檔。

要尋找此通知電子郵件：

1. 使用被停權使用者設定檔的 RefId 搜尋你的信箱
2. 電子郵件主旨會清楚指出發生了停權

或者，你也可以直接在儀表板中，點選受影響的使用者設定檔旁的「Suspended」標籤來檢視停權詳細資訊。

該使用者設定檔的所有 API 呼叫都會回傳 [403 HTTP 狀態碼](/errors/errors-http#403-access-denied)。

#### 重新啟用被停權的使用者設定檔

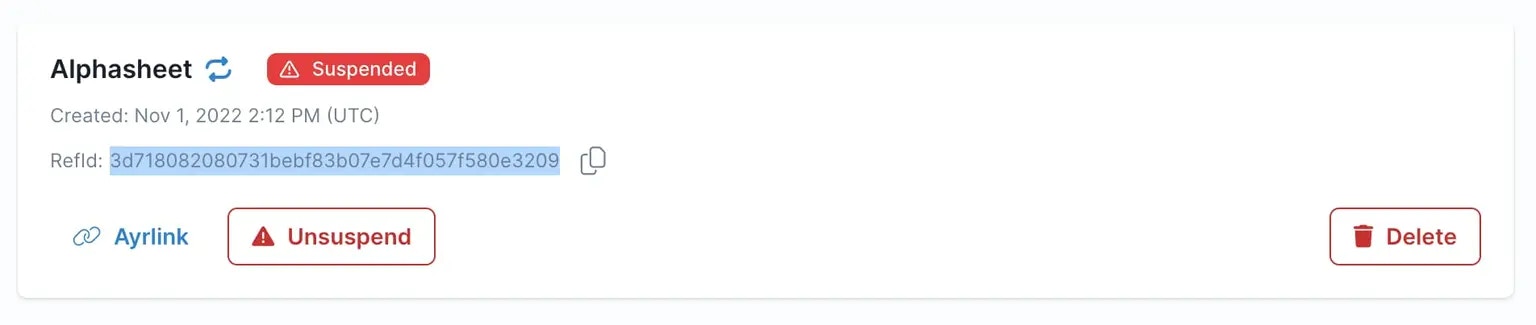
你可以透過以下步驟重新啟用（解除停權）使用者設定檔：

1. 登入儀表板並前往 User Profiles 頁面。
2. 點選「Suspended」分頁，或以電子郵件中所附的使用者設定檔 RefId 搜尋，以找到被停權的使用者設定檔。
3. 點選「Unsuspended」按鈕解除停權。
4. 檢閱並接受合規聲明。

<img class="center" src="https://mintcdn.com/ayrshare-docs/6mPR4kmwNEz1kMbX/images/multiple-users/suspended.webp?fit=max&auto=format&n=6mPR4kmwNEz1kMbX&q=85&s=3fcf79aeeeaae389525b1c041b0151dd" alt="Unsuspend a User Profile" width="1536" height="325" data-path="images/multiple-users/suspended.webp" />

對於使用者設定檔的首次停權，只要你接受合規聲明，即可立即解除停權。
但對於後續的停權，使用者設定檔會在你接受合規聲明後的 <i>48 小時</i>後重新啟用。

<Warning>
  我們建議你 *不要* 將主要設定檔作為一般使用者設定檔使用。若主要
  設定檔遭到停權，所有使用者設定檔也都會被停權。
</Warning>

### 管理已啟用的使用者設定檔

有效管理使用者設定檔對於維護 Ayrshare 系統的效率至關重要。
我們建議依照你的商業需求，制定移除不活躍使用者設定檔的政策。
例如，如果使用者在一段時間內未於你的平台上發布內容、要求分析，或未連結任何社群網路，可考慮刪除他們的 Ayrshare 使用者設定檔，以保持使用者資料庫的最新狀態並降低未來成本。

你可以透過檢視使用者的 [發文歷史](/apis/history/overview) 與 [API 使用量與連結](/apis/user/overview) 判斷該使用者設定檔在當月是否活躍。
如果判斷為不活躍，請 [刪除該使用者設定檔](/apis/profiles/delete-profile)。

## 白牌連結帳號頁面

連結帳號（社群連結）頁面是你的客戶會看到的 **唯一** Ayrshare 介面，因此你可以將它白牌化以配合你的品牌。以下設定由你的團隊在主要設定檔中設定一次即可，並會套用到使用者透過 [JWT URL](/multiple-users/api-integration-business#single-sign-on-with-jwt-authentication) 開啟的頁面。

**於 Launch、Business 與 Enterprise 方案可用：**

<ul class="custom-bullets">
  <li>[新增或移除公司 logo](#update-logo-on-social-linking-page) 並設定其高度。</li>
  <li>[選擇使用者可連結哪些社群網路](#set-social-networks-access)。</li>
  <li>[設定頁面語言](#set-language-for-social-linking)。</li>
  <li>[顯示你自己的說明連結或隱藏 Ayrshare 的說明連結](#help-links-visible)。</li>
  <li>[針對各使用者設定檔設定頂部與副標題](/apis/profiles/create-profile)（例如客戶的名稱或商家）。</li>
  <li>[控制 Close 按鈕重新導向](/multiple-users/api-integration-business#opening-and-closing-the-social-linking-url) 回你的應用程式。</li>
  <li>使用你自己的 HTML [自訂 Instagram 與 Telegram 對話框](#custom-modals)。</li>
</ul>

**於 [Max Pack](/additional/maxpack)（以及 Enterprise 內建）可用：**

<ul class="custom-bullets">
  <li>[套用自訂 CSS 檔案](#customize-css) 以控制顏色、字型與顯示的功能。</li>
  <li>[設定你自己的頁面標題、Close 按鈕文字與 favicon](#change-page-title-close-button-and-favicon)。</li>
  <li>[新增自訂頁尾文字或 HTML](#footer-text)。</li>
</ul>

請參閱 [使用者整合](/multiple-users/user-integration#social-linking-page-customization) 頁面，了解從使用者角度看起來的樣子。

## 設定

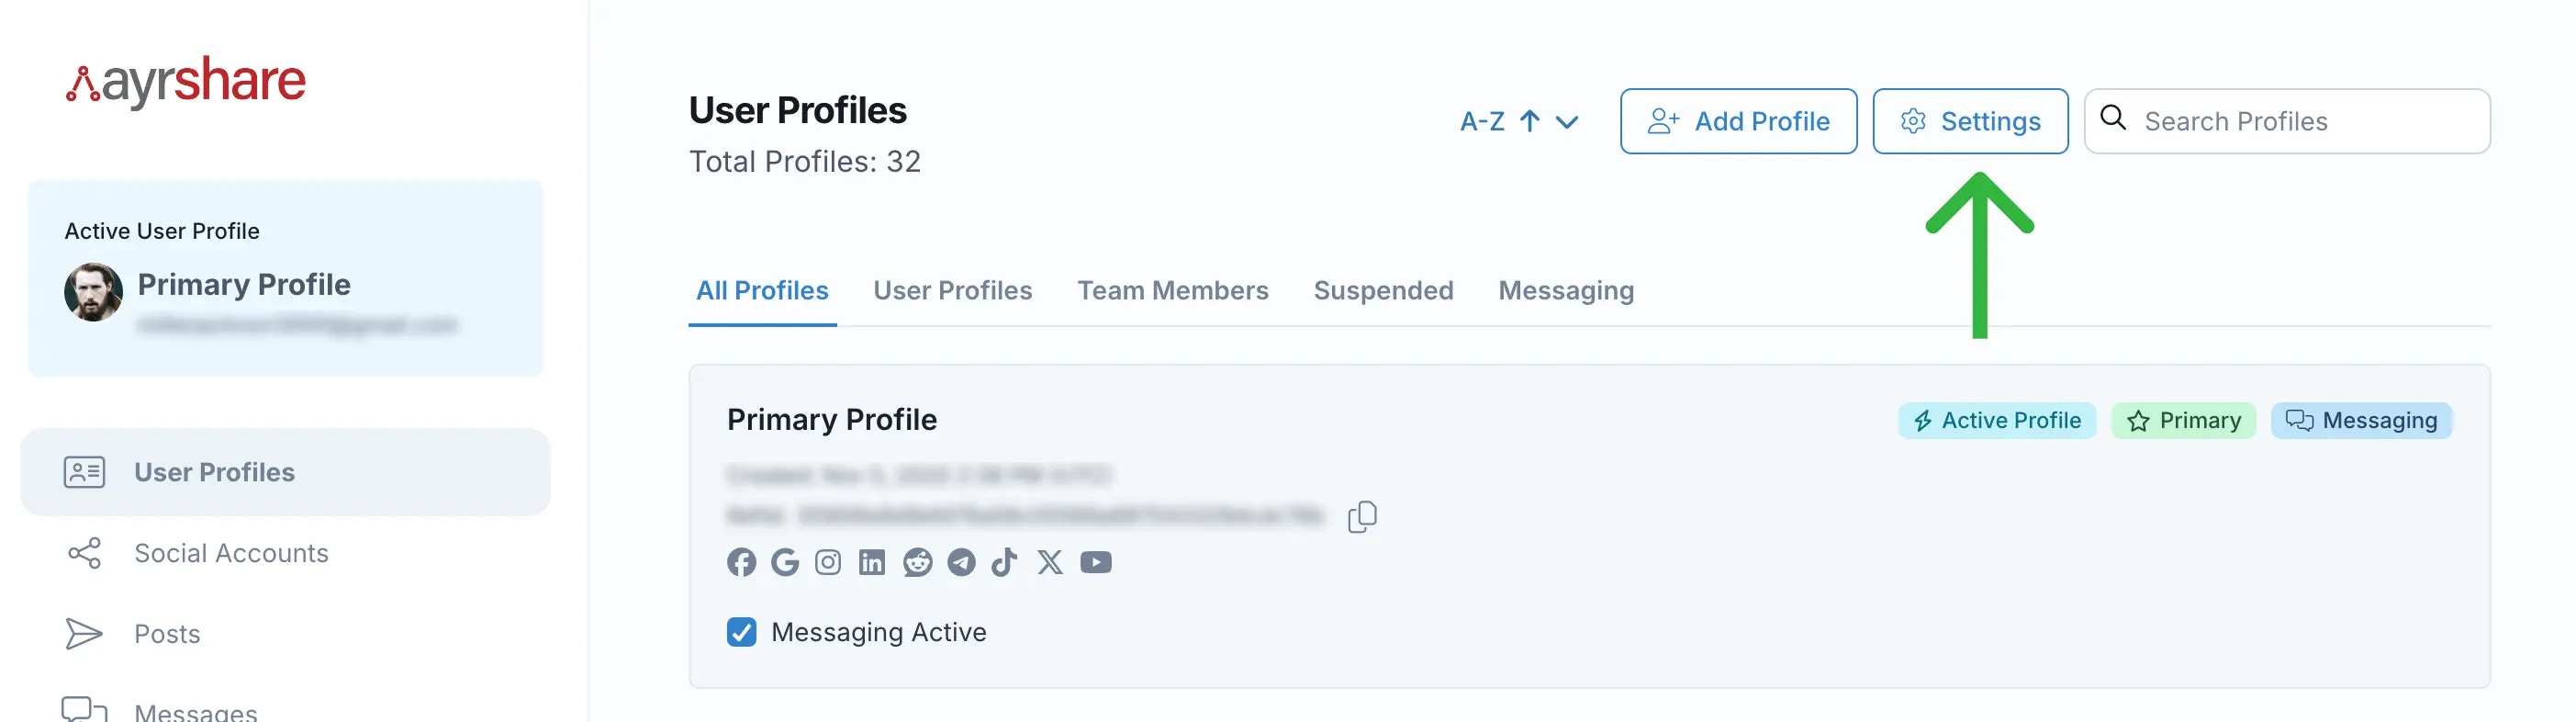
在 *User Profiles* 頁面選擇「⚙️ Settings」按鈕，即可存取你設定檔的全域設定。
存取設定前，請先切換到你的 *Primary Profile*。

<img class="center" src="https://mintcdn.com/ayrshare-docs/6mPR4kmwNEz1kMbX/images/multiple-users/settings%20button.webp?fit=max&auto=format&n=6mPR4kmwNEz1kMbX&q=85&s=b0d66d82edcd8753cc94987b6bbee520" alt="Permission Settings" width="2806" height="786" data-path="images/multiple-users/settings button.webp" />

### 連結頁面自訂選項的影片示範

<div class="video-container">
  <iframe
    width="560"
    height="315"
    src="https://www.youtube.com/embed/3RatEh09Qyg"
    title="Social Account Linking Page Customization Demo
"
    frameborder="0"
    allow="accelerometer; autoplay; clipboard-write; encrypted-media; gyroscsope; picture-in-picture"
  />
</div>

### 限制使用者設定檔存取

#### 限制主要設定檔的存取

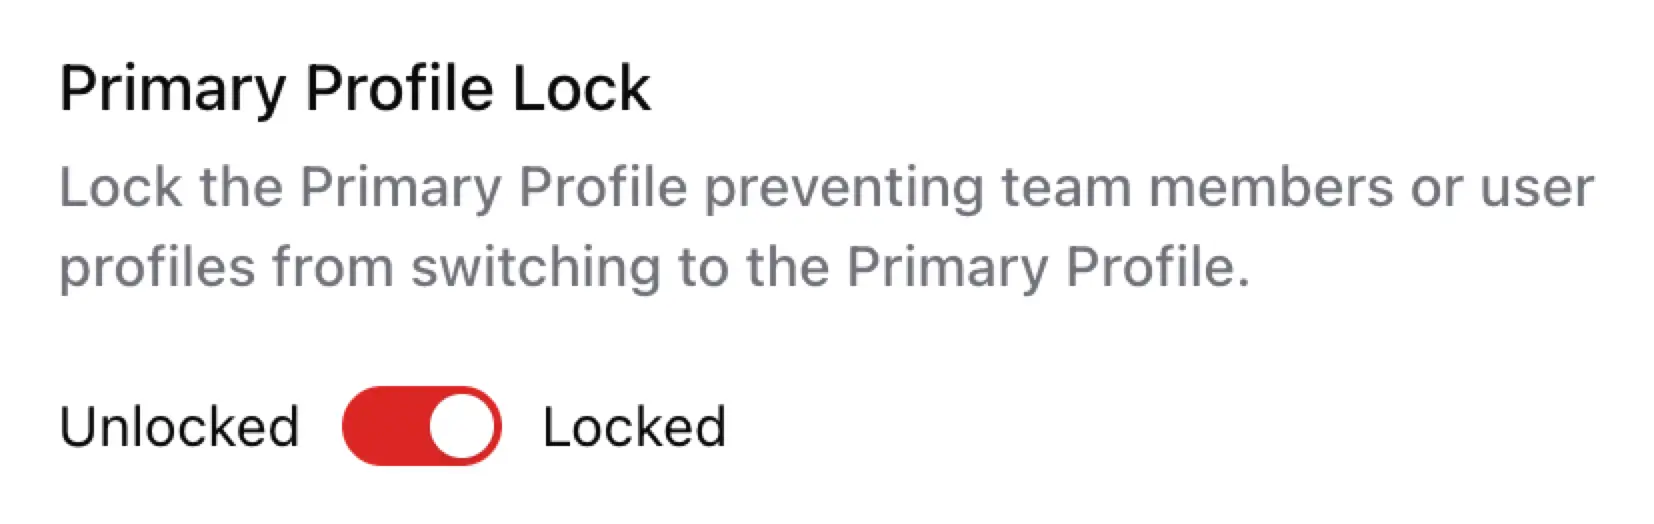
透過鎖定主要設定檔，限制使用者與團隊成員設定檔對主要設定檔的存取。
如果你想防止團隊成員或使用者設定檔存取 Profile Settings 或 Account/Billing 頁面，請啟用主要設定檔鎖定。

<img class="center" src="https://mintcdn.com/ayrshare-docs/6mPR4kmwNEz1kMbX/images/multiple-users/primary-lock.webp?fit=max&auto=format&n=6mPR4kmwNEz1kMbX&q=85&s=0c376e9039d943e97042a85d5bc97d0e" alt="Primary Profile Lock" width="70%" data-path="images/multiple-users/primary-lock.webp" />

啟用後，團隊成員與使用者設定檔將無法切換到主要設定檔，但仍可切換到其他團隊成員或使用者設定檔。

#### 限制團隊成員存取

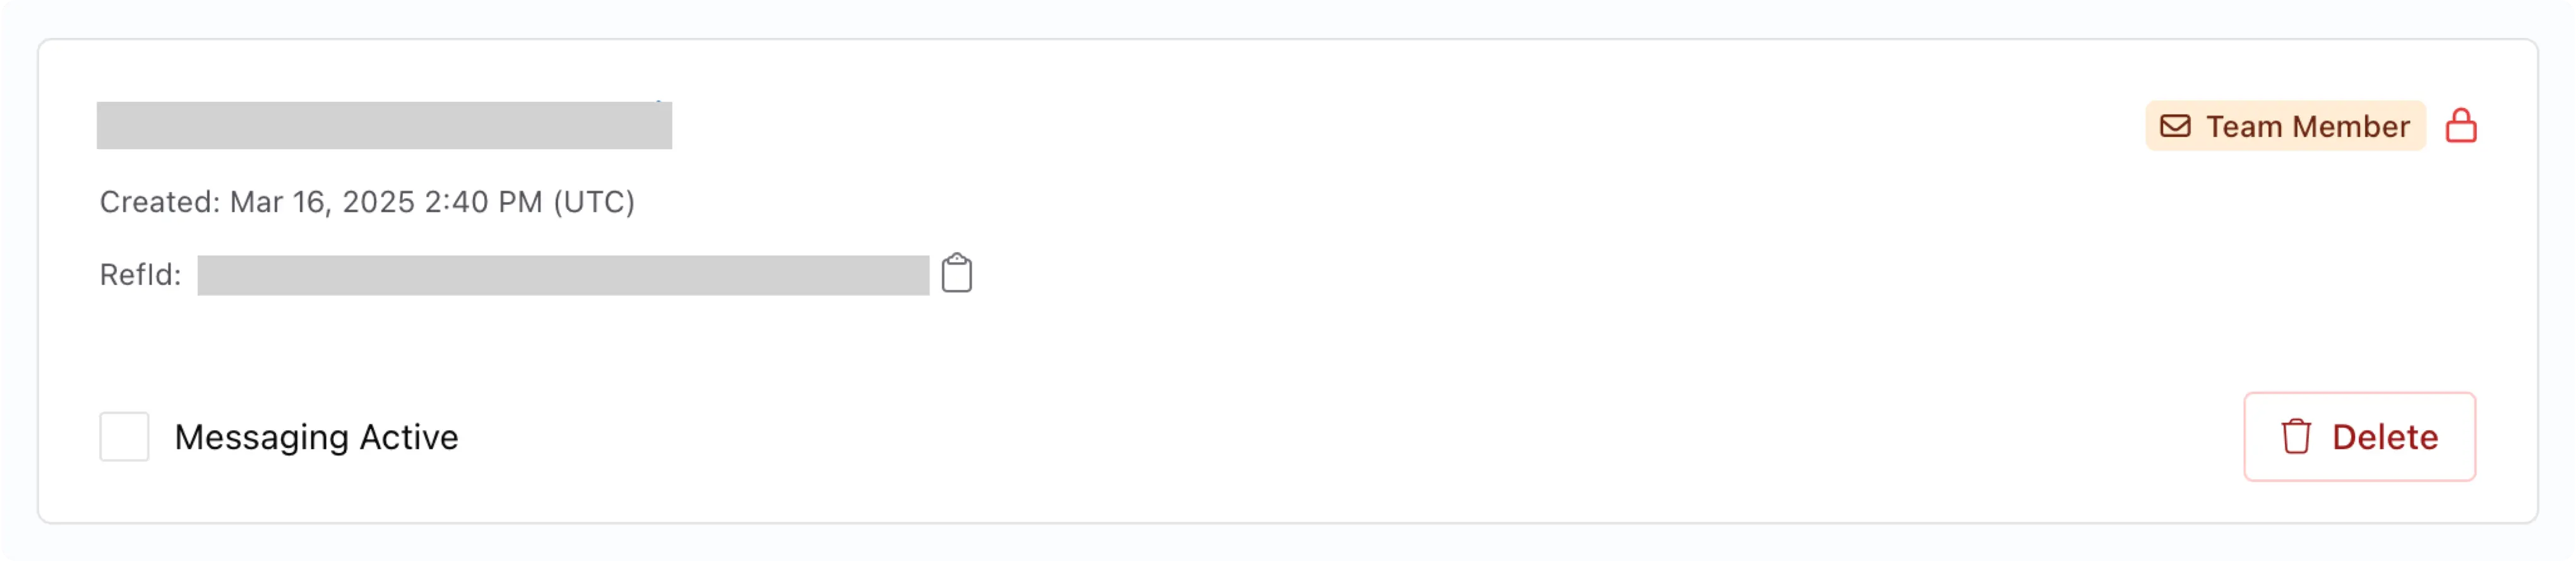
透過鎖定團隊成員的帳戶來限制他們的存取。
這會防止該團隊成員切換到任何其他使用者設定檔。

點選團隊成員設定檔右上角的 <Icon icon="lock" iconType="light" color="red" /> 或 <Icon icon="unlock" iconType="light" color="gray" /> 圖示來啟用鎖定。
<img class="center" src="https://mintcdn.com/ayrshare-docs/6mPR4kmwNEz1kMbX/images/multiple-users/team-member-lock.webp?fit=max&auto=format&n=6mPR4kmwNEz1kMbX&q=85&s=a64cfba8dbb8a88dd543be1cb834cb1d" alt="Team Member Lock" width="90%" data-path="images/multiple-users/team-member-lock.webp" />

你也可以在 [建立設定檔](/multiple-users/manage-user-profiles#create-a-new-profile) 時鎖定團隊成員。

### 更新社群連結頁面的 Logo

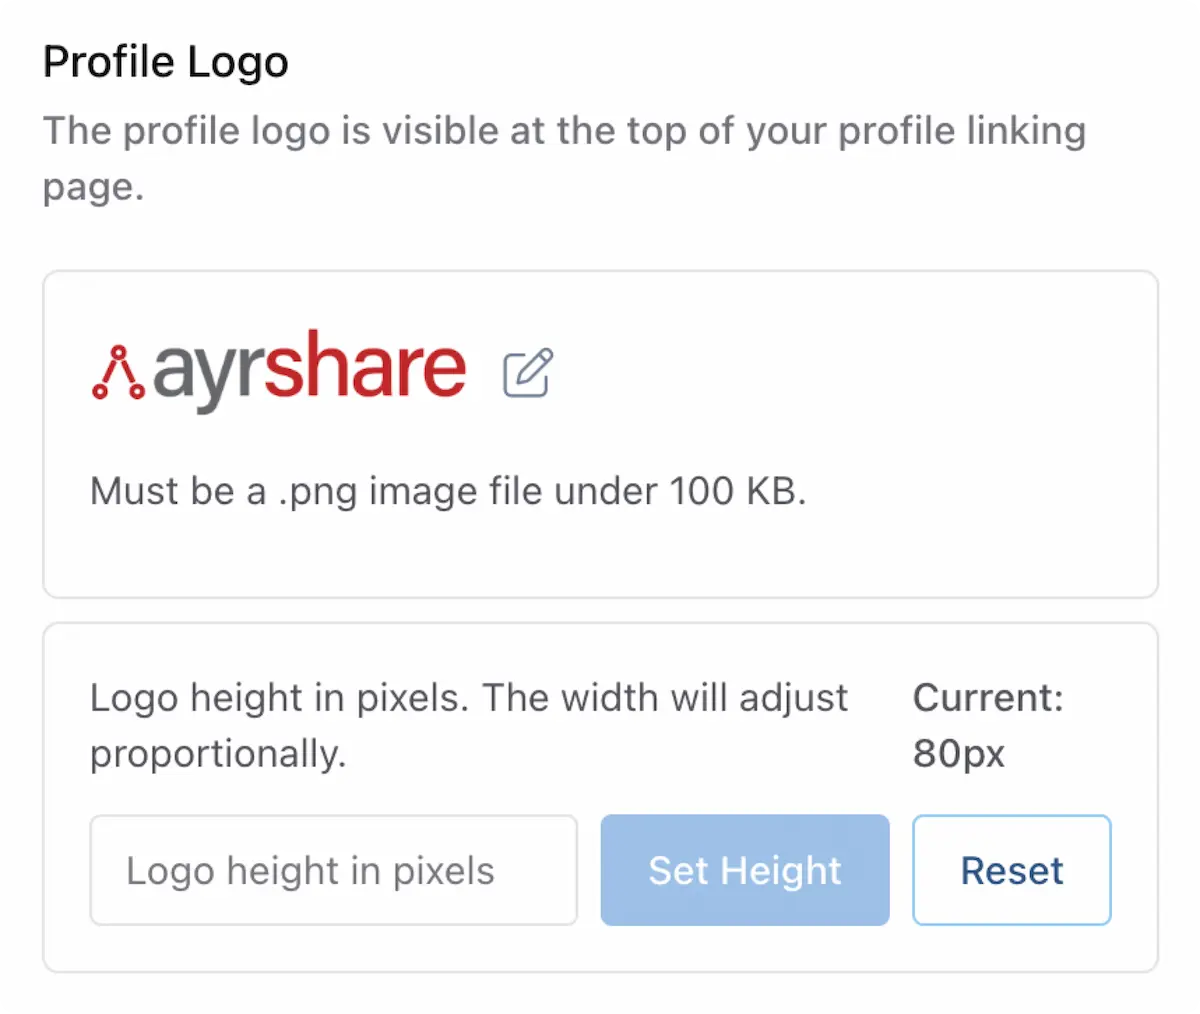
為 [社群連結頁面](/multiple-users/user-integration) 新增你自己的 logo 並設定 logo 高度。
<img class="center" width="70%" src="https://mintcdn.com/ayrshare-docs/6mPR4kmwNEz1kMbX/images/multiple-users/profile-logo.webp?fit=max&auto=format&n=6mPR4kmwNEz1kMbX&q=85&s=41fe0dcae1b87e944c2207c129c31ea7" alt="Update Profile Logo" data-path="images/multiple-users/profile-logo.webp" />

個別使用者設定檔可透過 [Create Profile](/apis/profiles/create-profile) 與 [Update Profile](/apis/profiles/update-profile) 的 `hideLogo` 參數，在其連結頁面上隱藏此 logo。其他每個設定檔的帳戶整體 logo 不受影響。這在代理商為某個合作夥伴進行白牌化，同時保留其他設定檔品牌的情況下相當有用。

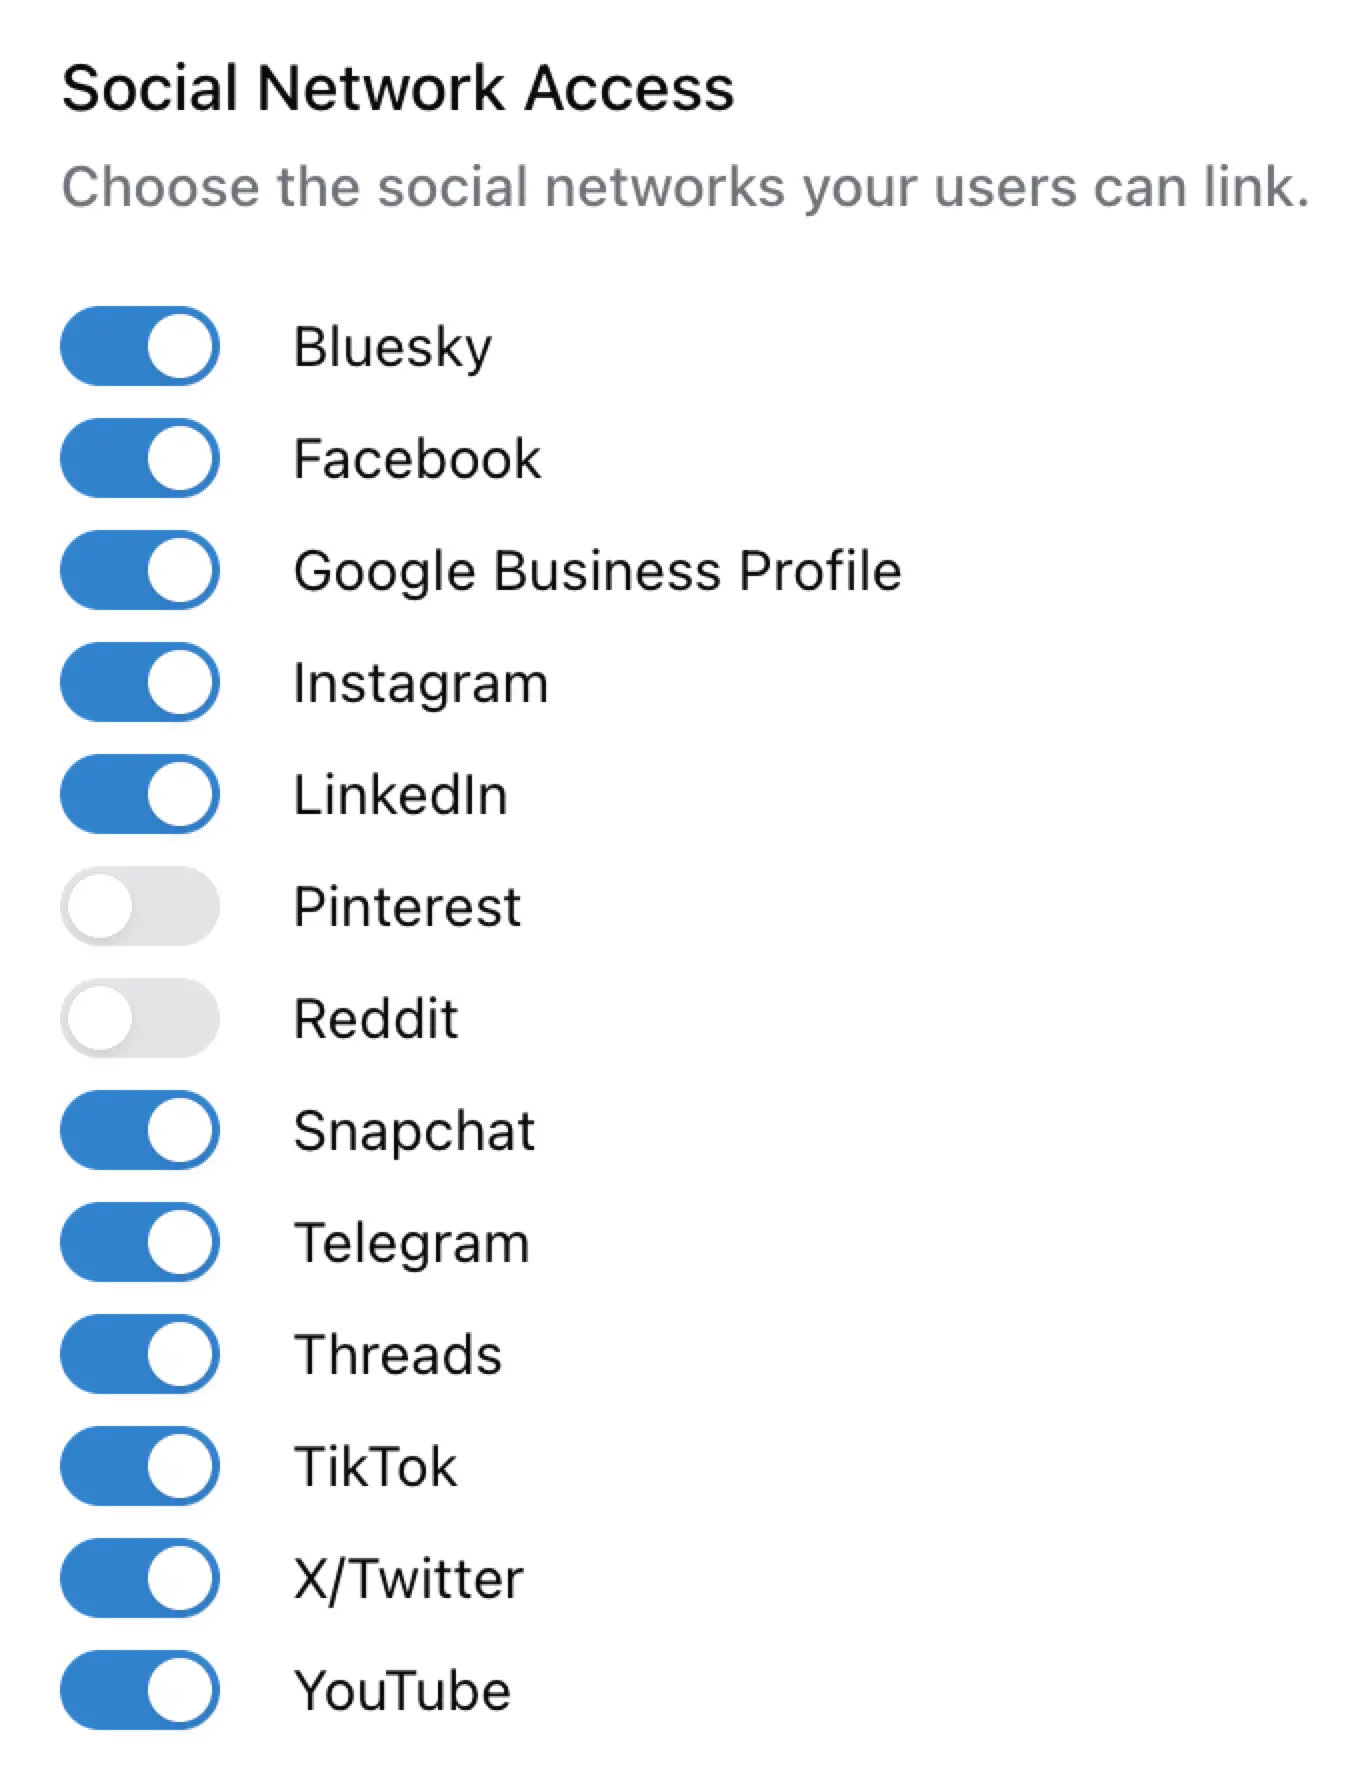
### 設定社群網路存取權

移除或授予你的使用者／設定檔存取可用社群網路的權限。
預設情況下所有社群網路皆為啟用且可用。

<Note>
  權限對你所有使用者設定檔為全域。停用只會將該社群網路從使用者的 Social Accounts 檢視中移除，並不會移除已建立的連結。
</Note>

<img class="center" width="50%" src="https://mintcdn.com/ayrshare-docs/6mPR4kmwNEz1kMbX/images/multiple-users/select-social-networks.webp?fit=max&auto=format&n=6mPR4kmwNEz1kMbX&q=85&s=c6ba6926628dd20ebf3c9e391d56b819" alt="Select Social Networks Access" data-path="images/multiple-users/select-social-networks.webp" />

如需在使用者設定檔層級停用社群網路的更多資訊，請參閱 [建立設定檔](/apis/profiles/overview#enable-or-disable-social-networks) 端點。

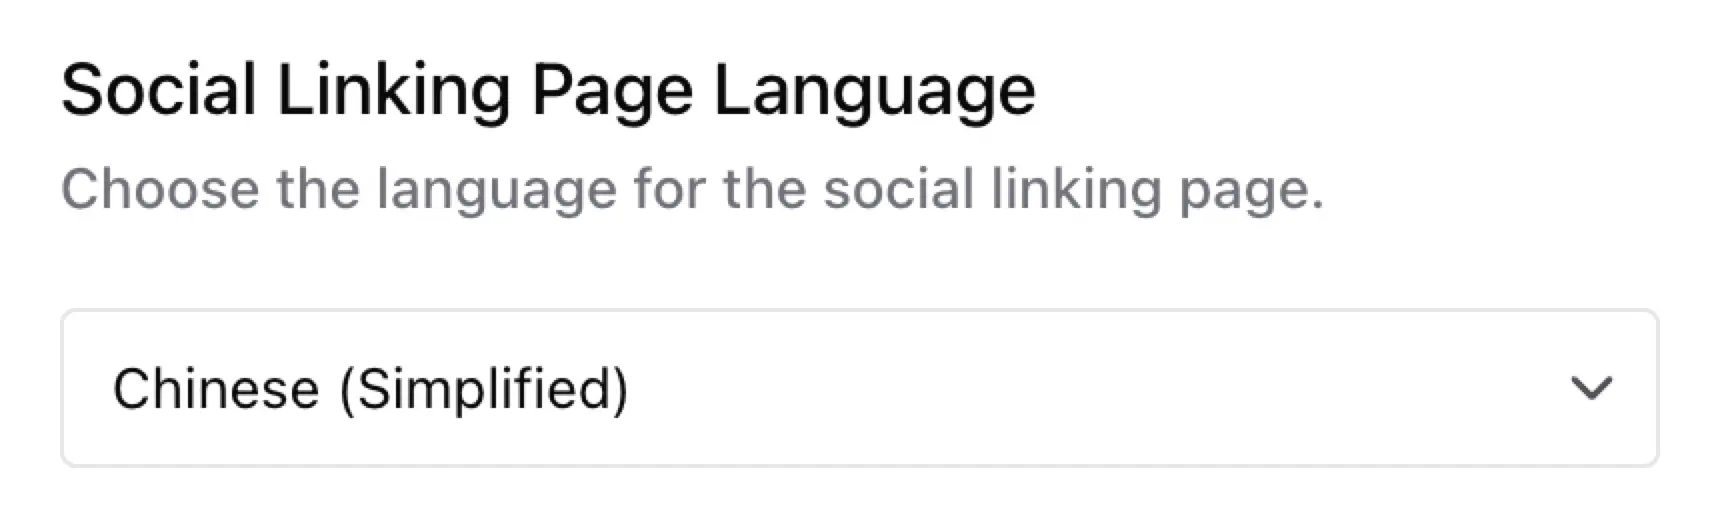
### 設定社群連結的語言

設定社群連結頁面的語言。預設為英文。
<img class="center" width="60%" src="https://mintcdn.com/ayrshare-docs/6mPR4kmwNEz1kMbX/images/multiple-users/social-linking-language.webp?fit=max&auto=format&n=6mPR4kmwNEz1kMbX&q=85&s=af0e96e350e8ee8cc31f005a291b2f34" alt="Set Language for the Social Linking Page" data-path="images/multiple-users/social-linking-language.webp" />

可用的語言有：

<ul className="custom-bullets">
  <li>英文</li>
  <li>簡體中文</li>
  <li>法文</li>
  <li>德文</li>
  <li>西班牙文</li>
</ul>

若你需要清單中未提供的語言，請聯絡我們。

其他翻譯選項請見：

<ul className="custom-bullets">
  <li>
    [翻譯 API 錯誤訊息回應](/errors/errors-ayrshare#error-message-translation)
  </li>

  <li>[翻譯貼文](/apis/generate/translate-post#translate-post)</li>
</ul>

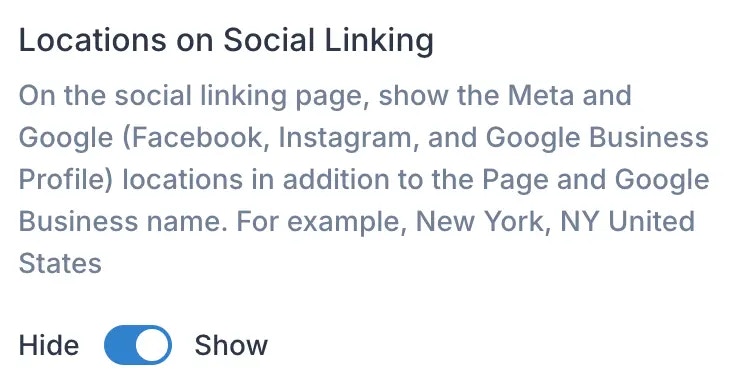
### 顯示頁面位置

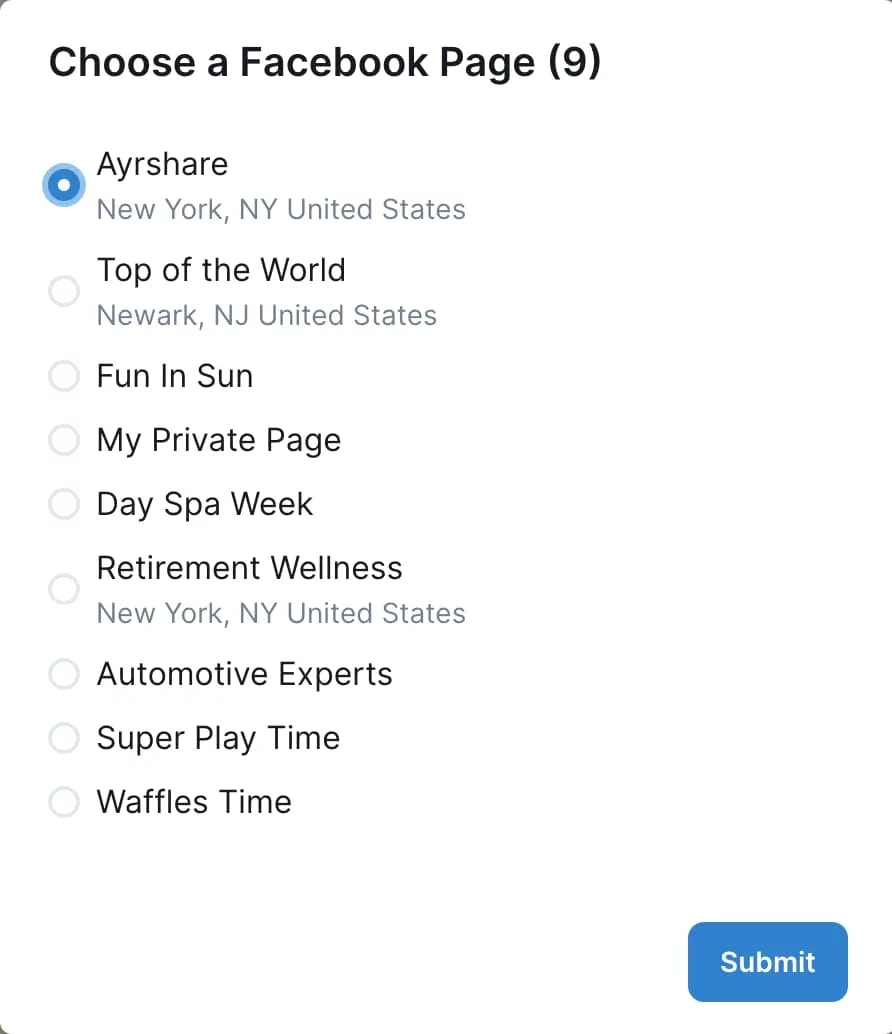
在社群連結頁面上，如果 Meta（Facebook 或 Instagram）或 Google Business Profile 頁面關聯了位置，則將該位置資訊與頁面名稱一起顯示。此額外的位置資訊在有多個同名頁面時特別有用，可讓使用者更容易加以區分。

<img class="center" width="60%" src="https://mintcdn.com/ayrshare-docs/6mPR4kmwNEz1kMbX/images/multiple-users/display-location.webp?fit=max&auto=format&n=6mPR4kmwNEz1kMbX&q=85&s=eeb7c04fd2df1c0d6b45a28a77d7e5bc" alt="Display Page Location" data-path="images/multiple-users/display-location.webp" />

若可用，頁面位置會顯示在社群連結頁面的頁面名稱下方：

<img class="center" width="60%" src="https://mintcdn.com/ayrshare-docs/6mPR4kmwNEz1kMbX/images/multiple-users/fb%20pages%20with%20location.webp?fit=max&auto=format&n=6mPR4kmwNEz1kMbX&q=85&s=67e81b3e33683d144492781c09dad604" alt="FB Display Page Location" data-path="images/multiple-users/fb pages with location.webp" />

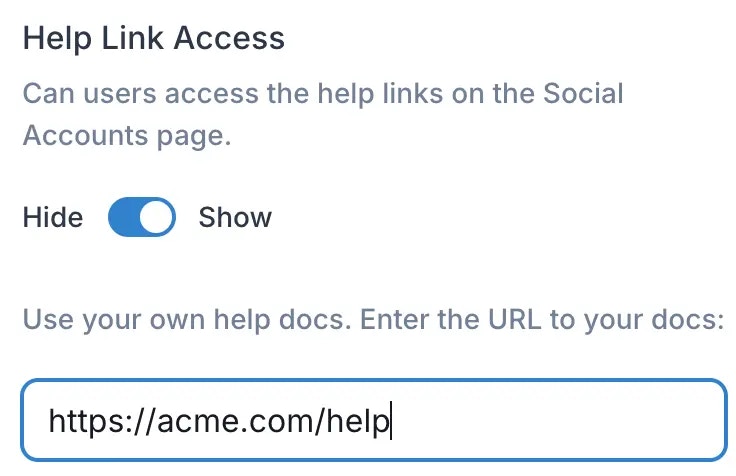
### 說明連結可見性

啟用或停用使用者社群連結頁面上 Ayrshare 說明文件的連結。你也可以輸入你自己公開文件的 URL 來取代。
<img class="center" width="60%" src="https://mintcdn.com/ayrshare-docs/6mPR4kmwNEz1kMbX/images/multiple-users/help-links.webp?fit=max&auto=format&n=6mPR4kmwNEz1kMbX&q=85&s=d2887d2bff0d8a5b132dea6122c1766a" alt="Help Links Visible" data-path="images/multiple-users/help-links.webp" />

### 用於警示的替代電子郵件

選擇不同的電子郵件位址接收警示，例如帳號連結中斷。

<img class="center" width="60%" src="https://mintcdn.com/ayrshare-docs/6mPR4kmwNEz1kMbX/images/multiple-users/email%20alerts.webp?fit=max&auto=format&n=6mPR4kmwNEz1kMbX&q=85&s=9706511726429bdedc6928a5c10ff71d" alt="Emails for Alerts" data-path="images/multiple-users/email alerts.webp" />

更多自訂項目（例如標題）可透過 [/profiles 端點](/apis/profiles/create-profile) 完成。

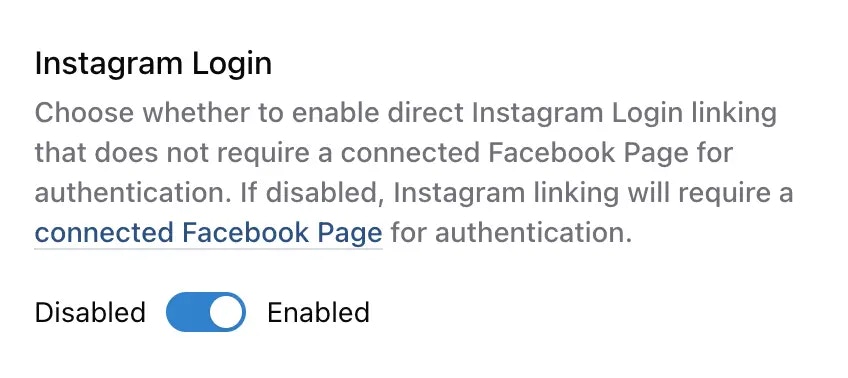
### Instagram 登入

啟用或停用社群連結頁面上的 Instagram 登入。
<img class="center" width="60%" src="https://mintcdn.com/ayrshare-docs/6mPR4kmwNEz1kMbX/images/multiple-users/instagram-login.webp?fit=max&auto=format&n=6mPR4kmwNEz1kMbX&q=85&s=7423d1ebb6929d4220a244b878fddaf7" alt="Instagram Login" data-path="images/multiple-users/instagram-login.webp" />

選擇是否啟用不需連結 Facebook 粉絲專頁即可直接進行 Instagram 登入的驗證方式。若停用，則 Instagram 連結會需要 [已連結的 Facebook 粉絲專頁](/dashboard/connect-social-accounts/facebook) 才能驗證。
<Warning>
  Instagram 登入 **預設為啟用**。若你需要下方列出的進階功能
  （hashtag 搜尋、共同創作、位置標記或品牌資料），必須手動停用此選項，
  改用 Facebook 粉絲專頁驗證。
</Warning>

#### 直接 Instagram 登入 vs Facebook 粉絲專頁驗證

**直接 Instagram 登入** Instagram API with Instagram Login 讓 Instagram 專業帳戶（商家與創作者）可直接連結他們的帳戶，而不需要關聯的 Facebook 粉絲專頁。此方式提供更簡潔的驗證流程。

**Facebook 粉絲專頁驗證**（傳統方法）需要使用者先連結一個與其 Instagram 專業帳戶關聯的 Facebook 粉絲專頁。

#### 直接 Instagram 登入的功能限制

雖然直接 Instagram 登入提供了便利，但使用此方式時某些功能 **無法使用**：

* **[品牌／使用者資料](/apis/listen/brand-user#param-instagram-user)** - 無法透過 brand 端點擷取 Instagram 帳戶資訊。
* **[Hashtag 搜尋](/apis/hashtags/search-hashtags)** - 無法在 Instagram 上搜尋 hashtag。
* **[共同創作](/apis/post/social-networks/instagram#collaboration)** - 無法邀請共同創作者參與 Instagram 貼文。
* **[位置標記](/apis/post/social-networks/instagram#location)** - 無法為 Instagram 貼文加上位置標記。
* **[`idId` - 舊版 Instagram 使用者 ID](/apis/analytics/social)** - Instagram 社群分析不會回傳此欄位。

#### 你應該選擇哪種方式？

* **啟用直接 Instagram 登入** 如果你只需要基本的發文功能，且不需要上述進階功能。
* **停用直接 Instagram 登入**（使用 Facebook 粉絲專頁驗證） 如果你需要存取所有 Instagram 功能，包括 hashtag 搜尋、共同創作、位置標記或品牌資料擷取。

<Note>
  對大多數客戶而言，建議使用直接 Instagram 登入驗證。如果
  你不確定該使用哪種方式，我們建議停用直接 Instagram 登入以確保可存取
  所有功能。之後若判斷不需要進階功能，隨時可再啟用。
</Note>

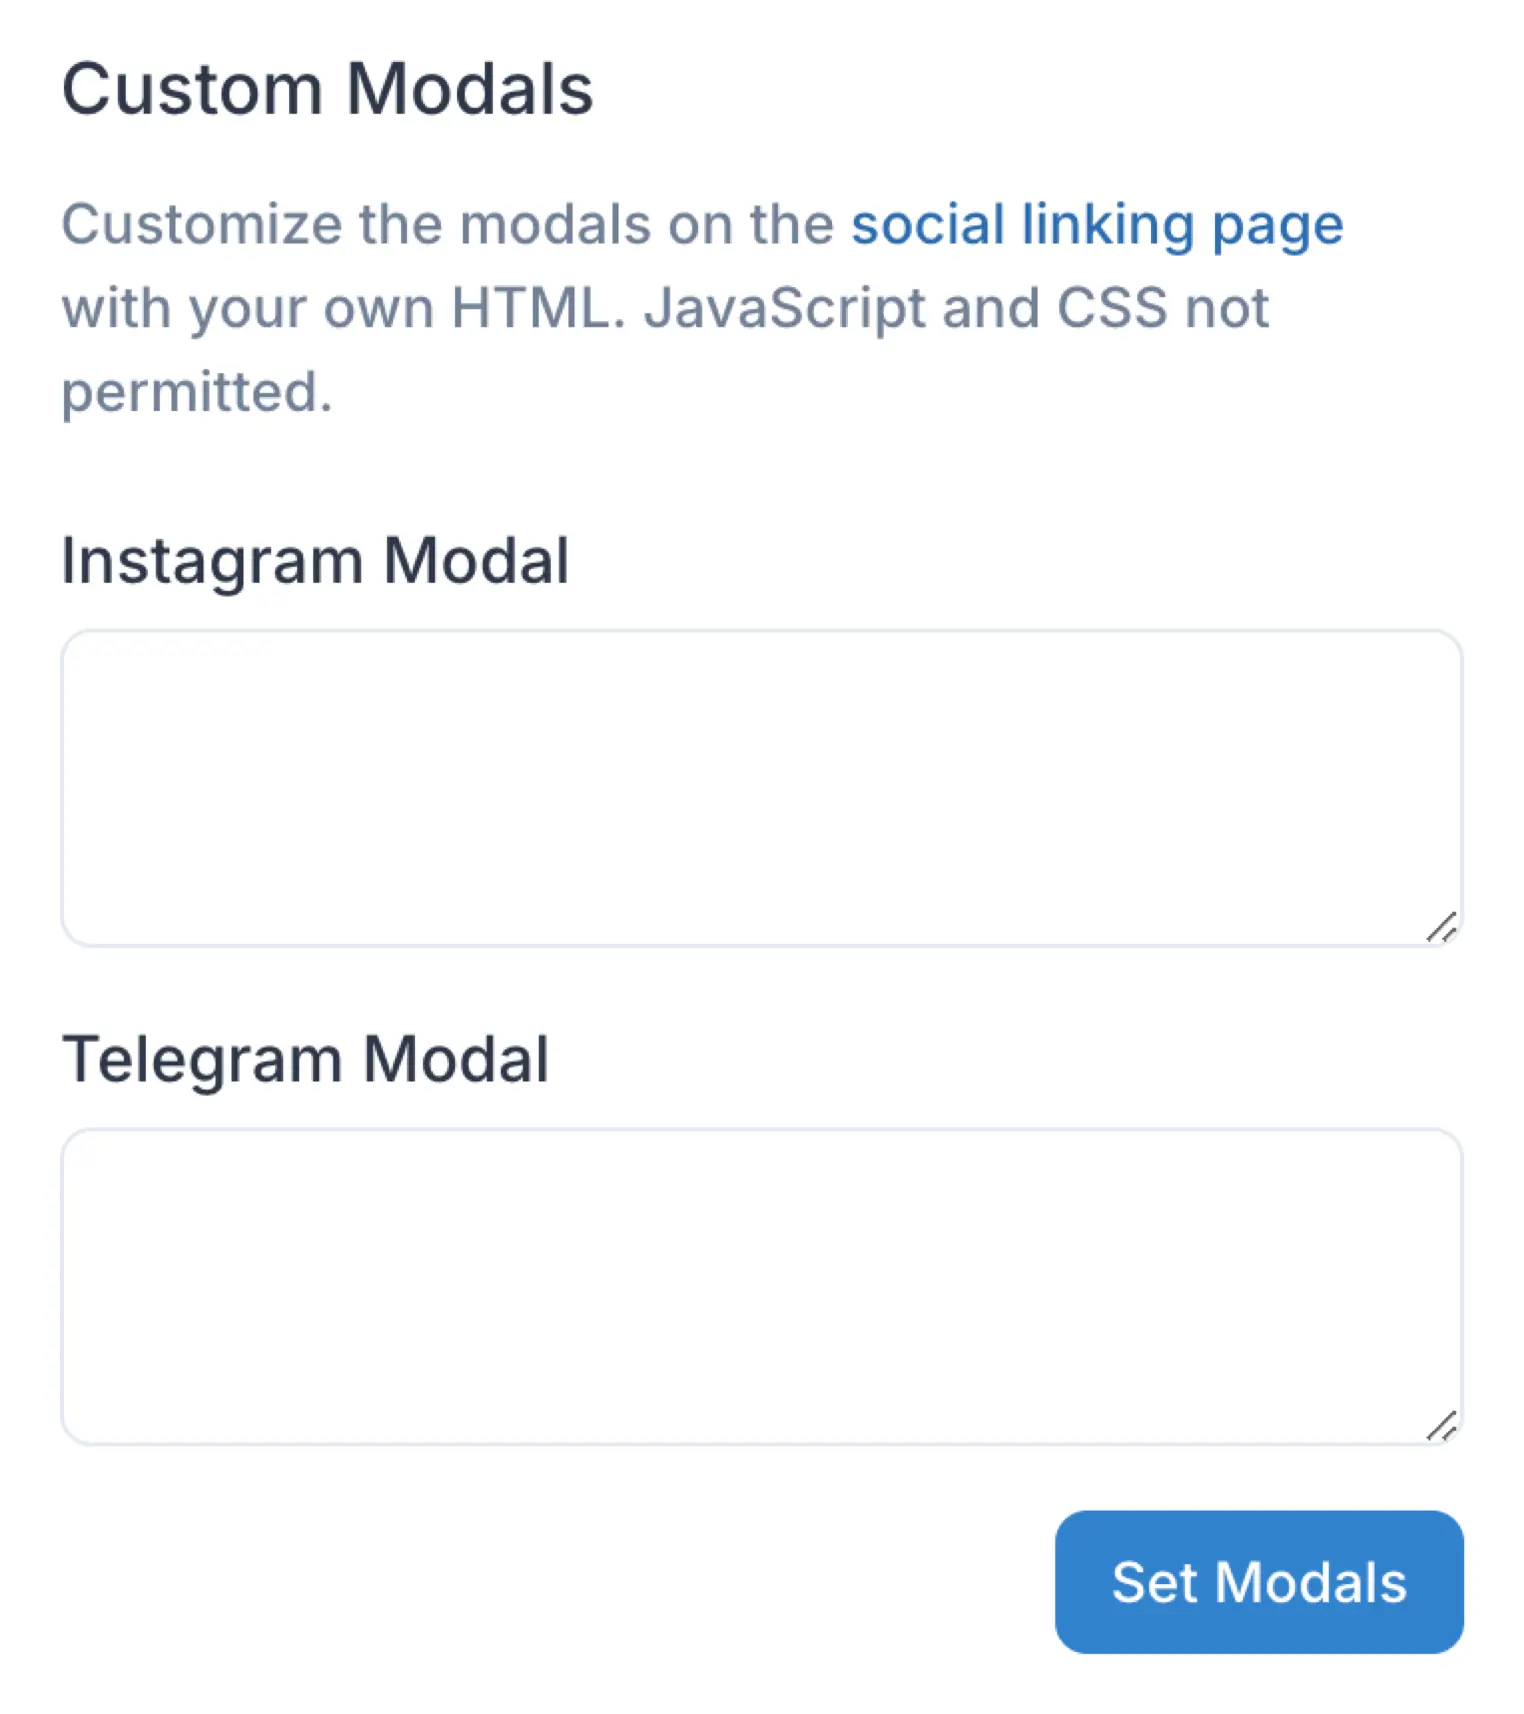
### 自訂對話框

你可以自訂社群連結頁面上顯示的對話框內容。
具體來說，你可以將 Instagram 與 Telegram 對話框的內文替換為你自己的自訂 HTML 內容，例如以不同語言顯示內容。
你的自訂內容可包含格式化文字、圖片，或兩者組合，以更符合你的需求。

<img class="center" width="50%" src="https://mintcdn.com/ayrshare-docs/dKBti0xVDJrOZ19f/images/multiple-users/custom-modals.webp?fit=max&auto=format&n=dKBti0xVDJrOZ19f&q=85&s=67e26724669b23fcc29b20fc9fec1c7c" alt="Custom Modals" data-path="images/multiple-users/custom-modals.webp" />

例如，加入你的自訂文字與 anchor 連結：

```html Custom HTML Modal theme={"system"}
<div>
  <style>
    span.underline {
      color: blue;
      text-decoration: underline;
    }
    span.underline a {
      color: blue;
      text-decoration: none;
    }
  </style>

  <span class="underline">
    Everyone agrees that
    <a target="_blank" href="https://www.ayrshare.com">Ayrshare Rocks!</a>
  </span>
</div>
```

<Note>HTML 必須包在 `<div>` 標籤中。加入自訂 CSS 可為 anchor 連結加入顏色與底線。</Note>

## 使用 API

### 建立與管理設定檔

你可以透過 /profiles 端點使用 API 建立、刪除與管理你的設定檔。詳情請見下方。
<Card title="Profile" icon="code" href="/apis/profiles/overview" horizontal />

### 取得 Profile Key

當你透過 API 使用 [/profile](/apis/profiles/create-profile) 端點建立新設定檔時，會回傳 Profile Key。如需再次取得 profile key，請前往儀表板取得。請見上方說明。

## 啟用訊息功能

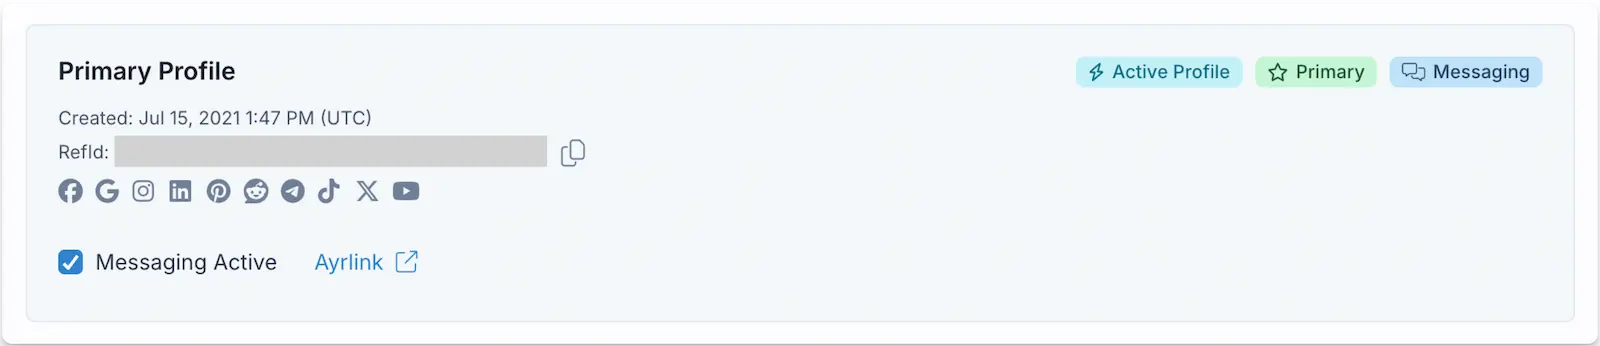
<img class="center" src="https://mintcdn.com/ayrshare-docs/6mPR4kmwNEz1kMbX/images/multiple-users/messaging-enable.webp?fit=max&auto=format&n=6mPR4kmwNEz1kMbX&q=85&s=3a413a9a937e7b38dddb82c062737b88" alt="Enable Messaging" width="1600" height="346" data-path="images/multiple-users/messaging-enable.webp" />

你可以在 Account 頁面為你的 Ayrshare 帳戶啟用訊息功能。更多細節請見下方：

<Card title="Messages" icon="code" href="/apis/messages/overview" horizontal />

## Max Pack 自訂

在 Ayrshare 儀表板頁面 *User Profile -> Setting* 中，你可以自訂社群連結頁面的多個面向。功能與能力的詳情請參閱 [Max Pack](/additional/maxpack)。

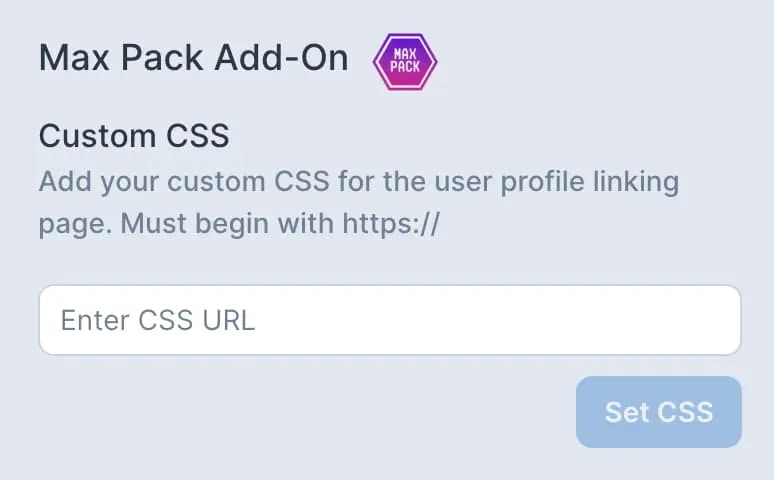
### 自訂 CSS

使用你自己的 CSS 檔案自訂社群帳號頁面的外觀與使用感：顏色、字型、隱藏功能、變更按鈕等。

<img class="center" width="60%" src="https://mintcdn.com/ayrshare-docs/dKBti0xVDJrOZ19f/images/multiple-users/custom%20css.webp?fit=max&auto=format&n=dKBti0xVDJrOZ19f&q=85&s=856e6f01c5730ead1dc69a3f9f89422a" alt="Customize CSS" data-path="images/multiple-users/custom css.webp" />

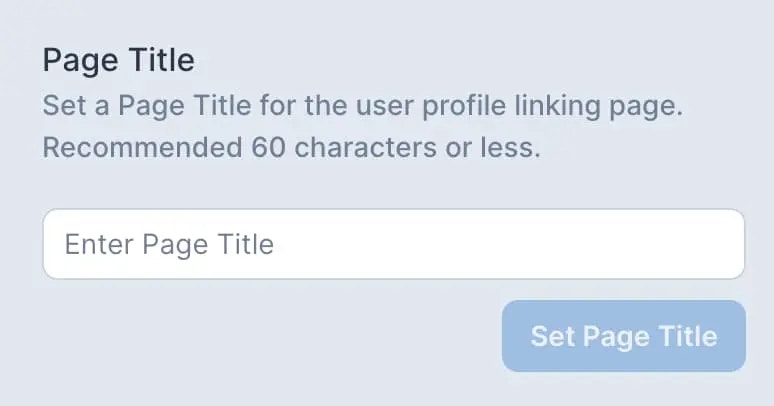
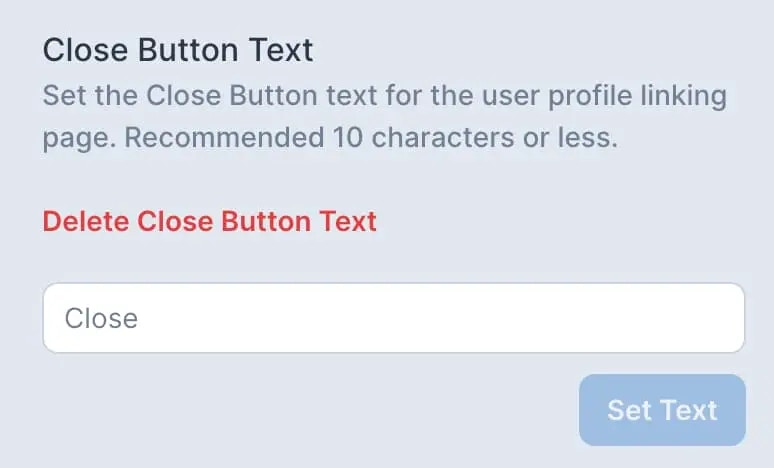
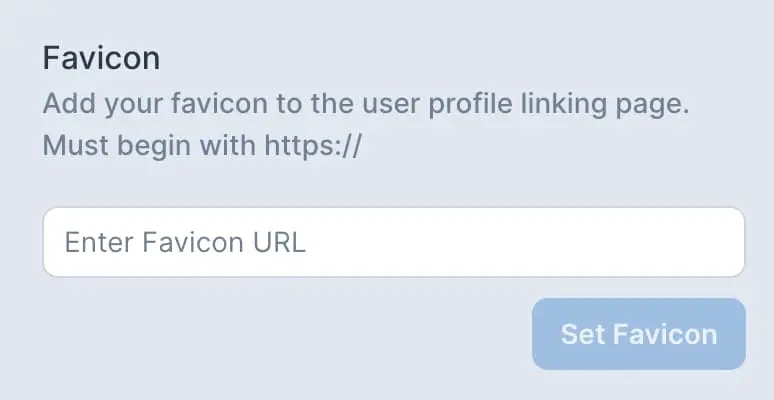
### 變更頁面標題、Close 按鈕與 Favicon

設定你自己的頁面標題、close 按鈕與 favicon（.ico 檔案）。

<img class="center" width="60%" src="https://mintcdn.com/ayrshare-docs/6mPR4kmwNEz1kMbX/images/multiple-users/page%20title.webp?fit=max&auto=format&n=6mPR4kmwNEz1kMbX&q=85&s=f8a9927bc786b752dbe1024ea8dac92e" alt="Page Title" data-path="images/multiple-users/page title.webp" />

<img class="center" width="60%" src="https://mintcdn.com/ayrshare-docs/dKBti0xVDJrOZ19f/images/multiple-users/close%20button%20text.webp?fit=max&auto=format&n=dKBti0xVDJrOZ19f&q=85&s=9b73e31a816fd80c6a617454244cb84e" alt="Close Button" data-path="images/multiple-users/close button text.webp" />

<img class="center" width="60%" src="https://mintcdn.com/ayrshare-docs/6mPR4kmwNEz1kMbX/images/multiple-users/favicon.webp?fit=max&auto=format&n=6mPR4kmwNEz1kMbX&q=85&s=b8a93f6075ab04d81aafa128ed09be3c" alt="Favicon" data-path="images/multiple-users/favicon.webp" />

### 頁尾文字

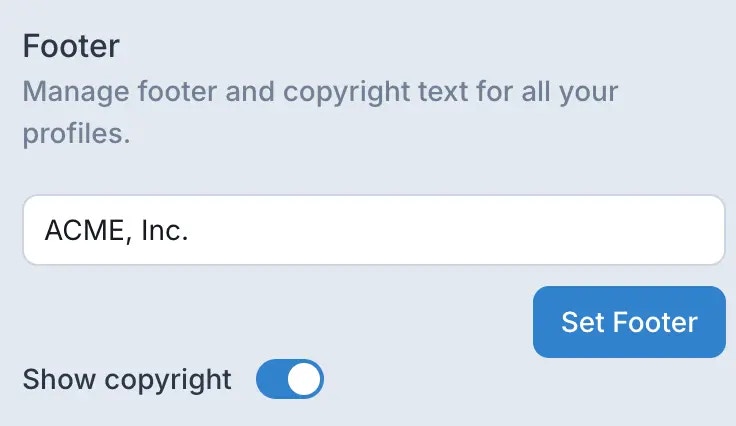
自訂社群連結頁面上的頁尾文字並新增版權資訊。這讓你可以用不同語言顯示頁尾文字。
<img class="center" width="60%" src="https://mintcdn.com/ayrshare-docs/6mPR4kmwNEz1kMbX/images/multiple-users/footer-set.webp?fit=max&auto=format&n=6mPR4kmwNEz1kMbX&q=85&s=f94ae8c52a9836af9648335e29879a8d" alt="Set Footer Text" data-path="images/multiple-users/footer-set.webp" />

## Enterprise 功能

### Max Pack

Enterprise 內建全部 [Max Pack](/additional/maxpack) 功能。

### 自動重新同步 Facebook 與 Instagram 粉絲專頁

當 Facebook 發生安全事件（例如密碼變更）時，該使用者帳戶所關聯的所有 Facebook 粉絲專頁（包括連結的 Instagram 帳號）都需要重新連結到 Ayrshare。對於管理多個粉絲專頁的帳戶，此流程可能相當耗時。

<ul class="custom-bullets">
  <li>連結 Facebook 或 Instagram 粉絲專頁時可使用「Resync」選項。</li>

  <li>
    啟用此功能後，所有先前連結的粉絲專頁都會自動重新連結至該使用者設定檔。
  </li>

  <li>
    注意：只有先前已連結的粉絲專頁會被重新連結；新的粉絲專頁不會自動新增。
  </li>

  <li>此功能支援最多 400 個粉絲專頁的 Facebook 帳戶。</li>

  <li>
    對於超過 400 個粉絲專頁的帳戶，建議將粉絲專頁分散到多個 Facebook 帳戶。
  </li>

  <li>
    **最佳做法：** 只在必要時使用「Resync」選項來重新連結所有粉絲專頁。日常操作中通常不需要此功能。
  </li>
</ul>

### IP 白名單

透過將特定 IP 位址加入白名單，強化你的帳戶安全性。此功能將 API 存取限制為僅允許經核准的 IP 位址，為你的 Ayrshare 整合提供額外一層保護。

### 技術與安全審查

直接與 Ayrshare 的專案團隊合作，進行完整的技術與安全審查。此服務可確保你的整合符合最佳實務，並滿足貴組織特定的安全需求。

### 專屬客戶管理與優先支援

由專屬客戶經理提供個人化支援，他們了解你的獨特需求，並可提供量身打造的解決方案。享有技術支援的優先存取權，可獲得更快的回應時間，並提供關鍵問題的升級處理程序。

### 自訂 API 端點

對於有特定需求的企業，Ayrshare 可以開發自訂 API 端點，以與你既有的系統與工作流程無縫整合。