Post to Multiple Social Media Accounts from Bubble
February 15, 2021
3 min read
Author: Ayrshare Team
Share Article
Ask AI about this article
Opens your AI assistant in a new tab with this article preloaded.

Post to all your social media accounts from the no-code tool Bubble.io
Bubble is a great no-code tool that lets you create web apps very simply and very quickly. Just by dragging some elements onto the page, and connecting them with actions, you can make some pretty advanced software.
In this tutorial, we show you how to create an app to write a new post and publish it to multiple social media accounts, such as Twitter, Facebook, and Instagram, using Ayrshare within your app. The first step is to create a new Bubble app and lay out some elements.
Or your can start with Ayrshare’s Bubble Plugin within your existing app.
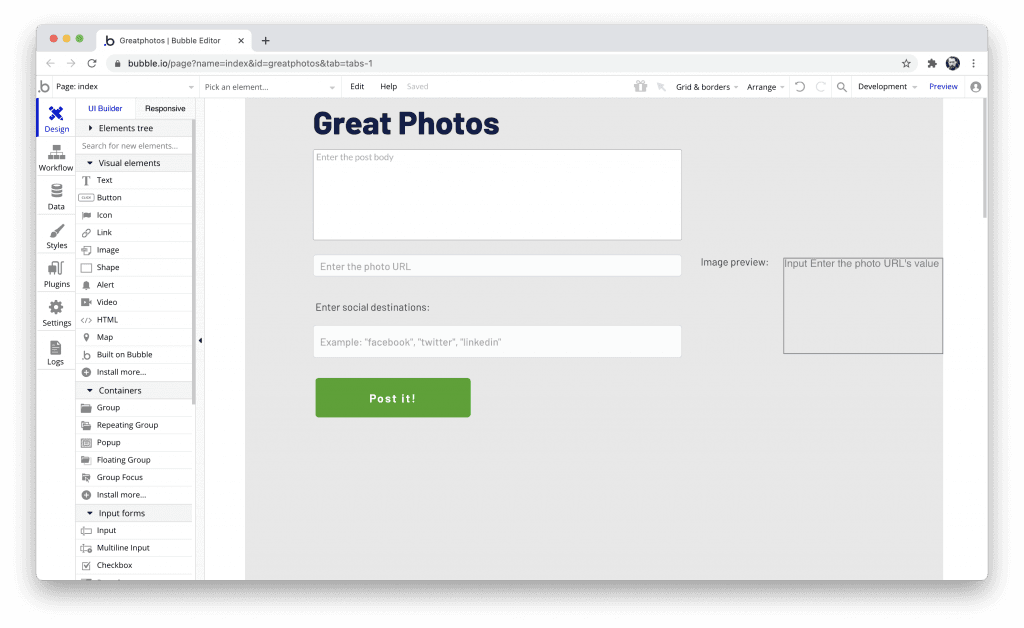
Create the web app elements
Let’s create an app called Great Photos. We start we dragged in a multiline input for the post body, and regular input elements for the photo URL and the social destinations. The photo preview is the image element. All the labels are text elements.
Finally we add a button and change the text on it to “Post it!” and connect the image element’s dynamic image source to the photo URL input field.
Set up the Ayrshare plugin
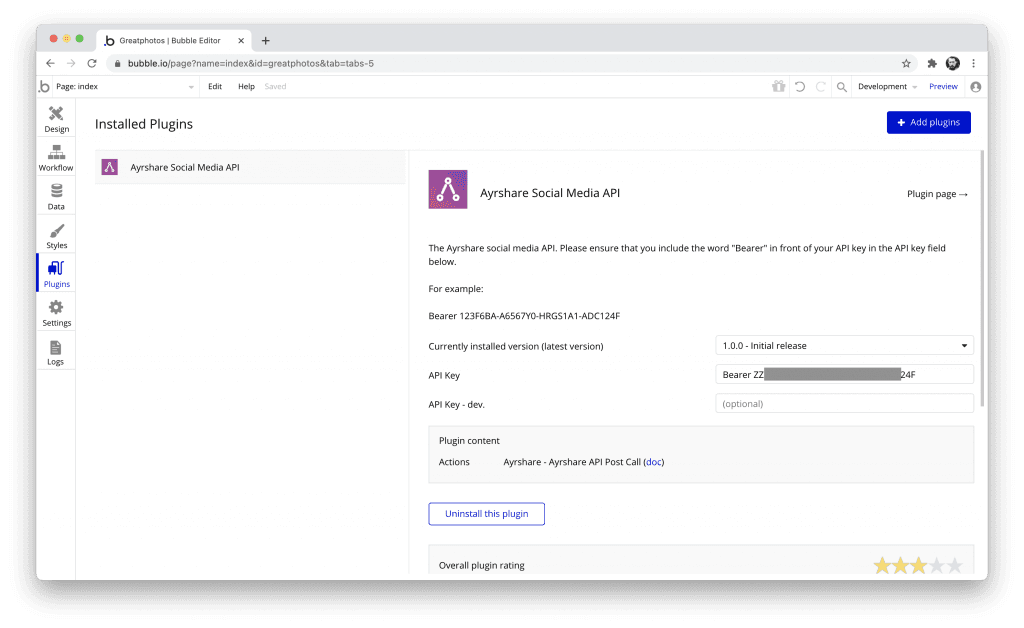
The next step is to install the Ayrshare plugin. You can access the plugin marketplace in the left menu in the Plugins section. Search for “ayrshare” and click the install button.
Log into your ayrshare.com account and copy your API key from the API Dashboard section. If you have not yet set up your Ayrshare social destinations, then you want to do that now. When you enter it into the plugin, remember to add the word “Bearer” in front of the API key.
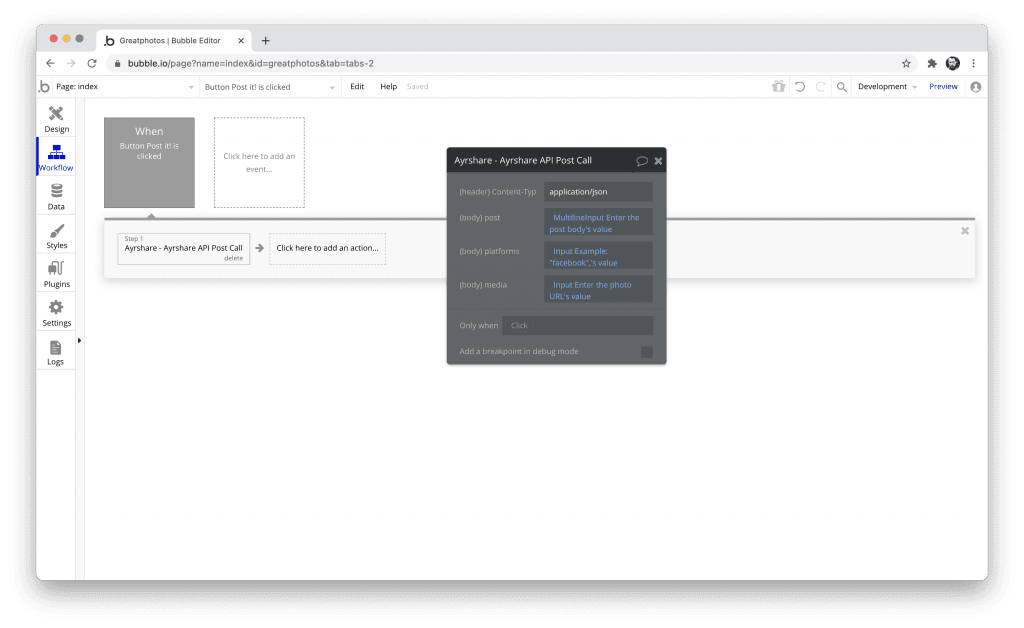
Create the posting logic
Double click the “Post it!” button and click the Start/Edit workflow option to make a new workflow. Click to add an action. We only need to create one step to get our app working.
From the menu, select Plugins -> Ayrshare API Post Call.
For the post field, click to Insert Dynamic Data and select the Multiline Input’s value. For the platforms field, select the dynamic data for the Destination input’s value. For the media, select the photo URL input’s value.
Run it!
In the Bubble Design view, click the Preview button and run the app. Go ahead and enter some text in the body field, a URL for a photo in the photo URL field, and the social destinations in the third field. Remember to enter the destinations with quotes separated by commas.
Click the “Post it!” button to post your content. You can check your Ayrshare dashboard and your social media accounts to ensure that your post was successfully posted.
It’s that simple. Good luck with your Bubble and social media journey!
If you prefer to watch this tutorial as a video, check out our 5 minute tutorial below.
Here is another video of how to use the Bubble API Connector Plugin to access more of the functionality of Ayrshare. This tutorial video explains how to post multiple images in a single social post.
About Ayrshare
Ayrshare is a social media API that allows you to publish posts, get analytics, manage comments, and sends direct messages on the social networks directly from your platform. Learn more in our social media API docs.
Written by: Ayrshare Team
Guides and stories from the Ayrshare team, the unified social media API trusted by more than 10,000 teams.
Ask AI about this article
Opens your AI assistant in a new tab with this article preloaded.