How To Create A Social Media Scheduling App With No Code
A tutorial on how to build a no-code web app to create and schedule a post for multiple social media destinations using Bubble.io and Ayrshare
This article is for the Ayrshare Bubble plugin versions 1.x and 2.x. Please reference our docs for instructions on how to use the more recent versions of the plugin which have improved logic.
In this tutorial we will build a web application similar to Buffer, Hootsuite, and many others that let you post to multiple social media destinations from a single screen. This is a no-code web app built by on Bubble.io with the social media connectivity handled by Ayrshare. Both Bubble and Ayrshare offer free plans to let you build the web app and get it fully functional with no cost. You can also check out the in-depth guide on using the Ayrshare Bubble plugin or API Connector.
Before you get started, make sure that you have a solid understanding of the basics of Bubble, how to use Bubble data, how to use Bubble workflows, and how to use Bubble plugins. These are basic building blocks of Bubble. If you are not familiar with these concepts, we suggest going through the introductory lessons that Bubble offers when you sign up for a free account. In our experience, Bubble is a great no code development platform choice for both advanced app development and those who are just starting out and testing no and low code platforms.
App Overview: Creating and Deleting Workflows
Bubble is one of the most capable no-code platforms available. In combination with the Ayrshare API, you have all the tools you need to build a sophisticated web app with full social media management: BuffSuite!
BuffSuite will allow a user to:
- Create a post with an image.
- Schedule a post.
- Select a social network destination, such as Instagram, Twitter, or Facebook.
- Send the post to the selected social networks via Ayrshare’s API.
- Save the request and response in the database.
- Get the historical and scheduled post list.
- Delete the post.
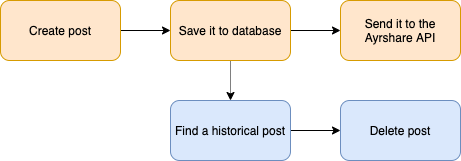
The high-level app flow will look like this:
The Data Structure
With any app, whether it is no-code or custom coded, it is important to think through your data structure before building.
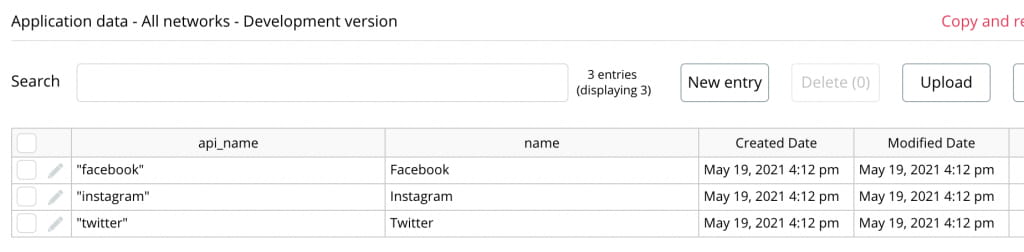
We created two data types. The first is the Network data type. This table holds the list of social networks our app supports. There are two fields: One field is name, which is the display name of the social network we surface in the app, and the other is the api_name, which is the name of the social network we send via the API calls. The reason we have two names is we need to construct a list (array) with quotes around each network name when we send it via the API.
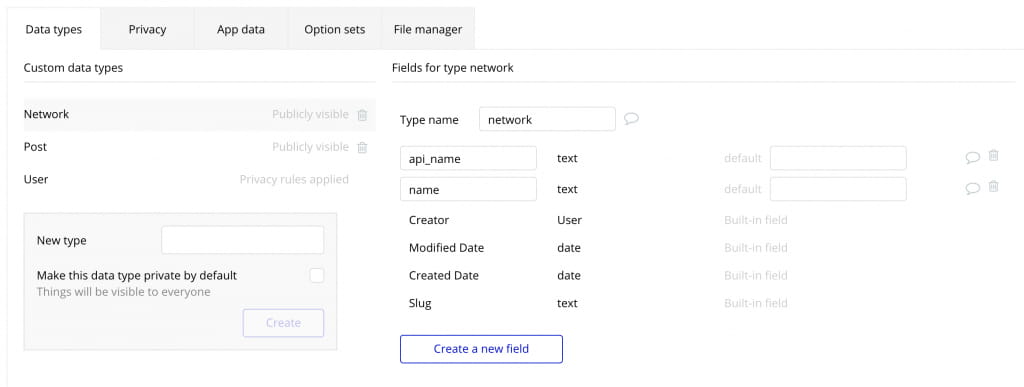
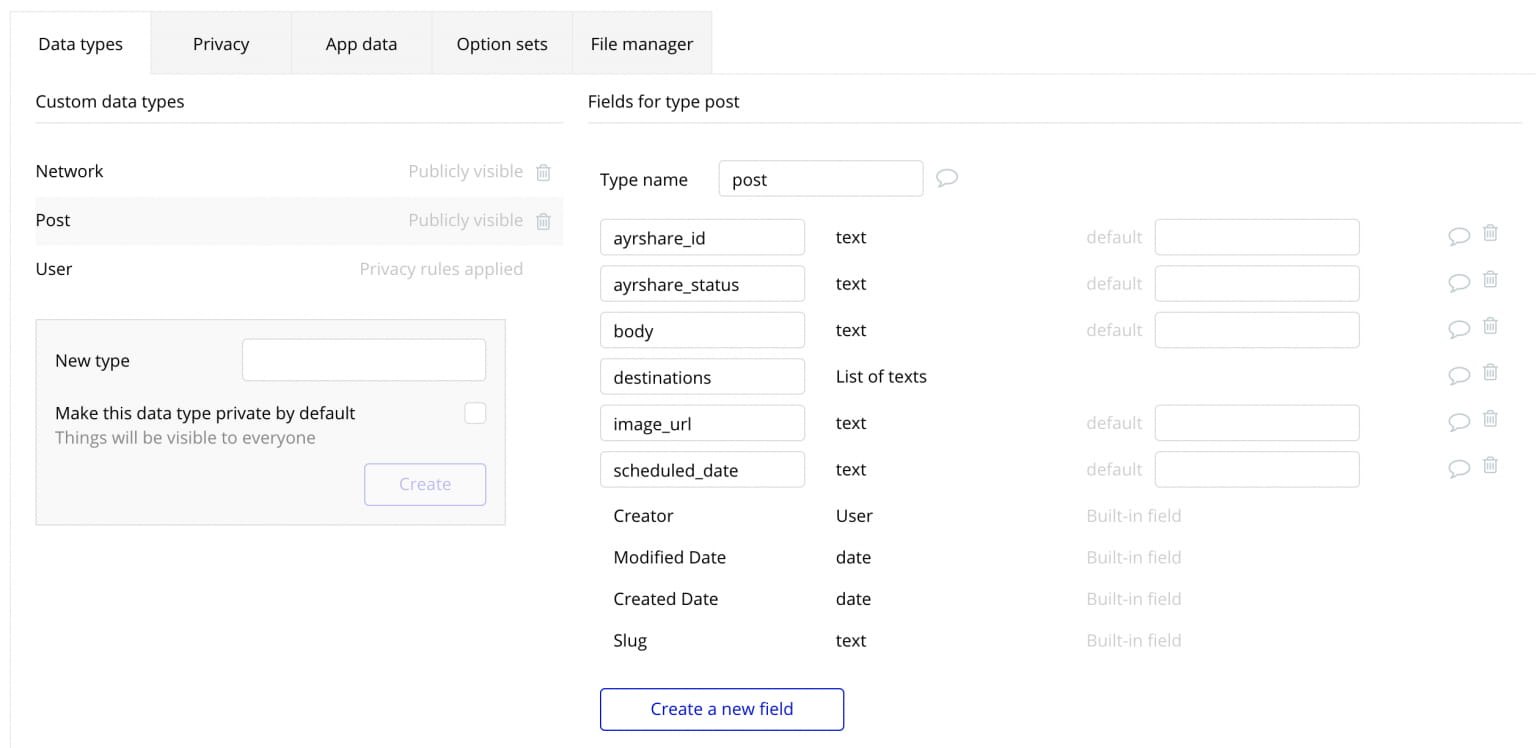
The other data type is the Post. This table holds the list of posts that we have created in the app with the post details and some associated data. We created 6 fields.
- ayrshare_id stores the Ayrshare API ID of the post.
- ayrshare_status stores the status message from the Ayrshare API for the post.
- body is the body of the post.
- destinations is the list of social networks for the post.
- image_url is the image in the post.
- scheduled_date is the date and time for a scheduled post.
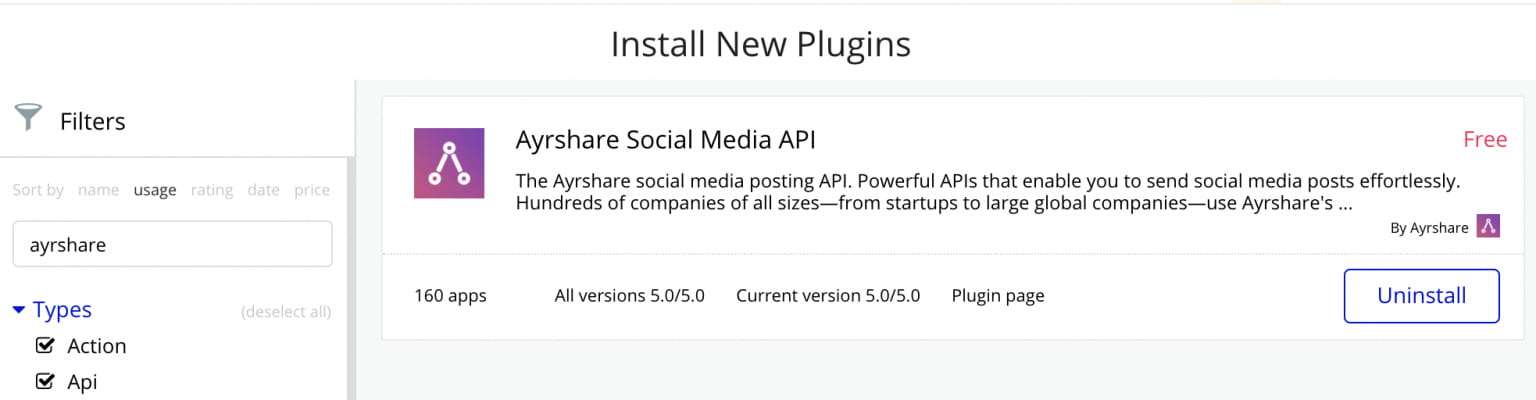
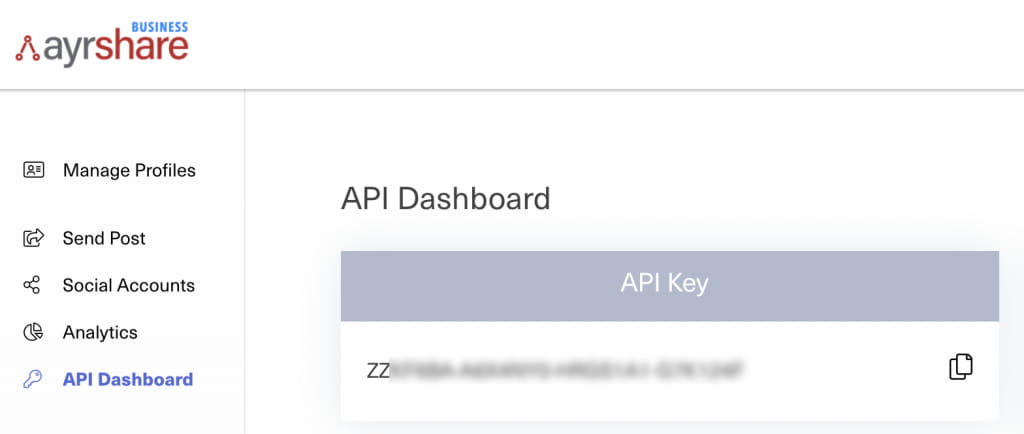
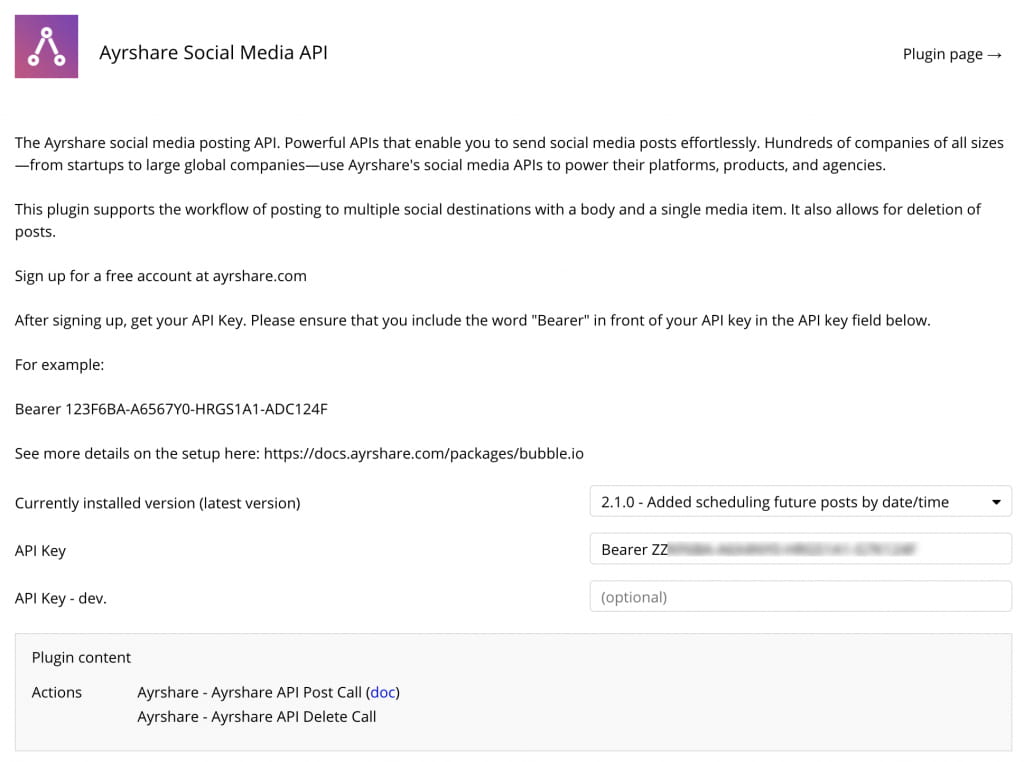
Install The Ayrshare API Plugin and Enter The Key
Search for the Ayrshare plugin in the plugins tab. Once it is installed, all you need to do it to add in the API Key which you can access from the Ayrshare Developer Dashboard under “API Key”. Remember to add the word “Bearer” with a space in front of the API Key.
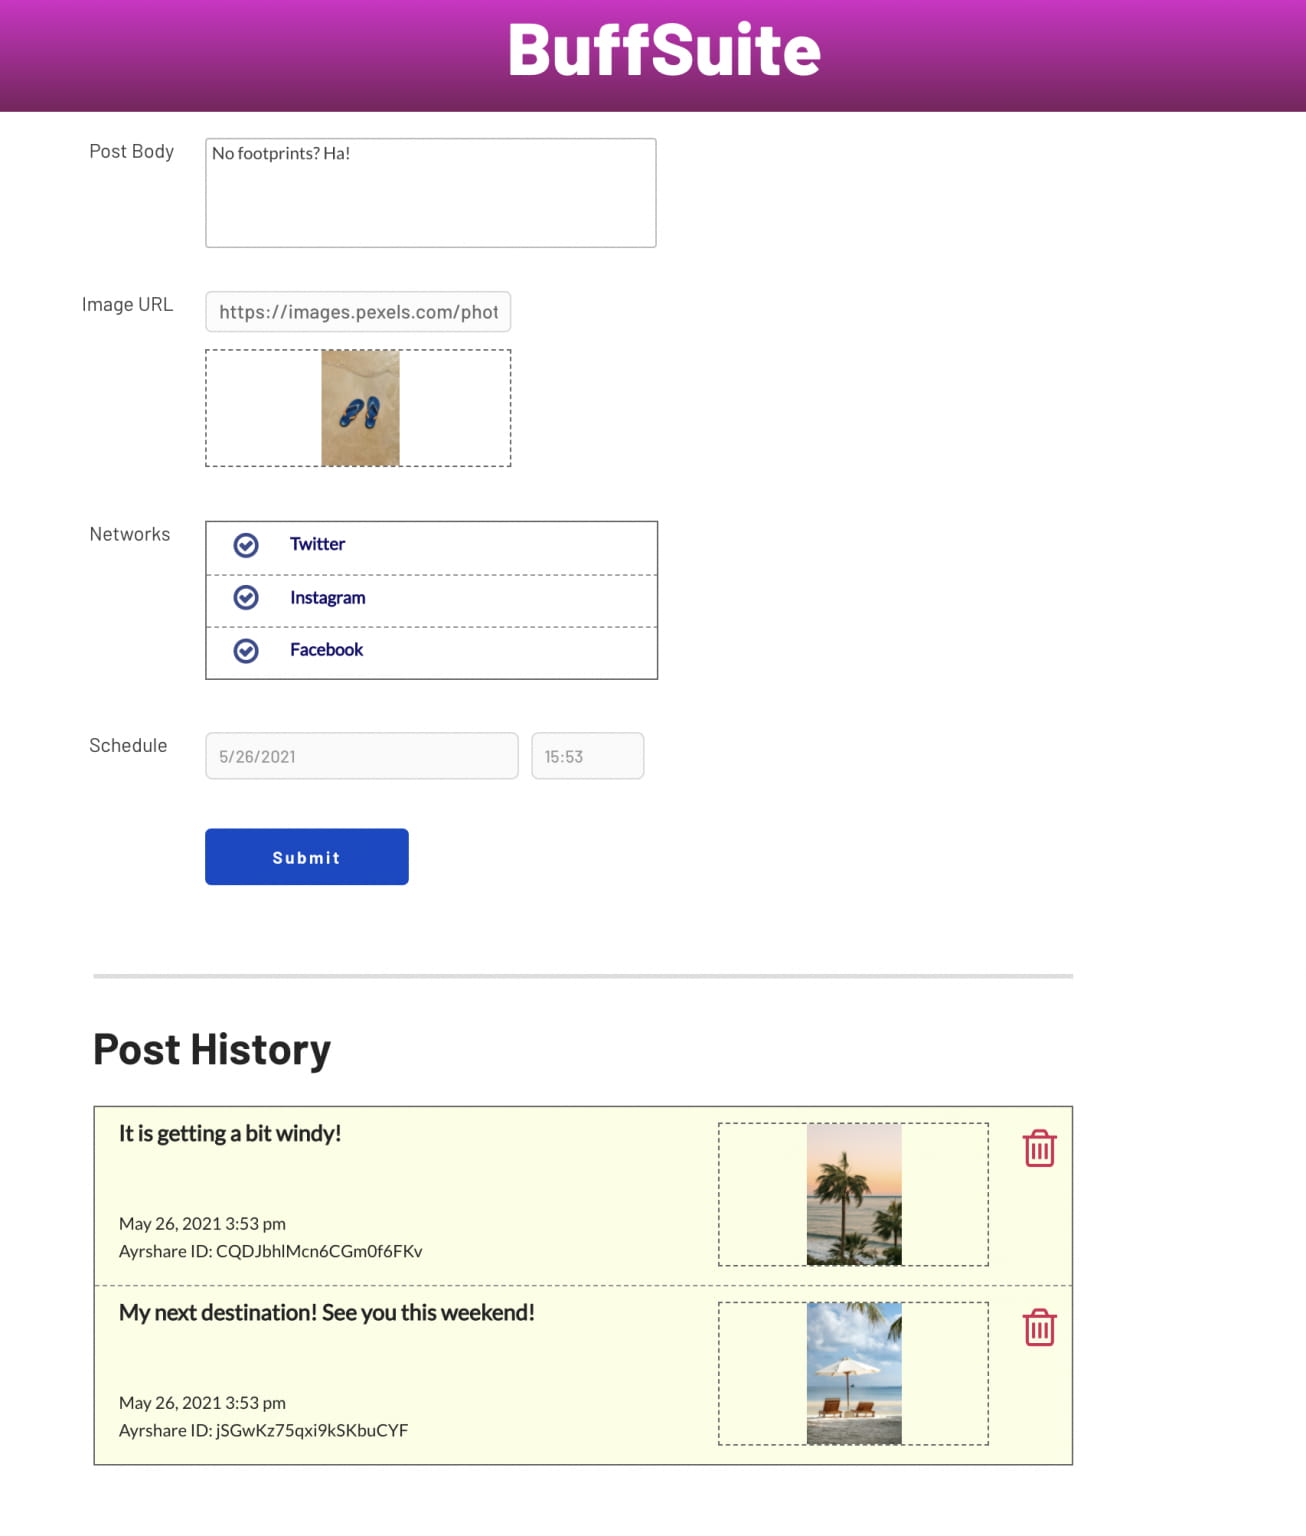
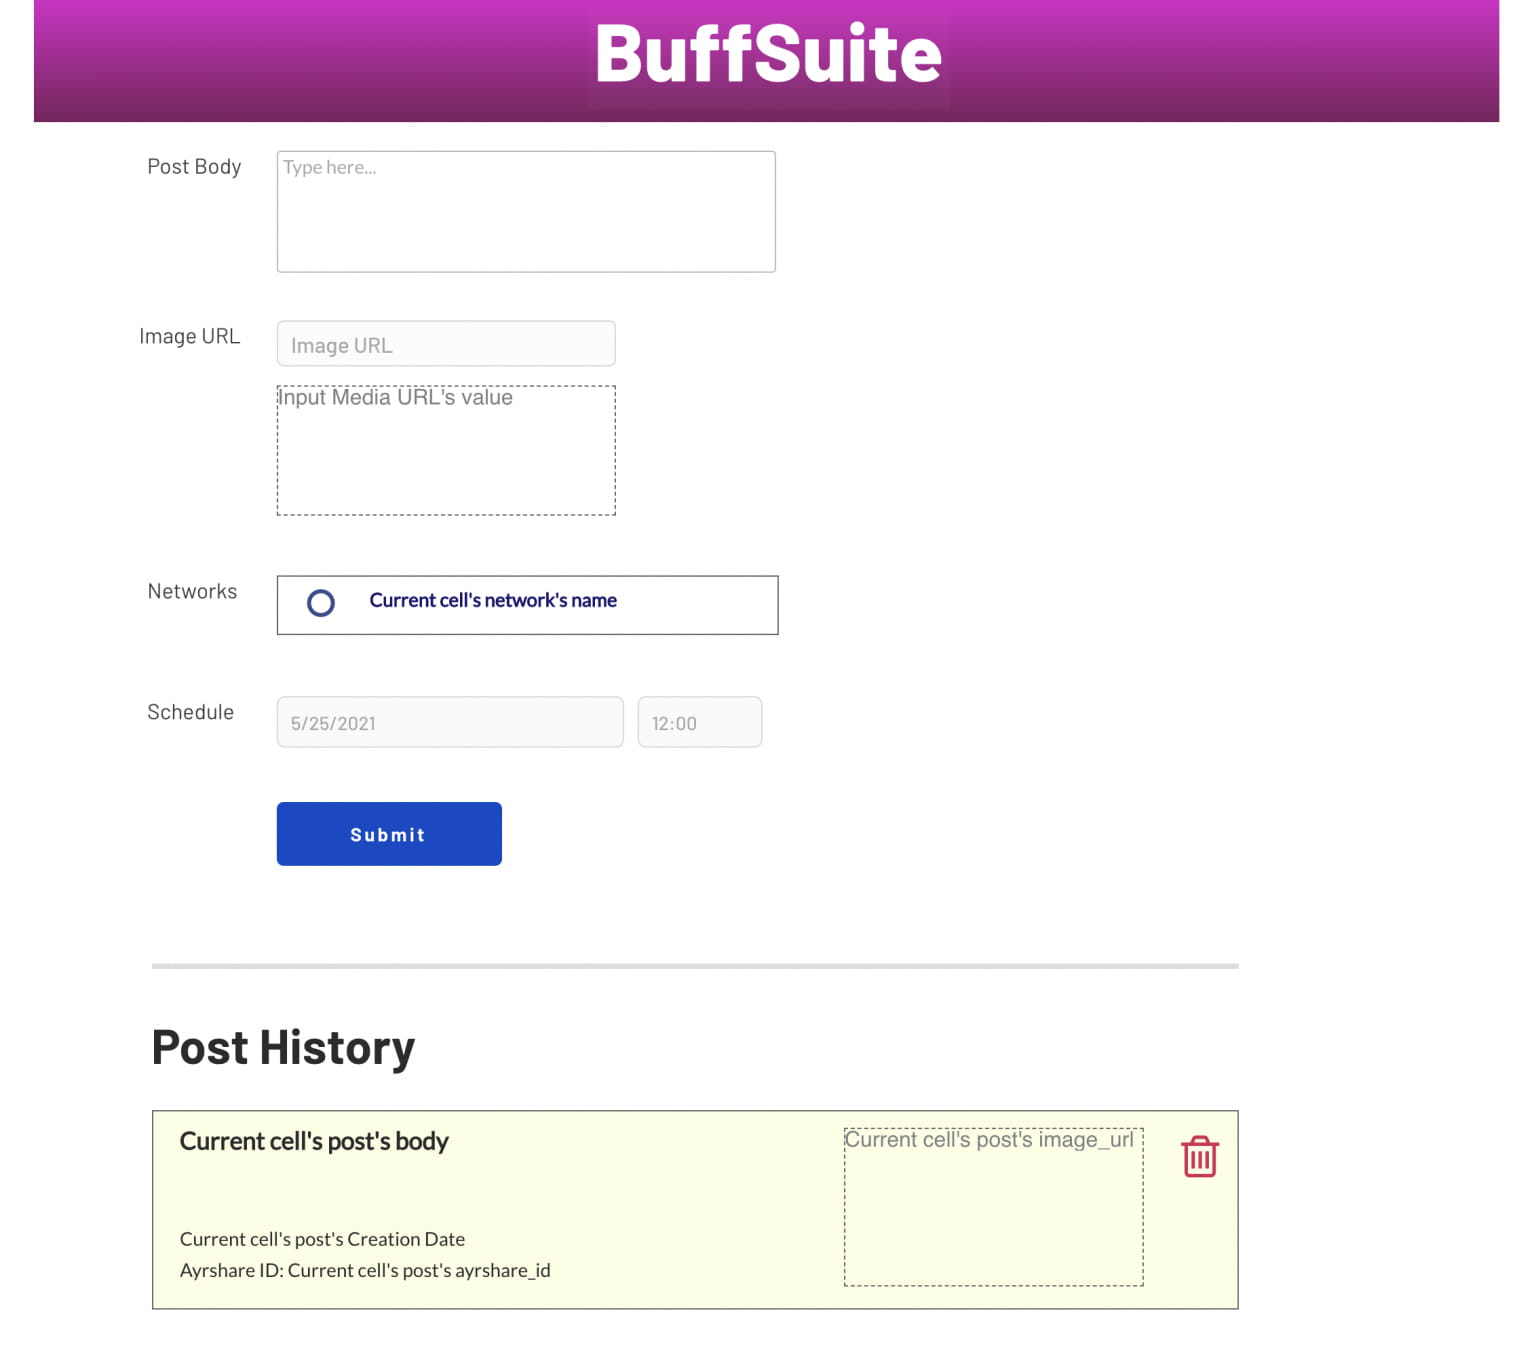
Laying Out The Elements
We used standard Bubble elements for this app. The post body is a multiline input field. The image URL is a single input field with an image element connected to it. The networks list is a repeating group which brings in the name from the Network data table.
We used an icon next to the network name that switches from a circle to a check mark when the user clicks on it. The schedule field is the Date/Time Picker element with the initial content set to the current date and time. Finally, the submit button completes the top form area.
Below the line, there is a repeating group which pulls in the post history from the Post data table. There are some text elements to show the body, creation date, and Ayrshare ID. The image element shows an image preview. Each cell has a delete icon which allows the user to delete that post.
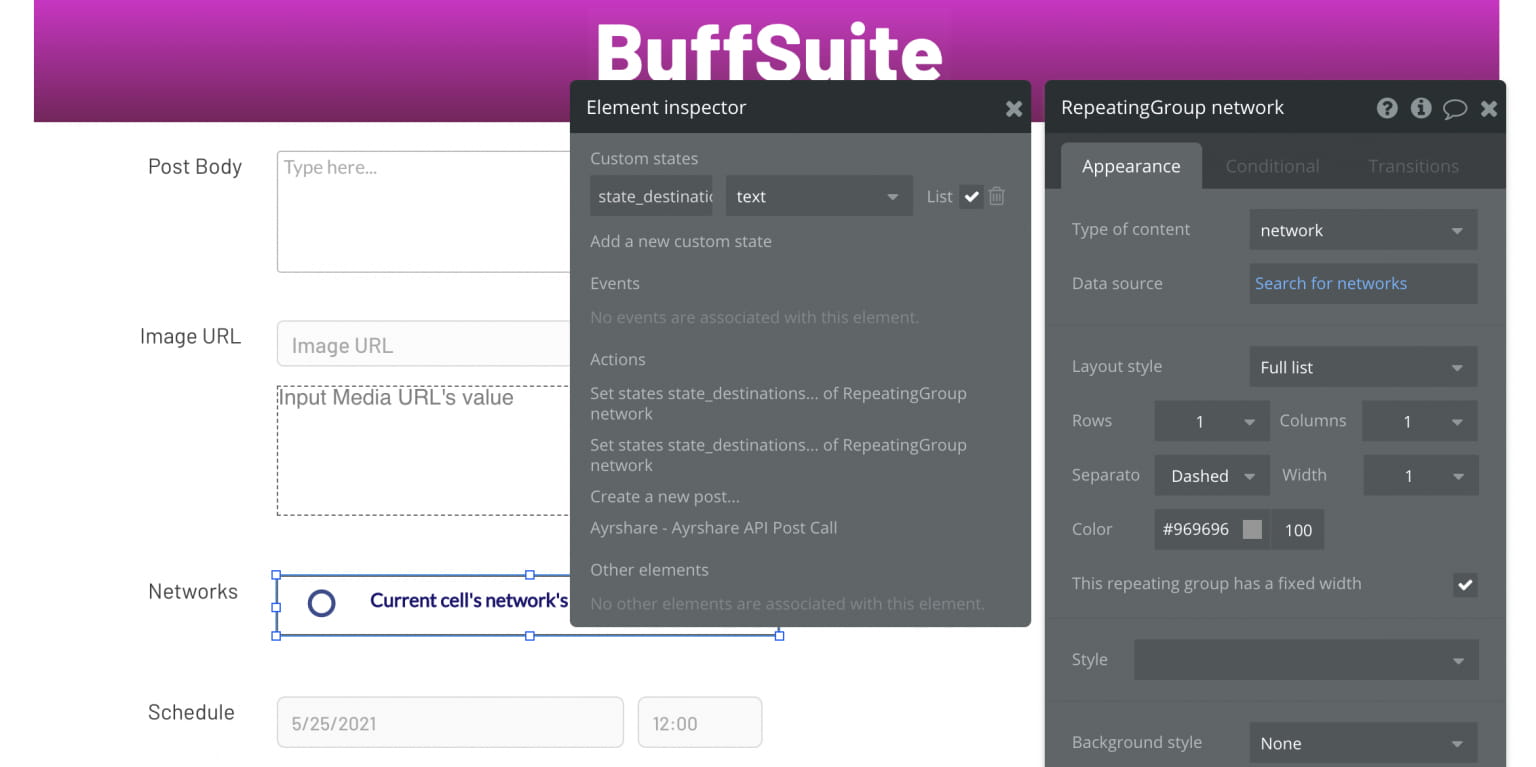
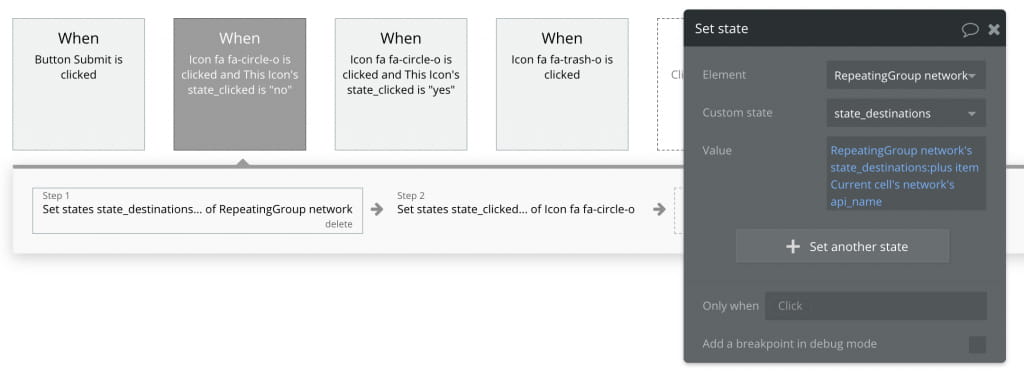
The network repeating group has a custom state associated with it. The state_destinations is a text state. We use this to create the list of destinations. So when the user selects Facebook as a destination, the value of “facebook” is added to this state; this is important so the post ends up at the right social media networks destinations.
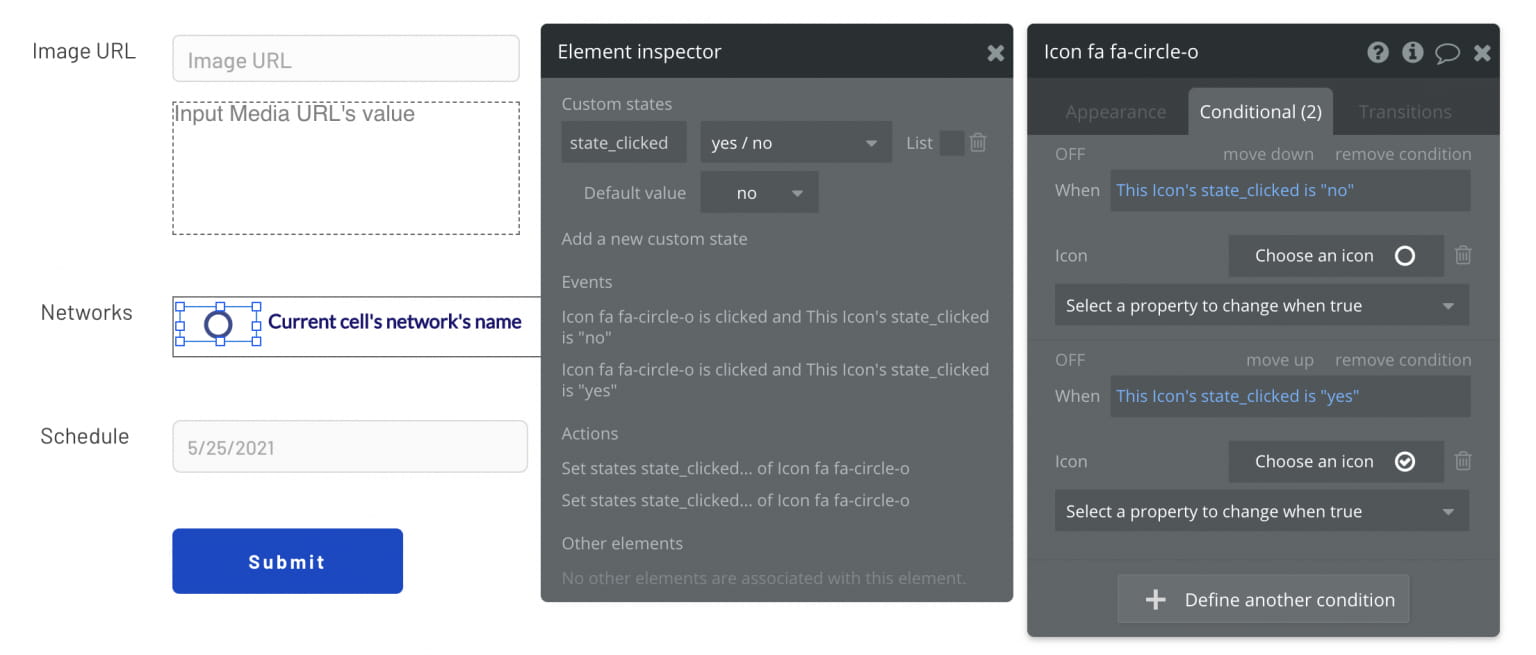
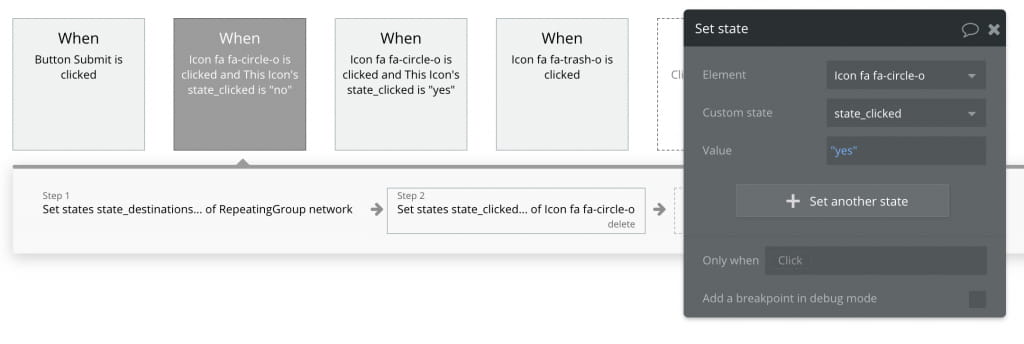
The icon in the repeating group has a custom state of yes/no and two conditions which determine the icon that is shown. The yes state shows the checked icon, and the no state shows the circle icon.
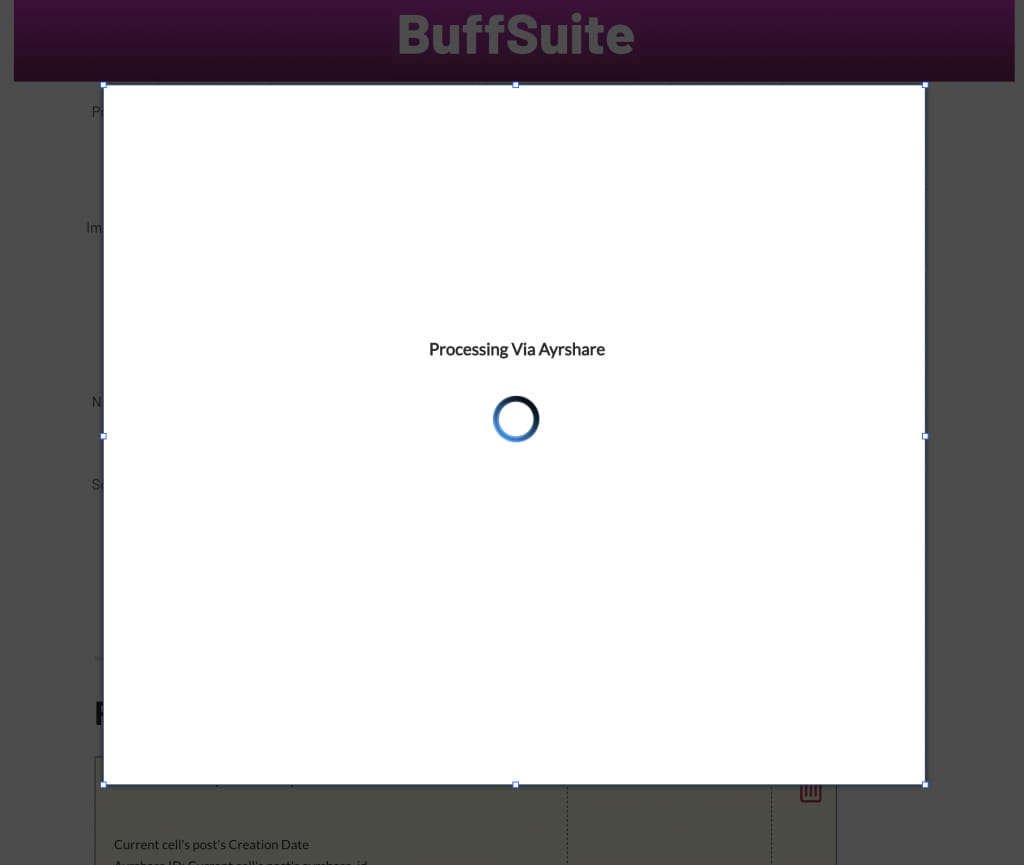
The last element we need to create is a popup container with a simple animated gif. The popup shows during the API calls to let the user know the app is processing their request.
Building The Four Workflows
We need four workflows to make this app functional. Let’s go through each one.
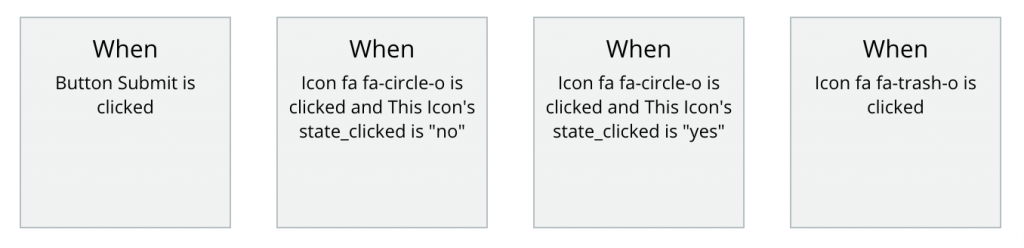
The middle two workflows control the icon next in the repeating group of social network destinations, and both have the same logic, where one adds the destination and the other removes it. Clicking the circle icon is the action of “selecting that social network destination” and switches the icon to the check icon, and vice versa. When the user selects the social network, the name of the social network is added to the custom state of the repeating group, using the :plus item action.
Clicking the social network also toggles the icon to the yes state which will change the icon from the circle to the check icon.
The Submit Button workflow handles much of the core logic of creating the post and sending it. There are 6 steps in this workflow.
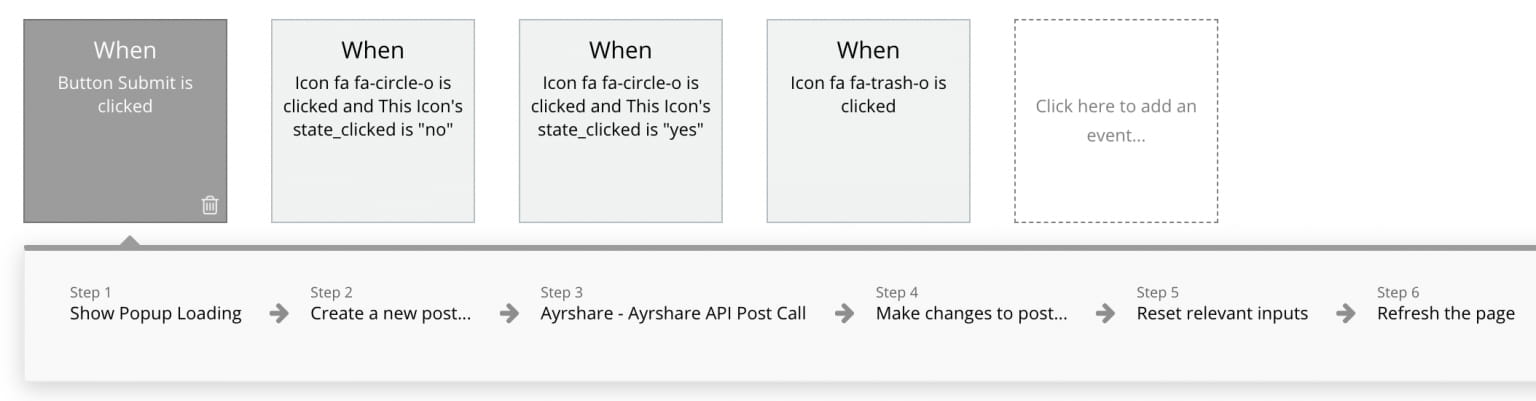
- Step 1: Show the popup container with the spinning loading image.
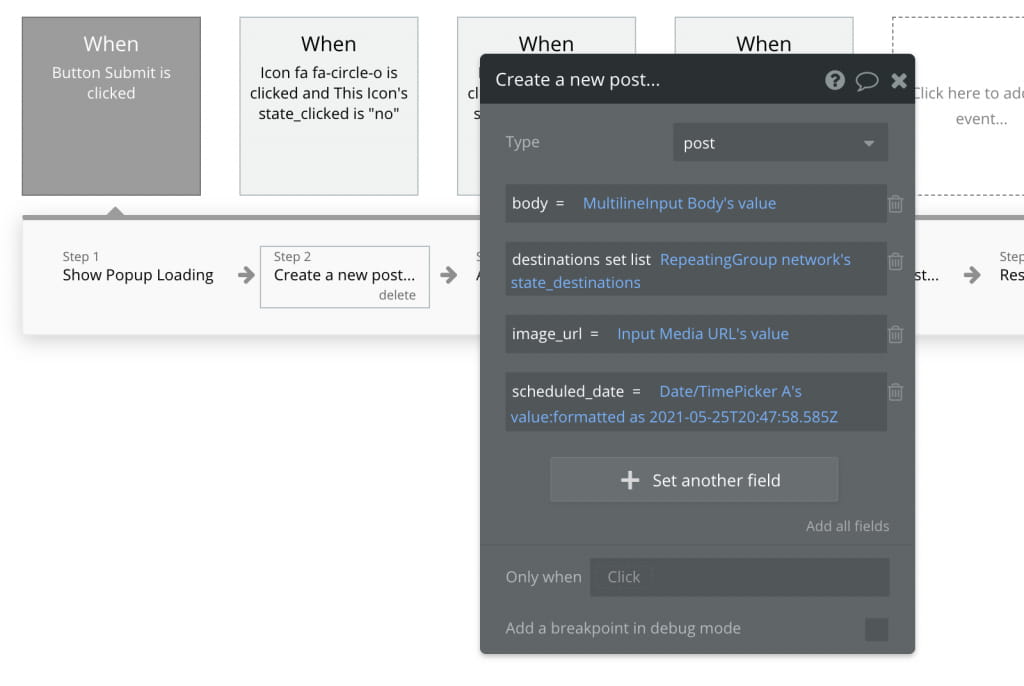
- Step 2: Create the post in the database. Save the body and image from their respective text fields. The destinations is a list that is in the custom state of the repeating group. The scheduled date is from the Date/Time Picker and formatted as Simplified Extended ISO which is one of the standard format type options in Bubble.
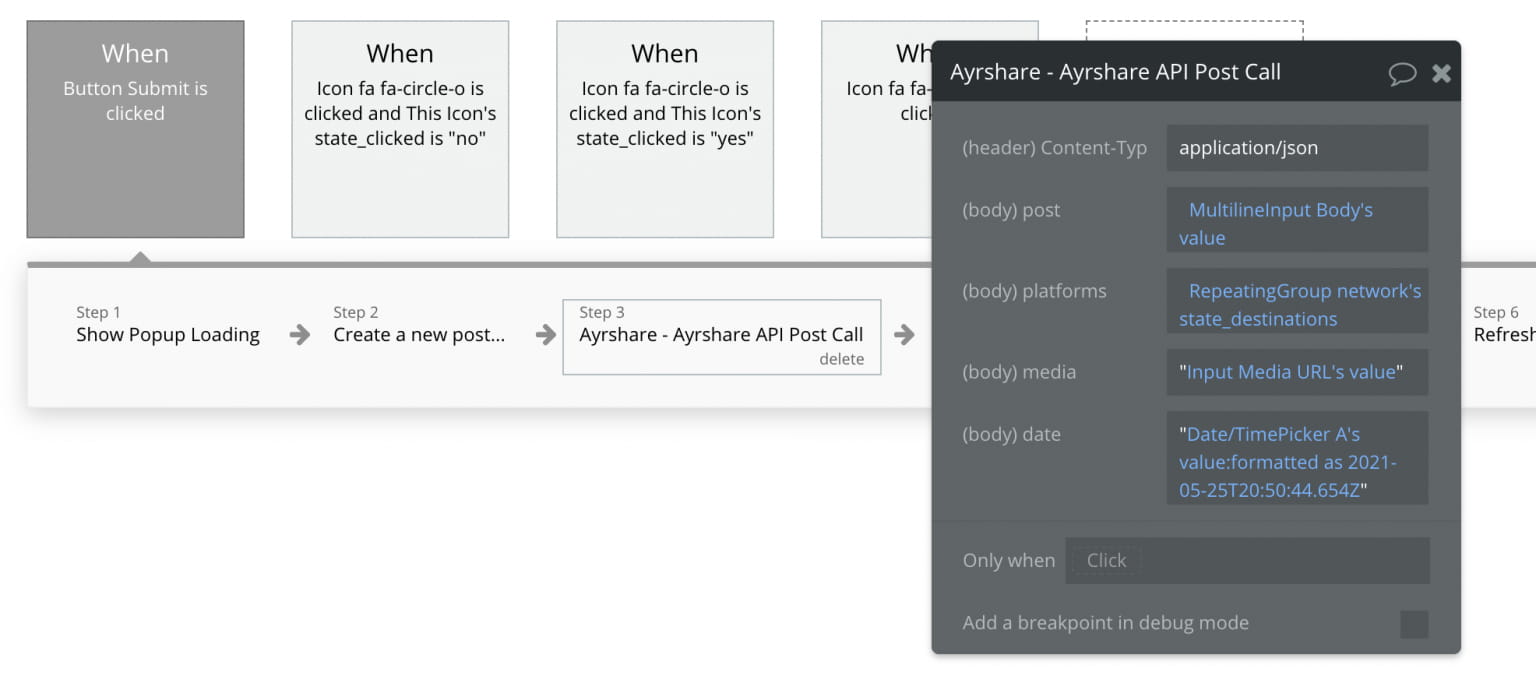
- Step 3: Make the Ayrshare API call. The post field is the body text value. The platforms is the repeating group destinations. The media is the URL value in quotes. The date is the Date/Time Picker formatted as Simplified Extended ISO, also in quotes.
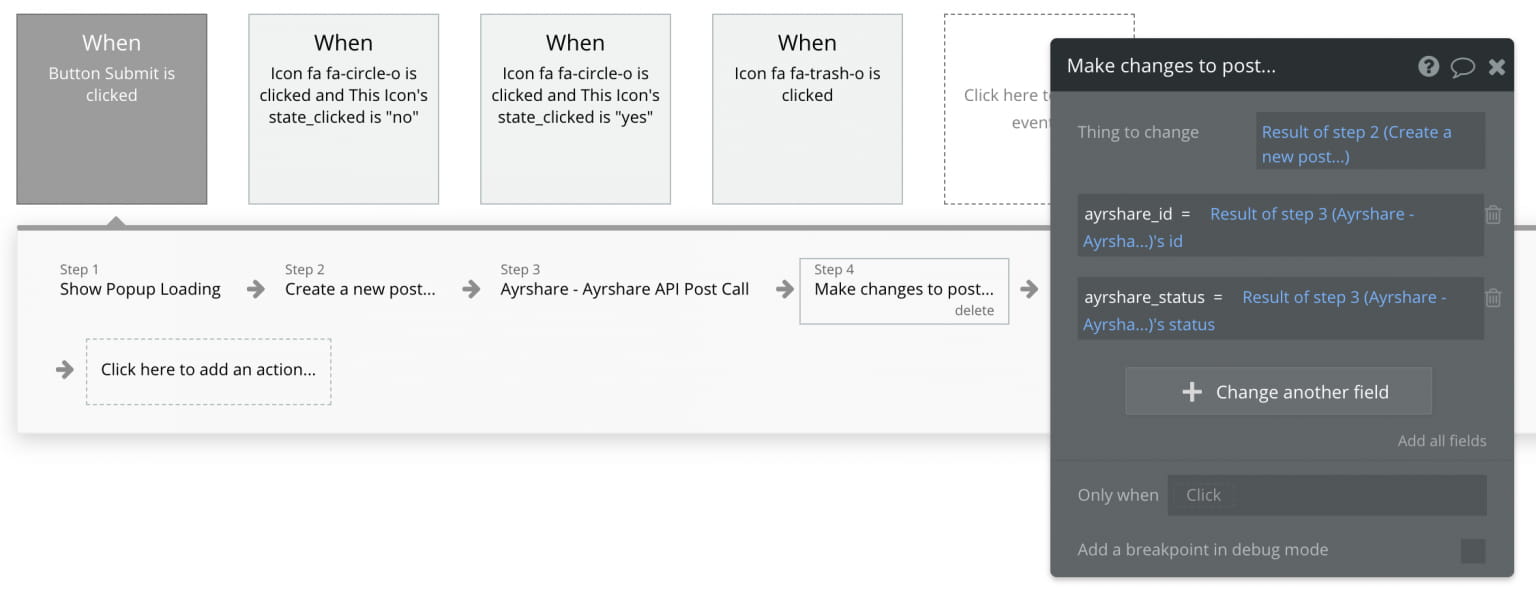
- Step 4: This step captures the response from the Ayrshare API and saves the ID and status. The post in the database is updated with the ayrshare_id and ayrshare_status fields. If the Ayrshare API returns an ID, that means that the post was successfully processed by Ayrshare. If there is no ID, then the status field will return an error string.
- Steps 5 and 6: Reset the relevant inputs and refresh the page. Refreshing the page removes the popup, clears the destinations, updates the Date/Time Picker, and updates the list of historical posts on the bottom of the page.
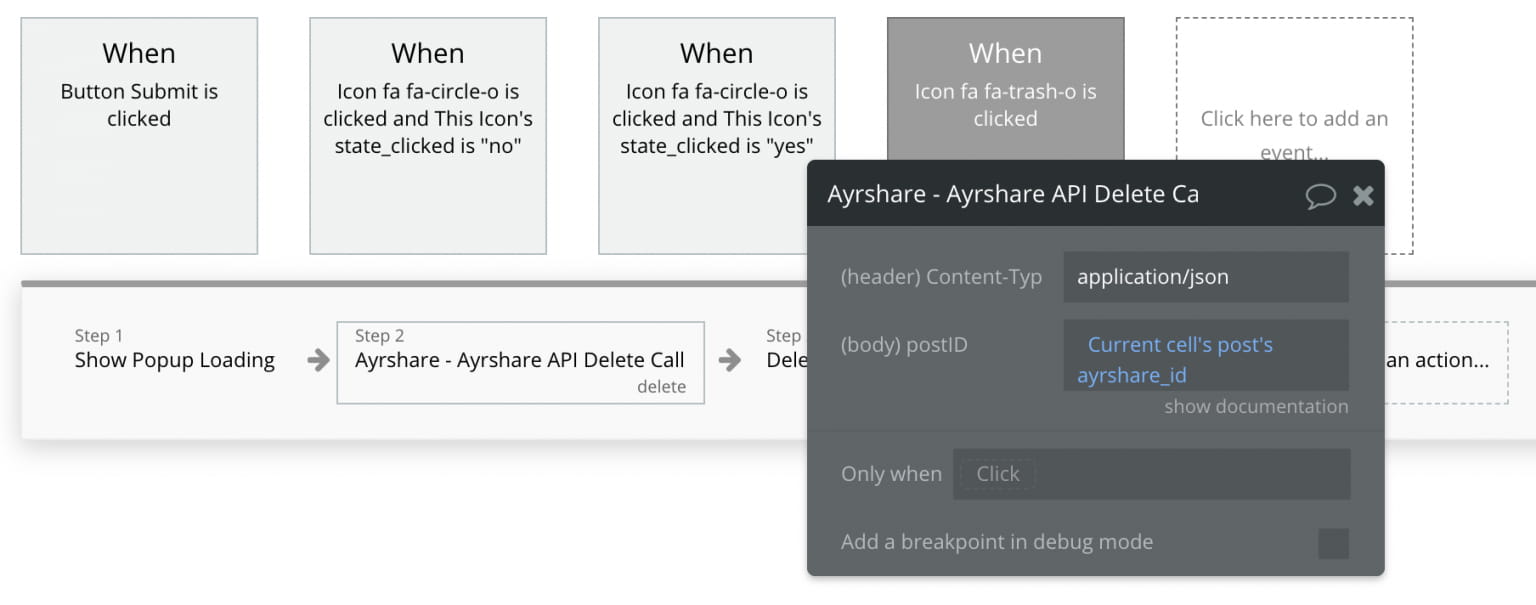
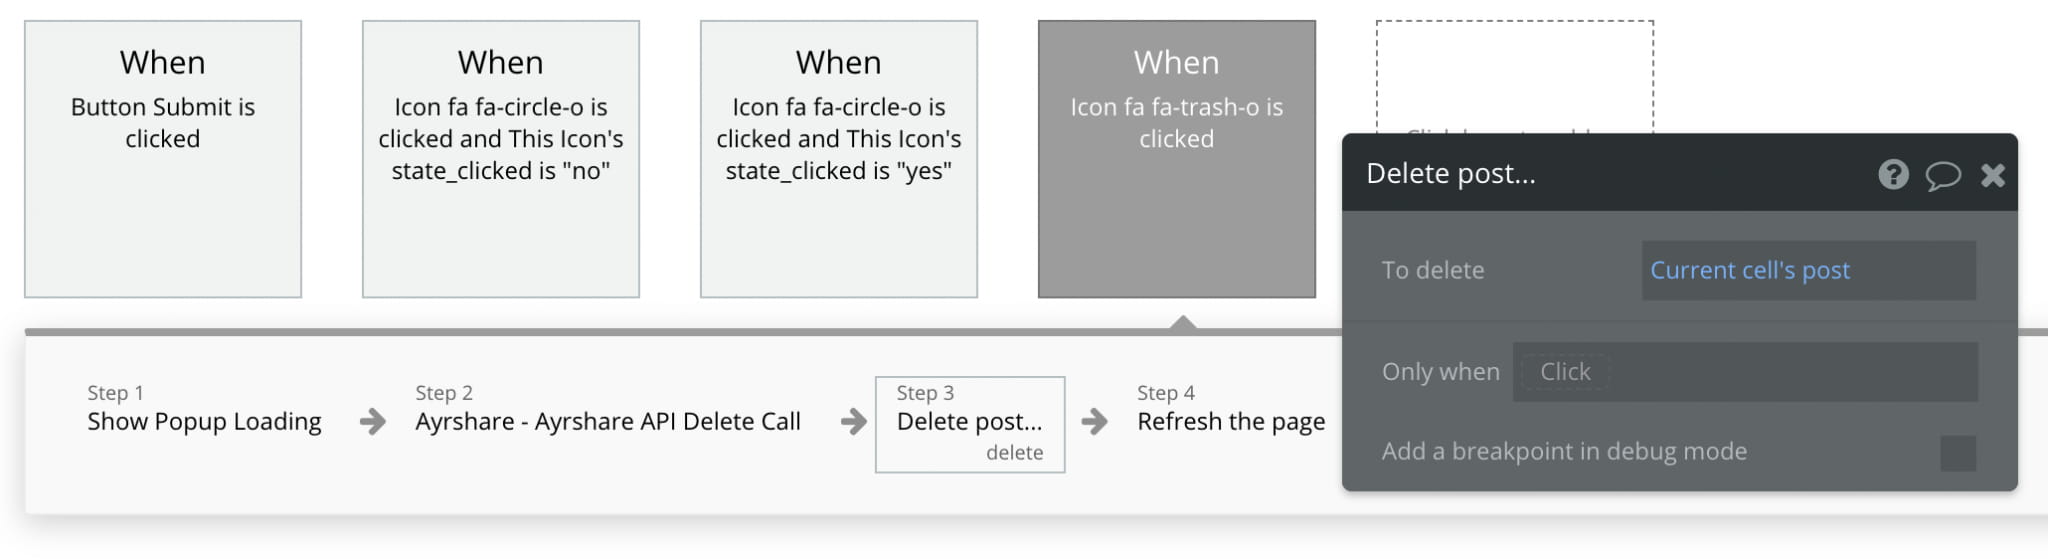
The fourth workflow is the delete workflow when the icon is clicked in the repeating group of historical posts. After showing the popup, the Ayrshare API Delete Call only needs the post ID. The next step deletes the post from the database, then the page is refreshed.
Run it!
Now that we have the app set up, we are ready to run it. Go ahead and create some amazing posts. We hope this gives you enough to get started on adding social media posting into your own no-code apps.