Facebook API: How to Post and Get Analytics Using the Facebook API
March 8, 2023
13 min read
Author: Marc Blinder

Article content
Share Article
Ask AI about this article
Opens your AI assistant in a new tab with this article preloaded.

With a whopping 2.9 billion users — about 35% of the entire human population! — Facebook is like a second internet with enormous reach. If you have a platform, app, or creator marketplace where your users create content, you will certainly have demand to share this content to social networks, especially Facebook. You want to make it simple and easy for your users to share image and videos, because the worst thing is to instruct them to download the media, leave your site (ouch), and figure out the process themselves.
How do you do make the sharing of content from your platform easy? The Facebook API!
In this article, we’ll discuss how to publish posts and get analytics using the Facebook API, also called the Facebook Graph API. If you are interested in other social media APIs, check out our articles on the LinkedIn API, TikTok API, Instagram API, YouTube API, or Twitter API.
Why Facebook Is Essential for Any Business
If you’re not convinced you should be offering your users the ability to share the content they created on your website, here is why. If you’re already convinced, skip to the next section to dive into the API.
Facebook provides a diverse set of features for individuals, businesses, platforms, and app to promote their talents and services through personal networks, feeds, pages, groups, photos and live videos, short-form content like stories, reels, events, and even fundraisers.
Some well-known businesses that actively market on Facebook include:
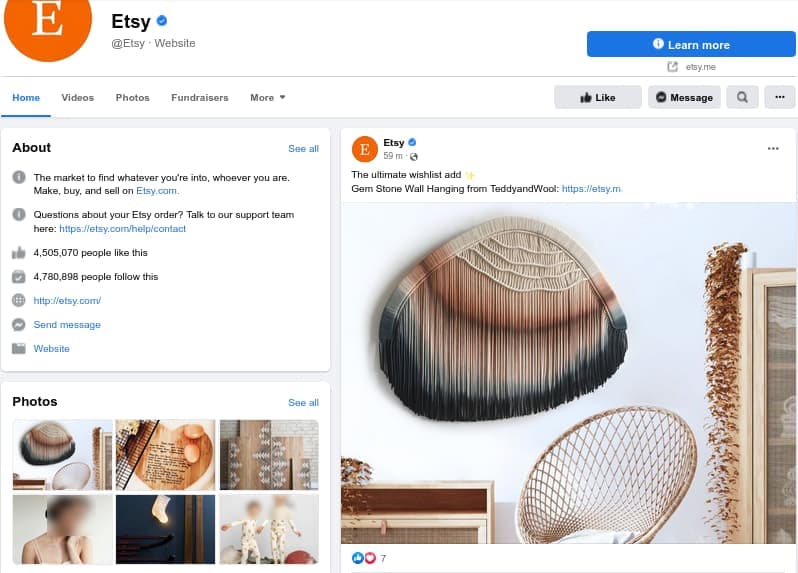
- Etsy, the marketplace for creative crafts, features its sellers and their products on its Facebook page.
- Airbnb, the homestay marketplace, manages Facebook groups in each city for its hosts and guests.
Both Etsy and Airbnb are content creators. The users (artists, crafters, or hosts) create vivid picture or videos of their offerings…crafts or homes…that they want to promote and sell. What better place than Facebook!
The diversity of users and content, plus good user experiences, make Facebook a reliable ecosystem to reach any demographic. Many small businesses even prefer having Facebook pages over websites.
Facebook’s APIs supplement its reach by enabling individuals and businesses to automate content creation and distribution. In the next sections, you’ll learn how to use Facebook APIs.
Introduction to Facebook APIs
Facebook’s diversity of features and concepts may suggest a complex programming model at first. But in reality it’s a simple programming model called the social graph.
All of Facebook’s features, from the common ones on the Facebook app to the specialized business ones — like the marketing API, Facebook App Ads, ad conversions, or WhatsApp business platform — are available through the Graph REST API.
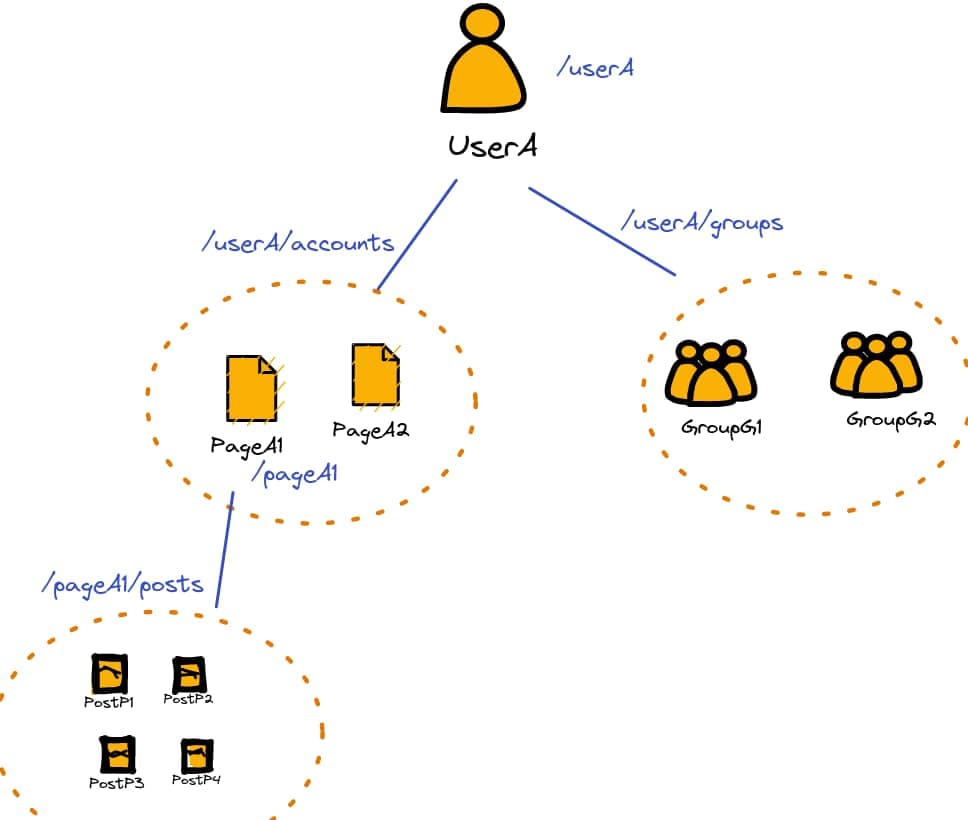
The Graph API follows these basic principles:
- Concepts are nodes: Every concept or object — every user, page, post, or catalog item — is a node. The docs list all the nodes.
- Node endpoints: Every node has a unique ID with its details available at a node endpoint like
https://graph.facebook.com/{version}/{ID}. - Relationships are edges: The relationships between nodes are represented by edges connecting them. So if a user administers some pages, that relationship is represented by edges from that user node to each of those page nodes.
- Edge endpoints: Every edge relationship can be read and modified through an edge endpoint like
https://graph.facebook.com/{version}/{id}/{relation}. For example, to get all the group nodes of user ID 500, the endpoint ishttps://graph.facebook.com/{version}/500/groups.
To fetch any type of content, just traverse the social graph from node to node, usually starting from a user node, and make requests on the relevant edge endpoints until you reach the target node.
In the next section, you’ll learn the prerequisites to start using the Facebook Graph API.
Prepare to Use the Facebook Graph API
Before you can call the graph API, you must register your app with Facebook, configure it correctly, and submit it for reviews and verifications.
1. Register With the Developer Portal
Create a developer account with Meta for Developers and sign in.
2. Create Your App
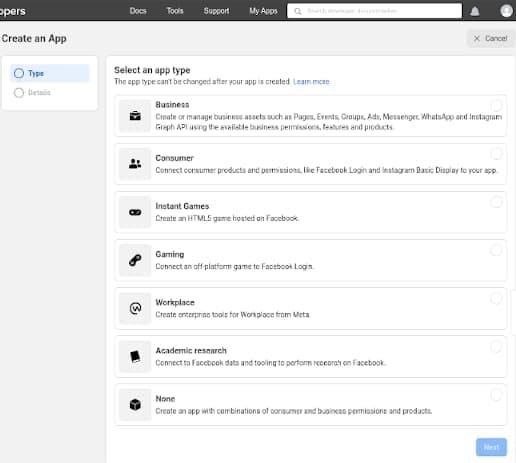
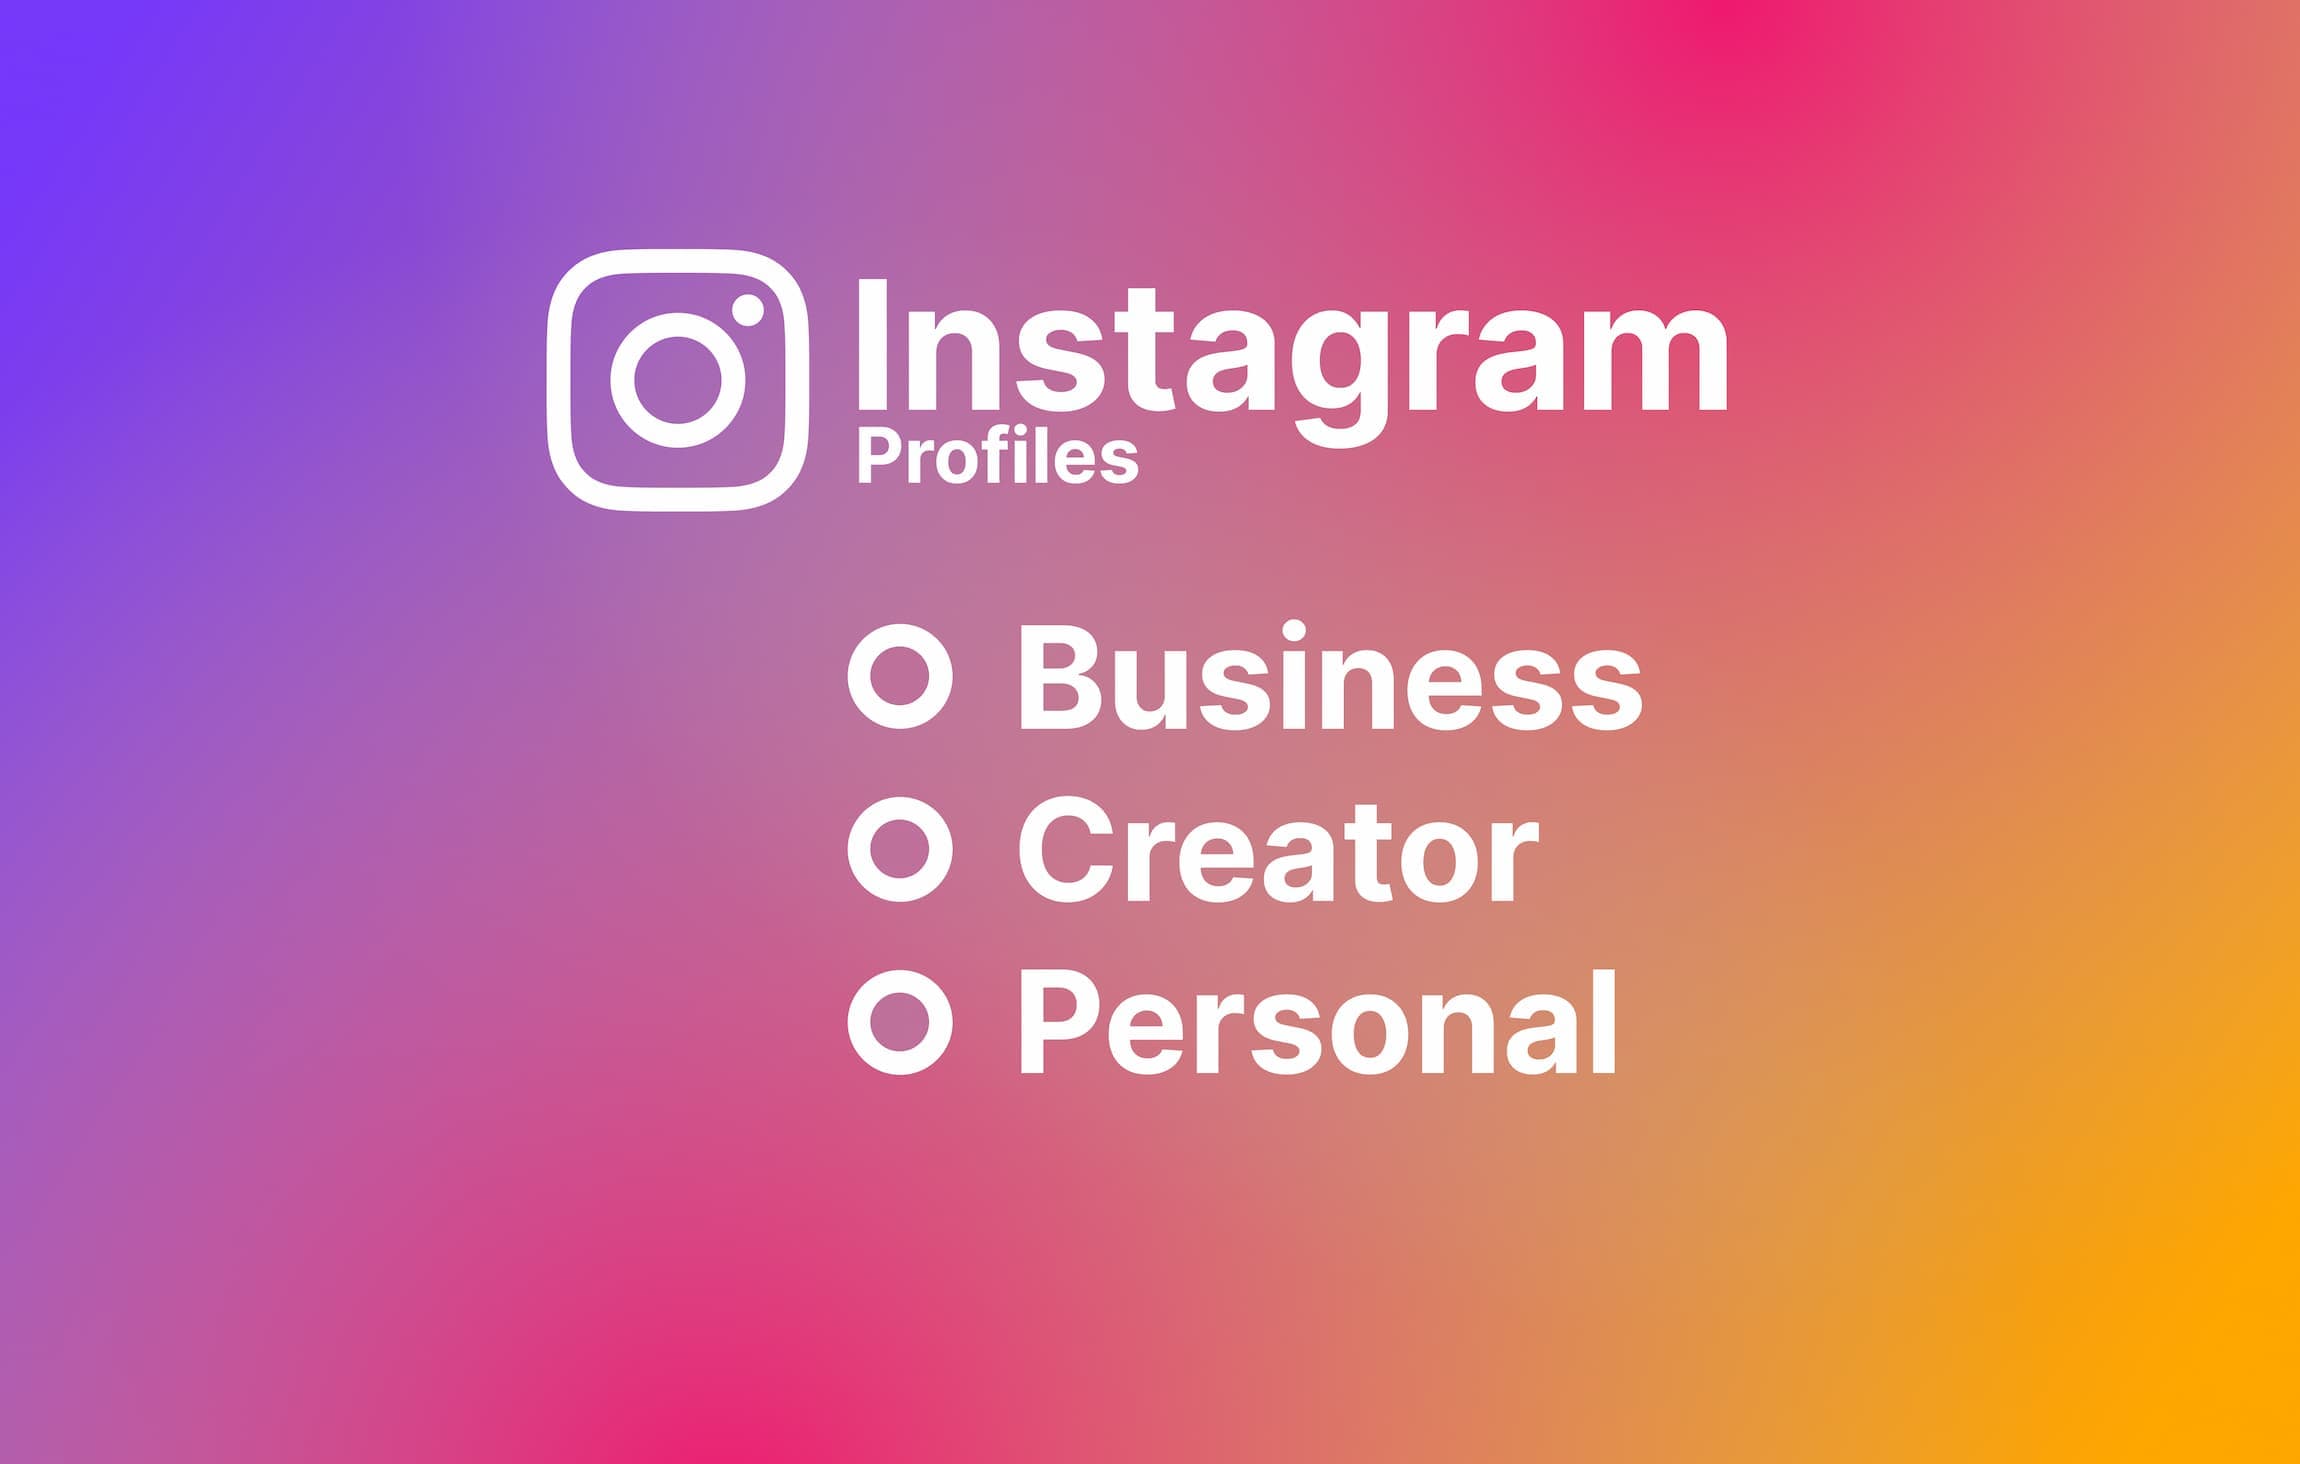
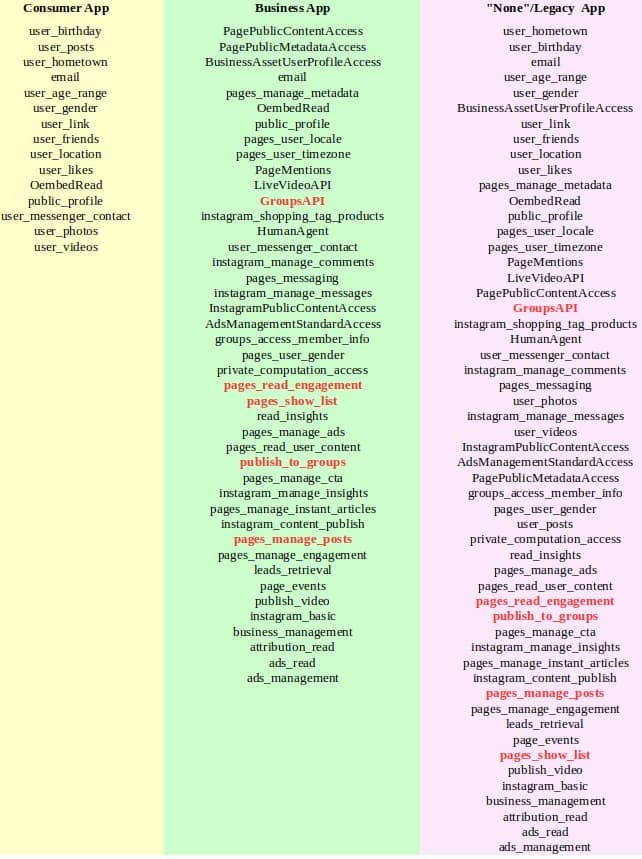
Create a new app from the “My Apps” page by setting your app type, name, and email. Although there are many app types, the following three are most common:
- Business: Business apps can manage pages, marketing campaigns, and other business content. They support automated posting on pages.
- Consumer: Consumer apps can get personal data about Facebook users but can’t manage any business content. They don’t support automated posting either.
- None / Legacy: They include both business and consumer functionality, including automated posting on pages.
The features and permissions allowed for each app type are shown below.
3. Configure Settings From the App Dashboard
Facebook creates an app dashboard to configure your new app.
On the “Settings > Basic” page, you’ll find an app ID and app secret. Save them to your database or vault because they’re needed later during app authorization.
Set the following too:
- Add your app’s domain name to “App domains”.
- Choose a category and an icon for your app.
- Link to your privacy policy and terms of service pages.
Next, configure the “Settings > Advanced” page. Though you probably don’t need it, the app review may check it.
Finally, configure the “App Roles” pages. They let you include actual and dummy users for prototyping and testing while under review.
4. Set a Redirect Link
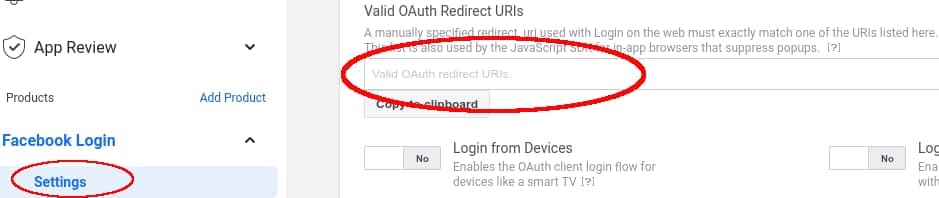
Use “Add Product” to add “Facebook Login” because it’s essential to the app authorization flow. On the “Facebook Login > Settings” page, you must:
- Add your app’s redirect link to the “Valid OAuth Redirect URIs” field.
- Set “Web OAuth login” to “Yes”.
Set the callback endpoints too to be notified about app removal and data deletion requests.
5. App Review and Verifications
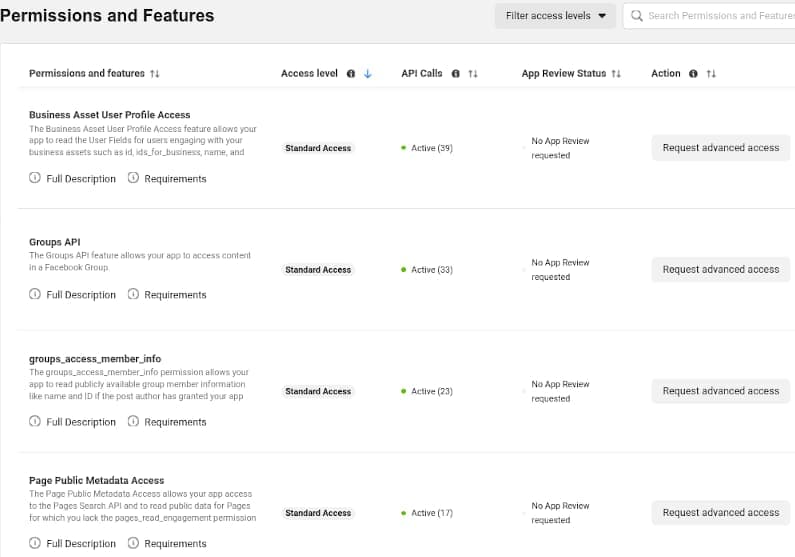
Review your app’s permissions on the “App Review > Permissions and features” page. Every app starts with “standard access” to all features that lets it read and modify your user data without an app review but not other users’ data.
To access the data of other users, you can request “advanced access.” Your app will then undergo an app review and these additional verifications before you can access the data of other users or businesses. You’ll also need to create a video and provide login credentials to a working app to receive approval.
Note: App review takes two days to a months to approval limbo. Expect to be rejected several times. Our advice is to have only one or two permissions per verification request so you an interpret the sometimes opaque rejection reasons.
Get Consent From Your Users
Your app must request user consent to act on their behalf. To do so, Facebook follows a standard OAuth 2.0 authorization code flow for web applications. We’ll show you how to implement it from scratch here. But to simplify it, Facebook provides software development kits (SDKs) for Android, iOS, PHP, and other platforms.
1. Show the Authorization Dialog
Start the authorization by creating an authorization URL and opening it from a browser. It’ll launch the authentication and authorization dialogs owned by Facebook.
The authorization URL format is:
text
text
https://www.facebook.com/v15.0/dialog/oauth?response_type=code%20granted_scopes&client_id={app-id}&redirect_uri={registered-url}&scope={perm1 perm2 ...}&state={state}
The request parameters are:
redirect_uri={registered-url}: The redirect link you registered with the Facebook developer portal. Facebook sends the authorization code to this link.client_id={app-id}: Your app’s ID from the app dashboard.scope={perm1 perm2 …}: The list of permissions your app needs (separated by spaces).response_type=code granted_scopes: This tells Facebook to send both the authorization code and the list of granted permissions to the redirect link.state={state}: A random string that’s sent back to your redirect link to help it distinguish genuine responses from maliciously forged ones.
Your app will need these permissions at a minimum:
- public_profile: To query the /me endpoint
- pages_manage_posts: To create posts on a page
- pages_show_list: To get the list of user pages from /me/accounts endpoint
- pages_read_user_content, pages_read_engagement, and read_insights: To get analytics for posts from /{post-id}/insights endpoints
2. Receive the Authorization Code
After a user has authorized your app, Facebook sends the authorization code to your app’s redirect_uri endpoint:
text
text
GET https://REDIRECT-URI?code={auth-code}&state={state}&granted_scopes={granted-scopes}&denied_scopes={denied-scopes}
- code={auth-code}: The authorization code for the user
- state={state}: The state you sent earlier in the authorization URL
- granted_scopes={granted-scopes}: Comma-separated list of permissions granted to your app
- denied_scopes={denied-scopes}: Comma-separated list of permissions denied to your app
Note: The user may not have granted all the permissions you requested. Design your application to work under limited authorization.
3. Exchange the Code for a User Access Token
Use that authorization code to obtain a user access token.
text
text
POST https://graph.facebook.com/v15.0/oauth/access_token?code={auth-code}&client_id={app-id}&client_secret={app-secret}&redirect_uri={registered-url}
code={auth-code}: The authorization code you receivedredirect_uri={registered-url}: Same redirect URL sent earlierclient_id={app-id}: Your app’s ID from the developer portalclient_secret={app-secret}: Your app’s app secret from the developer portal
The response JSON contains a user access token that’s valid for about 60 days.
text
text
{ "access_token": "EA...", "token_type": "bearer", "expires_in": 5183998}
Note: Treat access tokens like passwords. Encrypt and store them securely in your database or vault.
4. Get a Page Access Token From the User Access Token
For posting, reading, and analytics on a page, you need a page access token specific to that page. The steps to get one are shown in the next section.
Create a Post With the Facebook Graph API
We’ll walk you through posting on a page using the graph API. Facebook lets you only post on pages, not on any user’s feed.
1. First, get the user’s pages by querying the pages API /me/accounts endpoint with their user access token:
text
text
GET https://graph.facebook.com/v15.0/me/accounts?access_token={user-access-token}Your app should have the pages_show_list scope for this to work. In the data field of its response, each item is a user-administered page with its details and page access token.
text
text
{ "data": [{ "access_token": "EAA....", "name": "Page 1", "id": "1027722126750", "tasks": [...] },{ "access_token": "EBA....", "name": "Page 2", "id": "1029822998348", "tasks": [...] }]}
Store the page ids and access_tokens against the user in your database.
2. Finally, create your post by requesting the /{page-id}/feed endpoint of the selected page.
text
text
POST https://graph.facebook.com/v15.0/{page-id}/feed?access_token={page-access-token}{page-id}: The id of the target page in the data list{page-access-token}: The access_token of the target page in the data list- Request body: Post object in JSON format. Add
{“message” : “your post”}to set the text. Add{“link” : “A URL”}to include an image or other media. - Header ‘
Content-Type': 'application/json‘
Your app should have the pages_manage_posts scope for this to work. The response is just the id of the new post:
json
json
{ "id": "102772212679750_113516568259238"}
Server-side JavaScript to create a post using Node.js without any Facebook SDK:
javascript
javascript
const API_BASE = 'https://graph.facebook.com/v15.0';
// ===== GET USER'S PAGES =====const userToken = getUserTokenFromDB(); // Implement you own logic to retrieve
const pageResp = await fetch(`${API_BASE}/me/accounts?access_token=${userToken}`);
const pages = await pageResp.json();
// Assuming user has one page...const page = pages.data[0]const pageToken = page.access_token;const pageId = page.id;
// ===== MAKE POST ON PAGE =====const fbPostObj = {   message: 'Your post text',   link: 'https://IMAGE-LINK'};
const postResp = await fetch(`${API_BASE}/${pageId}/feed?access_token=${pageToken}`, {   method: 'POST',   headers: {       'Content-Type': 'application/json'   },   body: JSON.stringify(fbPostObj)});
const post = await postResp.json();const postId = post.id;
Get Analytics for a Post From the Graph API
The Graph API reports impressions, engagements, reactions, and more for each page or post at their /{id}/insights endpoint:
text
text
POST https://graph.facebook.com/v15.0/{post-id}/insights?access_token={page-access-token}&metric={metric1,metric2,...}
{post-id}: The id of a post reported by a /{page-id}/feed endpoint. For page-level analytics, replace with {page-id}.metric={metric1,metric2,...}: The list of metrics you’re interested in.{page-access-token}: A page access token for the page reported by the /me/accounts endpoint, as shown earlier.
Your app should have pages_read_engagement and read_insights permissions.
Sample code to get the analytics for a post using JavaScript:
javascript
javascript
const insightsUrl = `${API_BASE}/${postId}/insights?access_token=${pageToken}`   + '&metric=post_clicks,post_clicks_unique,post_clicks_by_type'   + ',post_engaged_users,post_impressions,post_impressions_organic'   + ',post_reactions_by_type_total'   + '&fields=name,values';
const response = await fetch(insightsUrl);const analytics = await response.json();
A typical analytics response:
text
text
{ "data": [ { "name": "post_clicks", "values": [{"value": 1}], "id": "1000880263824_111531786705/insights/post_clicks/lifetime" }, { "name": "post_clicks_unique", "values": [{"value": 1}], "id": "1000880263824_11157586705/insights/post_clicks_unique/lifetime" }, ...}
An Easier Alternative to the Facebook API
Instead of using the Facebook API, you can add Facebook posting to your app quickly using Ayrshare’s easier social media API:
javascript
javascript
// Install Ayrshare’s Node package: npm i social-media-apiimport SocialMediaAPI from 'social-media-api';
// 1. Get your API key from https://app.ayrshare.com/api.// 2. Add it to your application’s environment.//     export AYRSHARE_API_KEY=YOUR-AYRSHARE-API-KEY
const social = new SocialMediaAPI(process.env.AYRSHARE_API_KEY);
const post = social.post({   "post": "Your post on an FB Page",   "platforms": ["facebook"]}).then((json) => console.log(json)).catch(console.error);
The code above creates a post on the default Facebook page linked to your Ayrshare account. Your app receives a JSON response like this for a successful post:
json
json
{ "status": "success", "errors": [], "postIds": [ { "platform": "facebook", "status": "success", "id": "10277221269750_11575231786705", "postUrl": "https://www.facebook.com/10277221269750_11575231786705" } ], "id": "MQjGL3fh1DRHyBW3OoA", "post": "Your post on an FB Page"}
The postUrl is a link to the newly created post.
Link Ayrshare to Facebook Accounts
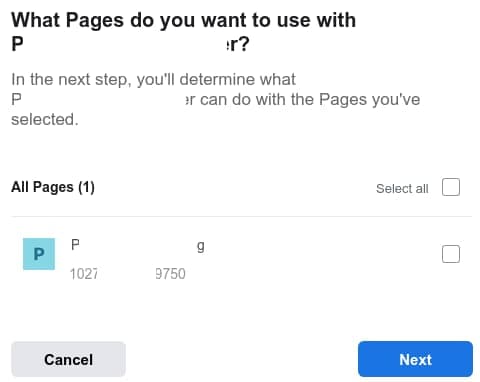
To post on your or your organization’s pages and groups, you must link your Ayrshare account with your (or your organization’s) Facebook account and authorize Ayrshare’s API to act on your behalf.
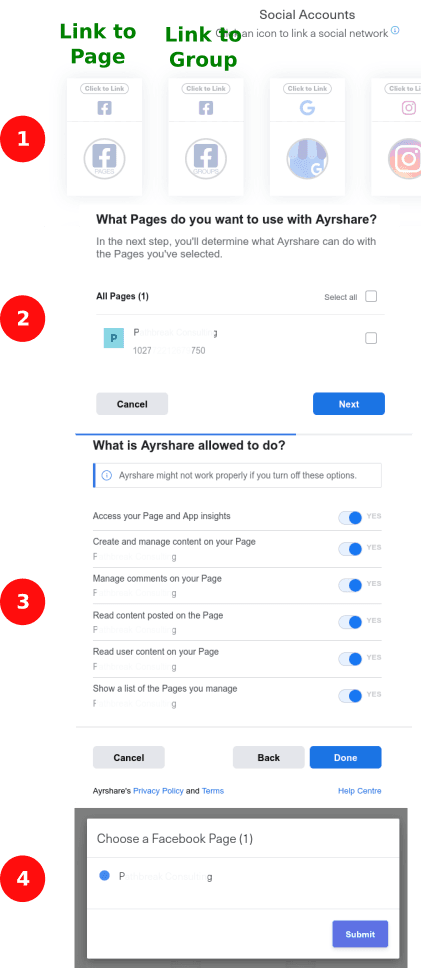
When you have multiple users with each publishing one or more Facebook pages or groups, create a user profile for each user-page and user-group pair. Next, ask each user to link their user profiles to their Facebook account and desired page or group. Your app can then post on a particular page or group by supplying its user profile key in the profileKeys option.
You don’t need any other prerequisites like application registration, app review, or OAuth flows!
Code Examples
Try out more examples with the Ayrshare social media API.
1. Make an Image Post With Ayrshare, Node, and Fetch
An example of using the node-fetch package to create a simple post with some text and an image link:
javascript
javascript
const params = {   'post': 'Your post',   'mediaUrls': ['https://IMAGE-LINK1'],   'platforms': ['facebook']}
const apiResp = await fetch('https://app.ayrshare.com/api/post', {   method: 'POST',   headers: {      'Authorization': `Bearer ${process.env.AYRSHARE_API_KEY}`,      'Content-Type': 'application/json'   },   body: JSON.stringify(params)});              const post = await apiResp.json();
2. Post an Image or Video With Ayrshare’s Python Package
For image and video posts, just set the mediaUrls option to a list of links. This is shown by the next example which uses the Social API PyPI package to simplify API calls.
Note: You need a Premium, Business, or Enterprise plan to post videos, reels, or more than one image.
If you don’t have a server for your media, you can upload them to our /media API endpoint.
javascript
javascript
import os
# Install: python -m pip install -U social-post-apifrom ayrshare import SocialPost
params = {   'post': 'Your post',   'mediaUrls': ['https://IMAGE-LINK'],   'platforms': ['facebook'],}
social = SocialPost(os.environ["AYRSHARE_API_KEY"])  result = social.post(params)
Also, check out how you can create an image carousel on Facebook using the Ayrshare API.
3. Post to a Facebook Group With Python Requests
If your user has linked their Facebook groups with Ayrshare, your app can post to their groups by adding fbg to the target platforms.
The code below shows how to make a group post with the Python requests package:
javascript
javascript
import osimport requests
# Add the API key to your environment.#     export AYRSHARE_API_KEY=YOUR-AYRSHARE-API-KEY
params = {   'post': 'Hi all! Check out our latest product!',   'platforms': ['fbg'] # 'fbg'=>group post, 'facebook'=>page post}
headers = {   'Authorization': f'Bearer {os.environ["AYRSHARE_API_KEY"]}',   'Content-Type': 'application/json'}
r = requests.post('https://app.ayrshare.com/api/post',   json=params, headers=headers)
ret = r.json()
Get Analytics for Your Posts With Ayrshare
Using the Ayrshare /analytics endpoint, your users can get insights on their posts’ engagement, impressions, and reactions:
text
text
POST https://app.ayrshare.com/api/analytics/postThe JSON response:
text
text
{ "facebook": { "id": "1397547544885713_2159585286968", "postUrl": "https://www.facebook.com/1397547544885713_2159585286968", "analytics": { "impressionsUnique": 3, "engagedUsers": 63, "clicksUnique": 2, "commentCount": 1,...}
Promote Your Users’ Businesses With Facebook API Posting
As the most popular social network in the world, Facebook’s reach and benefits for businesses are unbeatable. Facebook APIs provide avenues to automate and optimize that reach. For more in-depth information about the Facebook platform, check out our top 10 social media APIs for developers and discover why Facebook is the best platform for B2B ads.
Written by: Marc Blinder
Marc Blinder is CEO of Ayrshare, the social media API handling 30M+ calls a day across 13+ networks. After 18+ years building startups across the UK, Europe, and the US, he writes from London about social media APIs, social platforms, and AI.
Ask AI about this article
Opens your AI assistant in a new tab with this article preloaded.